Disclosure: Some of the links in the post below are affiliate links provided for your convenience. This means that if you purchase something through one of these links, I get a small commission at no added cost to you.
Don’t you just love handmade ornaments? They add such a special touch to your Christmas tree. DIY ornaments made great gifts – this Paper Quilled Rudolph Reindeer Ornament is actually a perfect gift. You can even add a personalized tag to the ornament hanger and turn it into your gift tag.
If you’ve never done any paper quilling (also known as paper filigree) before, let me reassure you. It is NOT as tricky as most people think. Sure, some designs can get a bit intricate but for a basic one like old Rudolph here, you can easily whip this up in about half an hour.
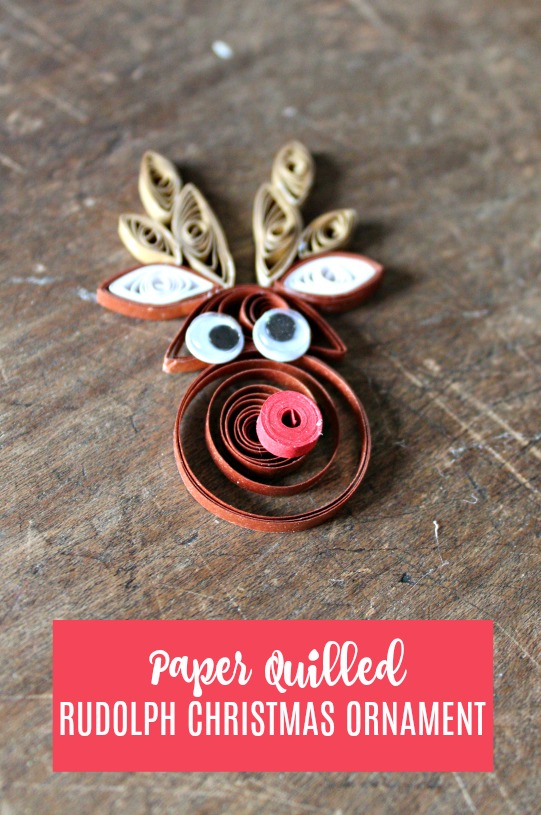
Paper Quilled Rudolph Reindeer Ornament
Materials needed:
Quilling tool
Quilling paper: Brown – 1 x 18 inches, 1 x 12 inches, 2 x 4 inches; White – 2 x 4 inches; Gold – 2 x 6 inches, 2 x 4 inches; Red – 1 x 8 inches.
Quilling template
Quilling board – optional
Straight pins – optional
2 – 6 mm (1/4 inch) googly eyes
Tacky glue
Toothpick
Wax or parchment paper
Ruler
Tweezers – optional
String or fine wire to hang your ornament
JUYA Paper Quilling Set up to 42 Colors One Color and 100 Strips per Pack 3/5/7/10mm Width Available(42 Colors, Width 3mm)TUPARKA 15 PCS Paper Quilling Kits with 29 Colors 600 Strips, Paper Quilling Tools and Supplies DIY Design Drawing Handcraft Tool
Anndason 5 in 1 Quilling Tools, 5pcs Different Size Quilling Slotted Tools
BCP Circle Template Board Paper Quilling Mold Mould Template Board Heart Template Board Quilling Work Board DIY Scrapbooking Paper Quilling Handmade Tools
1 Pcs Quilling Ruler Template Circle Size Origami Paper Quilled DIY Tool Kit,Color Random by HONGTIAN
I Love To Create Aleene’s Always Ready Turbo
Upins 1000 Pcs Black Wiggle Googly Eyes with Self-Adhesive, 6mm 8mm 10 mm 12mm Mixed Packaging
Instructions:
Assesmbling your paper strips:
Begin by assembling your strips of quilling paper as listed above. Please note that it is best to tear your paper to size than to cut it. The torn edge adheres and blends in much better.
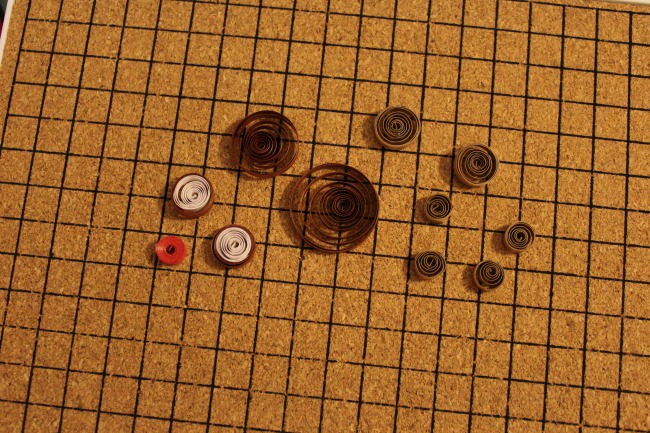
Coiling the strips:
Use the quilling tool to roll the strips into coils with diameters as follows:
- 1 – 18 inch strip of brown – 1 inch loose coil
- 1 – 12 inch strip of brown – 3/4 inch loose coil
- 2 – 6 inch strips of gold – each should be a 1/2 inch loose coil
- 4 – 4 inch strips of gold – each should be a 1/4 inch loose coil
- 1 – 8 inch strip of read – 1/4 inch tight coil
For the 2 – 4 inch strips each of white and brown, you need to glue one of the white strips end to end with one of the brown strips. You should end up with 2 – 8 inch strips that are half white and half brown.
When you coil these, you want to start with the white end so that the white ends up on the inside of the coil with the brown on the outside. Form loose-ish coils that are 3/8 inch in diameter.
Coiling tips:
To make the coils,I place one end of the paper strip into the slot of the quilling tool. If my strip has a torn end to it, I will start with the other end. Form the coil by twirling the quilling tool between the thumb and index finger of one hand. I use the thumb and index finger of my other hand to hold the paper in place against the tool.
Sizing the coils:
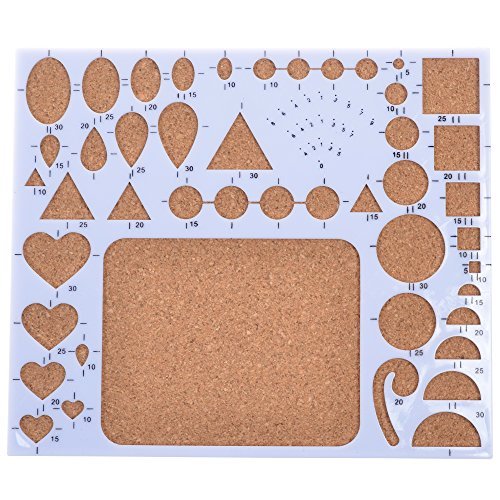
To get your coils to the correct size diameters, place them into the quilling circle template corresponding to the size you want them to be. These sizes don’t have to be absolutely precise. Approximate sizes are just fine. You can also experiment with changing the sizes to adjust the overall size of your project or add different effects.
Gluing the coils:
When it comes to gluing, the most important tip I can share is to use it sparingly. You want enough to have it stick without it oozing out and becoming visible in your finished design. This is where I find a toothpick comes in very handy as a glue applicator. Glue each coil so that it maintains the size of the template. Let it dry briefly.
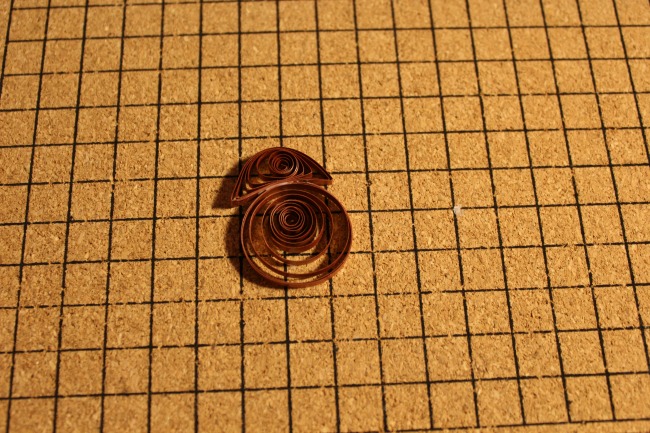
Form the shapes:
For this reindeer ornament, we’re going to need 3 basic shapes. Coils, marquise (I call them eyes), and crescent moons. The largest brown coil and the red coil stay as is.
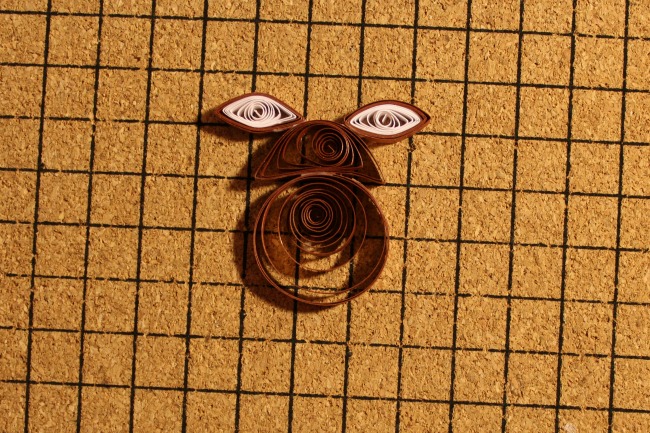
To make a marquise/eye shape, you simply give the coil a pinch, and then pinch again directly opposite the first one. This is what needs to be done with the brown and white coils and the 1/4 inch gold coils.
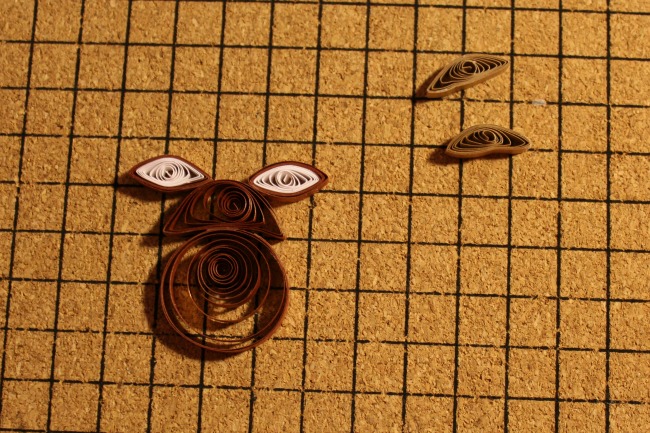
For the crescent moon shape, I like to start by making a slightly off-center marquise. What I mean by this is I give the coil a pinch, but then for the second pinch, I don’t make it directly opposite the first one.
Instead, I place it slightly off so that it naturally forms a bit of a curve to make the crescent. I poke the inner part of the crescent and coax the paper into more of a crescent as desired. This is what needs to be done with the 3/4 inch brown coil and the 1/2 inch gold coils.
Assembling the paper quilled Rudolph:
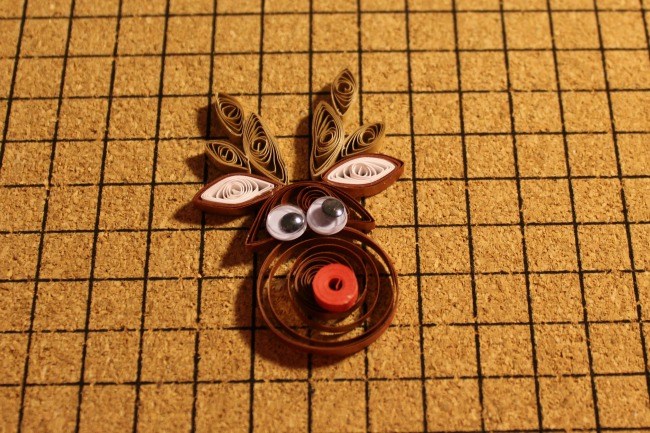
Use the photo of the finished reindeer ornament to see the placement of each of the shapes. Glue together using the toothpick to apply the glue cleanly and evenly. If using a cork quilling board, you can use straight pins to hold the different shapes together as the glue dries.
If you don’t have a quilling board, you might want to work on a piece of wax or parchment paper. This will help prevent the paper from sticking to the work surface below. It will peel away quite easily from the wax or parchment paper.
The most important rule of paper quilling is to have fun with it! Play around with the shapes and design to make it your own.
What if I don’t have any paper quilling supplies?
These supplies were plentiful in craft stores back in the 70’s, but they’re a little trickier to find now. I have a list for you from Amazon below that you can use to order some for yourself. If you can’t wait, try calling around to your craft stores – including any rubber stamping and scrapbooking stores! They sometimes keep the supplies in stock to use as embellishments.
You can also put together some makeshift supplies. Cutting your own strips can be tedious, but less so if you make them a little wider (say, 1/2 inch). Your ornament won’t look quite as delicate. but that doesn’t mean it won’t be super cute.
Thinner paper is best. You want it to curl without creases. If all you have on hand is construction paper though, make your curls a bit looser. Instead of using a typical quilling tool, try using a pencil and keep things more open. This can help prevent creases.
Is paper quilling just for adults?
Not at all! It does require some hand-eye coordination and fine motor control, but I started quilling myself at the age of 10. For younger kids, as suggested above, use wider strips of construction paper. Let them roll the strips around a pencil. As they get more proficient at it, you can move down to a chopstick or bamboo skewer.
When ready to graduate to more of a paper quilling tool, I have a great DIY option that can serve as a stepping stone to an official one. This is also perfect for older adults who have arthritis in their hands or anyone else with a bit of limited finger dexterity.
Find a needle with a fairly large eye – like the kind you would use for needlepoint. Using a pair of wire snippers, clip off the very top of the needle’s eye.
This turns it into an an open slit which is perfect for quilling. Stick the sharp end of the needle into a cork. I like to dip it in tacky glue first for extra security.
Now you’ve got the cork to hold onto as you twirl the quilling paper into coils. The extra thickness of the cork makes it easier to grasp onto as you do.
See? This paper quilled Rudolph ornament is easier to make than you might think. With some experience at paper quilling, you could easily make this in about 15-20 minutes.
Want to make more? You can find instructions for a simple but elegant snowflake inspired paper quilled Christmas ornament here.




Tjay says
So cute!