This Flying Witch Paper Plate Craft is such a fun way to get kids into the Halloween spirit! With a few simple craft supplies and our printable template, they can create a spooky nighttime scene featuring a little witch flying across the sky on her broomstick.
And here’s the really fun part: the witch actually moves! Kids can slide the popsicle stick behind the paper plate to make her fly back and forth past the moon, stars, clouds, and bats.
It’s an inexpensive Halloween craft that’s perfect for an afternoon at home, a classroom activity, or a Halloween party. Best of all, once the crafting is finished, kids have something they can play with, too!
If your kids love crafts that move, they’ll have fun making our moving ghost puppet, too!

Why You’ll Love This Halloween Paper Plate Craft
There are so many reasons to add this flying witch craft to your Halloween activities.
- Budget-friendly: Most of the supplies are inexpensive, and you may already have many of them in your craft stash.
- Interactive: Kids can make their witch fly across the Halloween sky using the popsicle stick.
- Easy to customize: Choose different colors for the witch’s outfit, add extra stars, or create your own spooky background.
- Great for developing fine motor skills: Tracing, cutting, gluing, and assembling the pieces all give little hands some valuable practice.
- Perfect for groups: This is a fun project for classrooms, homeschool activities, Halloween parties, or family craft time.
Younger children may need some help with cutting out the smaller pieces and making the slit in the paper plate, but they can still enjoy choosing colors, decorating their scene, and making the witch fly.
Supplies Needed for Your Flying Witch Paper Plate Craft
You don’t need anything fancy to make this cute Halloween craft. Just gather a few basic supplies and you’re ready to get started.
- Colored craft paper
- Paper plate
- Popsicle stick (craft stick)
- Pencil
- Printable flying witch craft template
- Scissors
- Craft glue
- Markers
A quick tip: Construction paper or colored cardstock works well for this project. Cardstock will give the smaller pieces a little more structure, while construction paper is often easier for younger children to cut.
How to Make a Flying Witch Paper Plate Scene
This Halloween craft has two main parts: assembling the flying witch and creating the paper plate background. Once both are ready, you’ll put them together to make your moving Halloween scene.
Step 1: Prepare the Craft Template
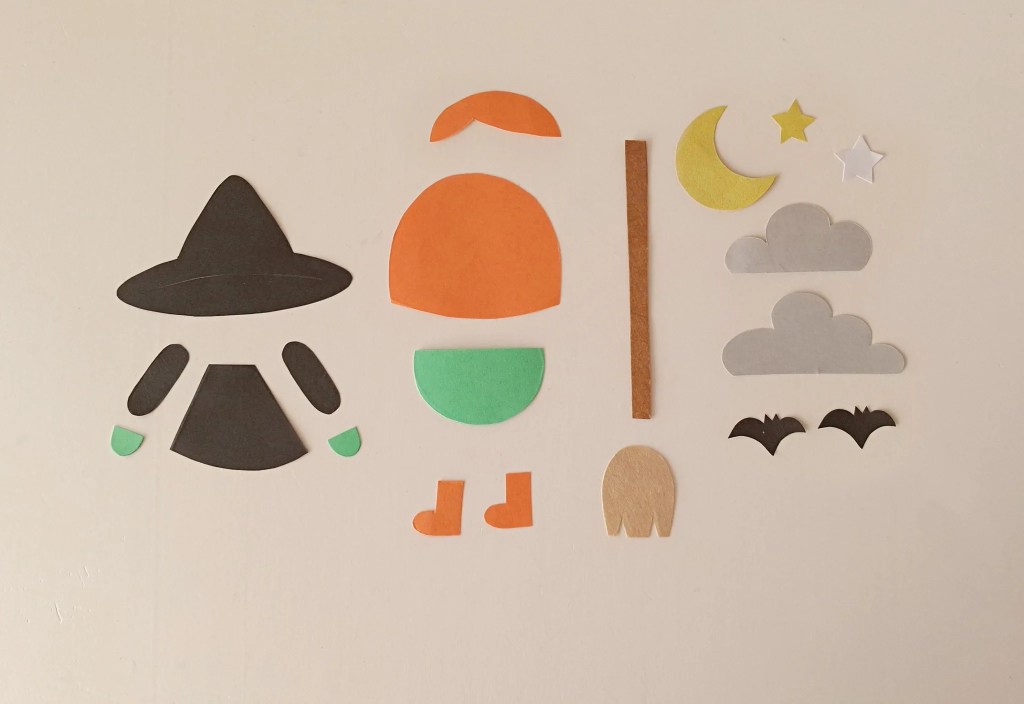
Download and print the flying witch paper plate craft template.
Choose your favorite colors of craft paper for the witch, her broomstick, and the Halloween sky decorations. Trace the template pieces onto the corresponding papers using a pencil, then carefully cut them out.
The template includes the pieces for the witch and broomstick, along with a moon, cloud, star, and bat to decorate the background.
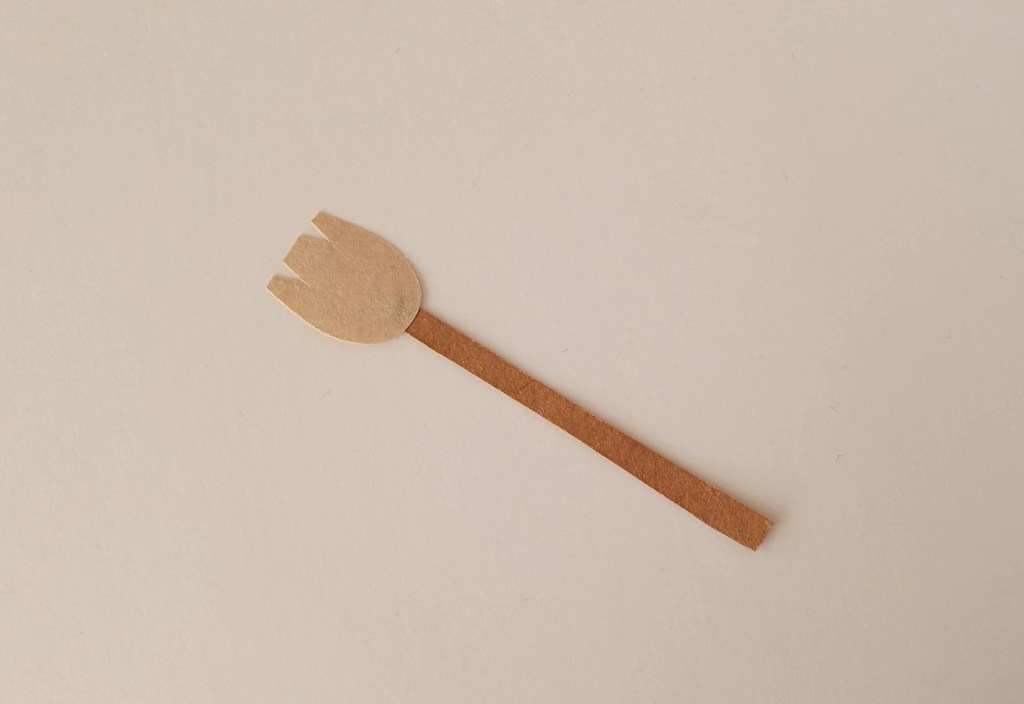
Step 2: Assemble the Broomstick
Glue the broom cutout to the handle cutout to create the witch’s broomstick.
Set it aside while you assemble the other pieces.
Step 3: Prepare the Witch’s Arms and Legs
Attach the hand cutouts to the sleeve pieces using craft glue.
Use a black marker to color in the shoe portion of the leg cutout.

Step 4: Add the Witch’s Hair and Hat
Glue the witch’s head cutout onto the back hair piece.
Carefully cut a slit along the brim of the witch’s hat, following the template.
Slide the top of the witch’s head through the slit from underneath the hat. Adjust the position until it looks right, then secure the hat and head together with glue.
Step 5: Assemble the Witch’s Body
Glue the completed head to the top of the dress cutout.
Attach the arm pieces to the dress, positioning them toward the front of the witch.
Add the remaining body pieces, including the legs, and allow the glue to set.

Step 6: Give Your Witch a Face
If you’re using the optional front hair piece, glue it to the top of the witch’s head.
Use a black marker to draw her face. You can give her a cheerful smile, a mischievous grin, or whatever expression you like!
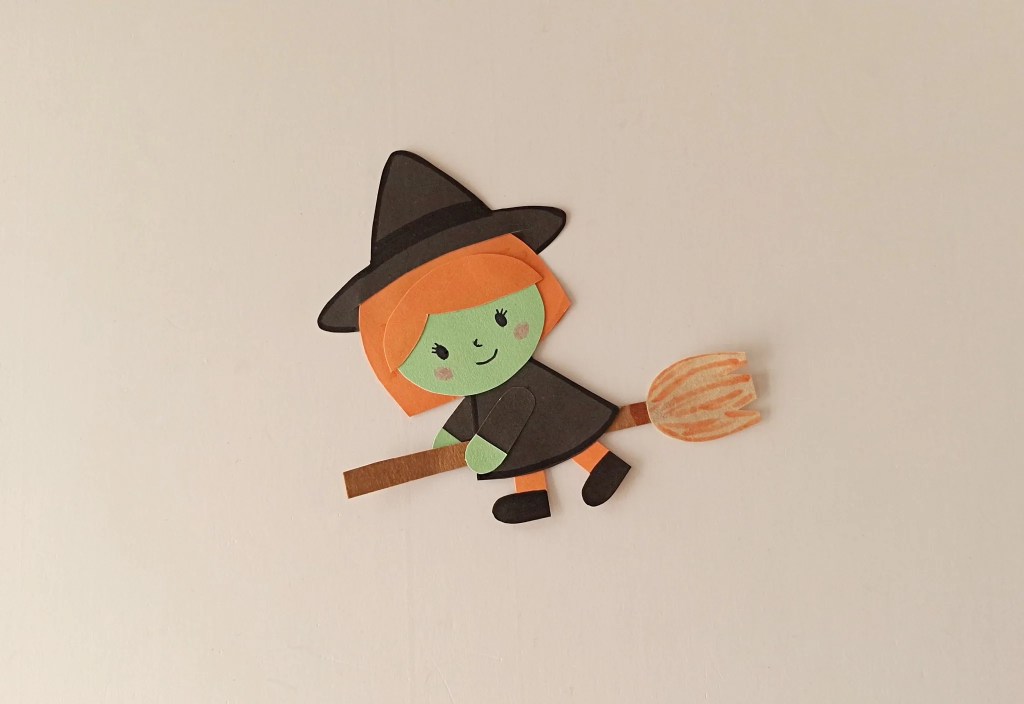
Step 7: Attach the Witch to Her Broom
Position the completed witch on her paper broomstick and secure the pieces with glue.
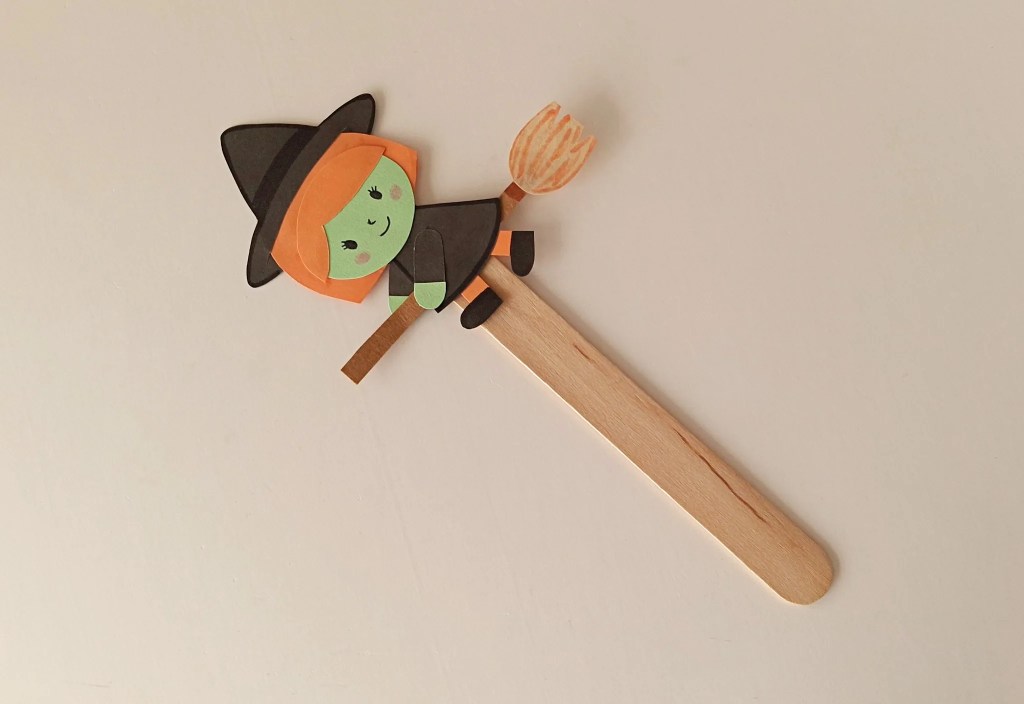
Then glue the assembled flying witch to one end of a popsicle stick.
This craft stick will become the handle that makes your witch fly across the Halloween sky.
Step 8: Prepare the Paper Plate
Take a paper plate and carefully cut a horizontal slit slightly below the center.
The slit needs to be wide enough for the popsicle stick to slide through and move from side to side.
An adult should help younger children with this step.
Step 9: Cover the Bottom of the Paper Plate
Choose a piece of colored craft paper for the lower section of your Halloween scene.
Cut it to fit the bottom portion of the plate and glue it in place, making sure the top edge lines up neatly with the slit.
Be careful not to cover the opening.

Step 10: Cover the Top of the Paper Plate
Use another piece of colored craft paper to cover the upper portion of the plate.
Line up the bottom edge with the slit, just as you did with the lower section.
Make sure the slit remains open so the popsicle stick can move freely.

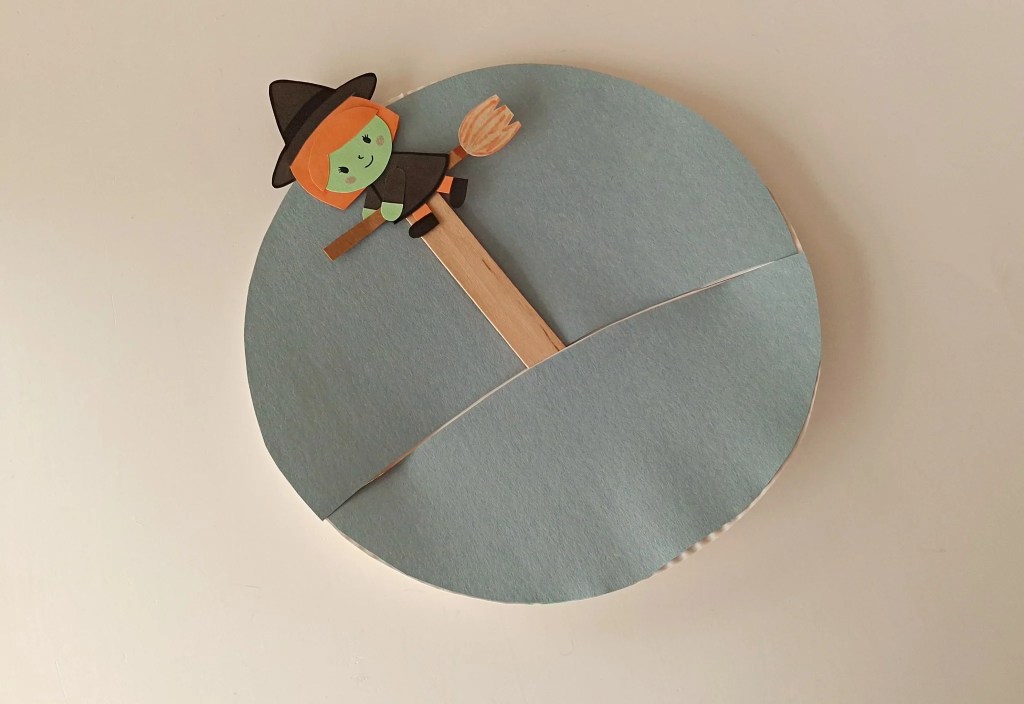
Step 11: Insert the Flying Witch
Slide the bottom end of the popsicle stick through the slit from the front of the paper plate.
Push it through until the witch sits above the slit and the remaining length of the stick extends behind the plate.
Gently move the stick to check that the witch can slide back and forth.
Step 12: Decorate the Halloween Sky
Now it’s time to bring your Halloween scene to life!
Arrange the moon, cloud, star, and bat cutouts on the paper plate. Once you’re happy with their placement, glue them in place.
You can also use markers to add extra stars or other little details to the background.
Just be sure to keep the decorations away from the moving slit so they don’t interfere with the witch’s flight.
Love those little bats? You can make some larger ones with our egg carton bat craft!

Step 13: Make Your Witch Fly!
Once the glue has dried, hold the paper plate upright and move the popsicle stick from behind.
Watch as your witch flies back and forth across the Halloween sky!
Kids can make up their own little Halloween stories as they move the witch past the moon and bats.
Tips for Making This Halloween Witch Craft
A few simple tricks can make this paper plate craft even easier and more enjoyable.
Prepare the pieces ahead of time for younger children. If you’re making this with preschoolers or a large group, consider cutting out some of the smaller template pieces in advance. They can concentrate on assembling and decorating their witches instead.
For little ones who are still learning to cut, child-friendly safety scissors can make paper crafting easier. Crayola has safety scissors designed for young children, although adult supervision is still important.
Don’t make the slit too wide. You want enough room for the craft stick to move smoothly without creating such a large opening that the witch becomes difficult to control.
Let the glue dry before playing. It’s tempting to start flying the witch around immediately, but giving the pieces time to dry will help keep everything together.
Try different background colors. Dark blue, purple, or black paper makes a lovely Halloween night sky. You can even use contrasting colors above and below the slit to create a more interesting scene.
Make each witch unique. Kids can experiment with different hair colors, dress patterns, hat decorations, and facial expressions. No two witches need to look alike!
For another easy project using colored paper and a printable template, try these Halloween paper bookmarks.
Fun Ways to Use Your Flying Witch Craft
This moving paper plate craft is fun to make, but there are plenty of ways to enjoy it afterward, too.
Halloween storytelling: Encourage kids to invent a story about where their witch is flying. Is she heading to a Halloween party? Visiting a friend? Looking for her missing black cat?
Classroom Halloween activities: This would make a fun art project for an elementary classroom. You could even display everyone’s flying witch scenes together for a festive Halloween bulletin board.
Halloween party craft station: Set out the precut template pieces, paper plates, glue, and markers so kids can assemble their own moving Halloween decorations.
You could even set up a second station for making Halloween treat bags that kids can take home.
Fine motor practice: Moving the popsicle stick back and forth gives kids another opportunity to practice coordination and controlled hand movements after they’ve finished cutting and gluing.
Flying Witch Paper Plate Craft FAQs
What age is this Halloween craft best for?
This craft is especially well suited to preschool and elementary-aged children, although younger kids will need more adult assistance. Older children can generally complete most of the steps independently.
Can I use construction paper instead of cardstock?
Absolutely! Construction paper works well for this project and is often easier for little hands to cut. Cardstock is a good option if you want slightly sturdier pieces, particularly for the witch.
What if the witch doesn’t slide smoothly?
Check that the slit is wide enough for the popsicle stick and that no glue or paper decorations are blocking the opening. You may need to carefully lengthen the slit a little to give the witch more room to move.
Can kids decorate the paper plate differently?
Of course! The printable template gives you everything needed for the basic scene, but kids can add extra bats, stars, clouds, or even a haunted house silhouette. Just keep the moving area clear.
Have Fun Making Your Flying Witch!
This Flying Witch Paper Plate Craft combines two things kids love: creating something with their own hands and then getting to play with it!
With a printable template, a few basic supplies, and a little imagination, they can make their very own witch flying through a Halloween night sky.
Whether you’re planning a classroom project, a Halloween party activity, or just looking for a fun craft to do at home, this is a sweet way to enjoy some creative time together.
Don’t forget to save this Halloween paper plate craft to Pinterest so you can find it when you’re ready to make it!
Get more craft ideas like this along with delicious easy meals and fun holiday celebrations by subscribing to our newsletter. We often send out free printables in these as well, just for our email subscribers.


Leave a Reply