This friendly little ghost is ready to wave hello! Pull the popsicle stick up and down, and the ghost’s arms move along with it.
With its witchy hat, tiny broomstick, and rosy cheeks, this moving ghost puppet is more sweet than spooky. It’s a fun Halloween paper craft for kids to make at home, in the classroom, or at a Halloween party.
The moving mechanism requires a few extra steps, but once it has been assembled, kids will love making their ghost wave and fly.
For another friendly Halloween character, make this Spoon Witch Craft with its colorful felt hat and yarn hair.

Supplies
- Colored craft paper
- White cardstock
- Moving ghost puppet template
- Pencil
- Scissors
- Craft glue
- Markers
- String or strong, non-stretch yarn
- Popsicle stick
- Two brad fasteners
- Needle
- Awl
Safety note: An adult should handle the awl and needle or closely supervise older children while they complete those steps. Check that the ends of the brad fasteners are folded flat against the back of the puppet.
How to Make a Moving Ghost Puppet
Step 1: Prepare the Patterns
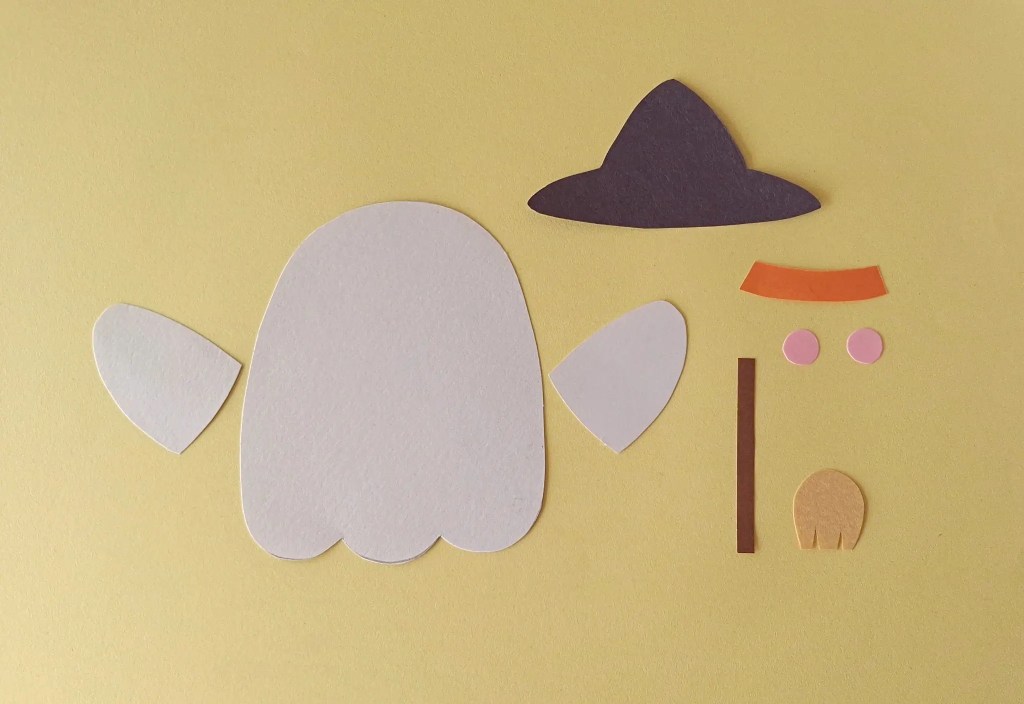
Download and print the moving ghost puppet template.
Choose white cardstock for the ghost’s body and hands. Select your desired colors of craft paper for the hat, hatband, broom, and other decorative pieces.
Trace each template pattern onto the corresponding paper with a pencil. Carefully cut out all the traced shapes.
Step 2: Assemble the Hat and Broom
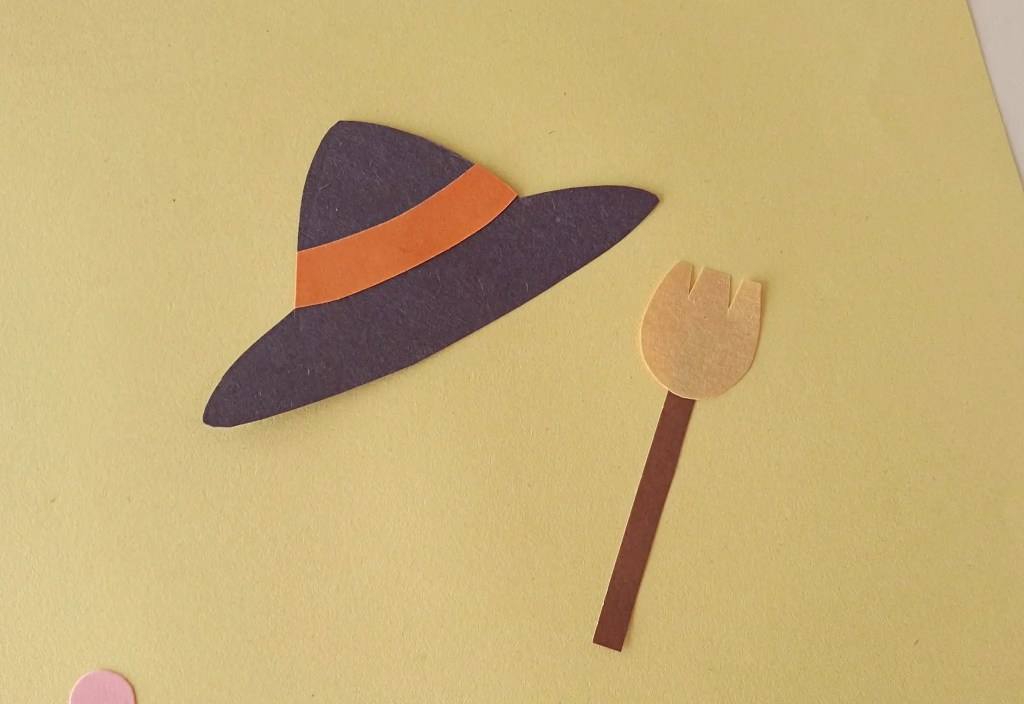
Glue the hat ribbon just above the brim of the hat.
Glue the broom head to the broom handle to complete the miniature broomstick. Set both pieces aside to dry.
Step 3: Draw the Ghost’s Face
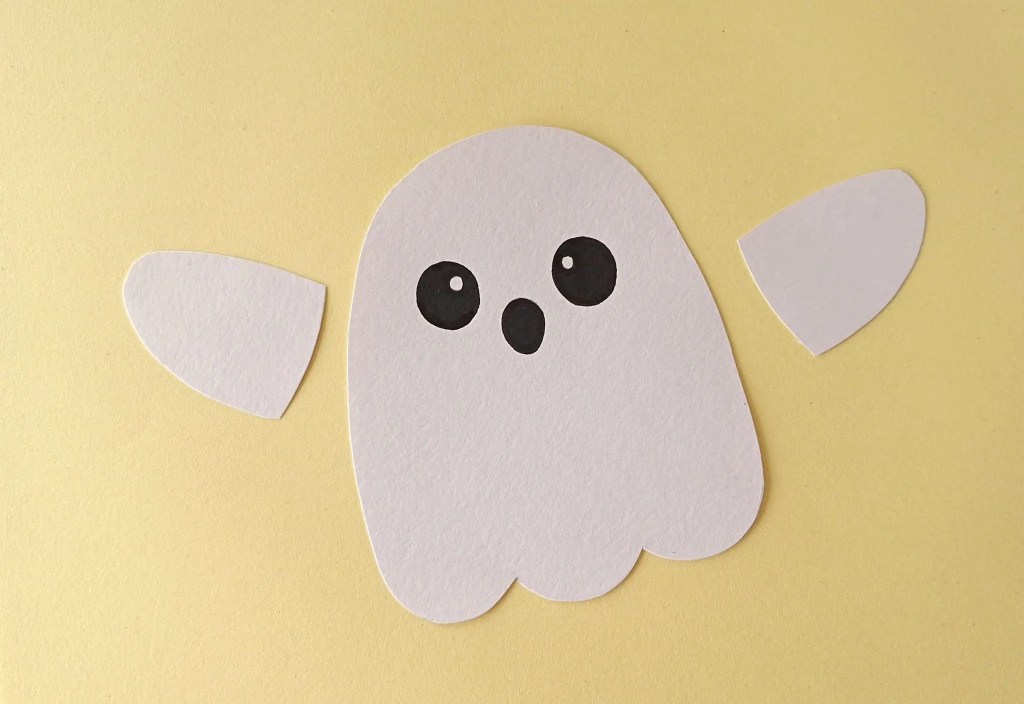
Use markers to draw a face near the top of the ghost’s body. You can copy the expression shown in the photos or give your ghost its own personality.

Step 4: Mark the Holes
Turn the ghost’s body over so the back is facing upward.
Mark two dots near the inner top portion of each arm, leaving approximately 1 centimetre between the two dots.
Next, mark one dot on each side of the ghost’s body where you want to attach the arms.

Step 5: Make the Holes
Use an awl to carefully make a hole at each marked dot.
An adult should complete this step for younger children.
Step 6: Position the Right Arm
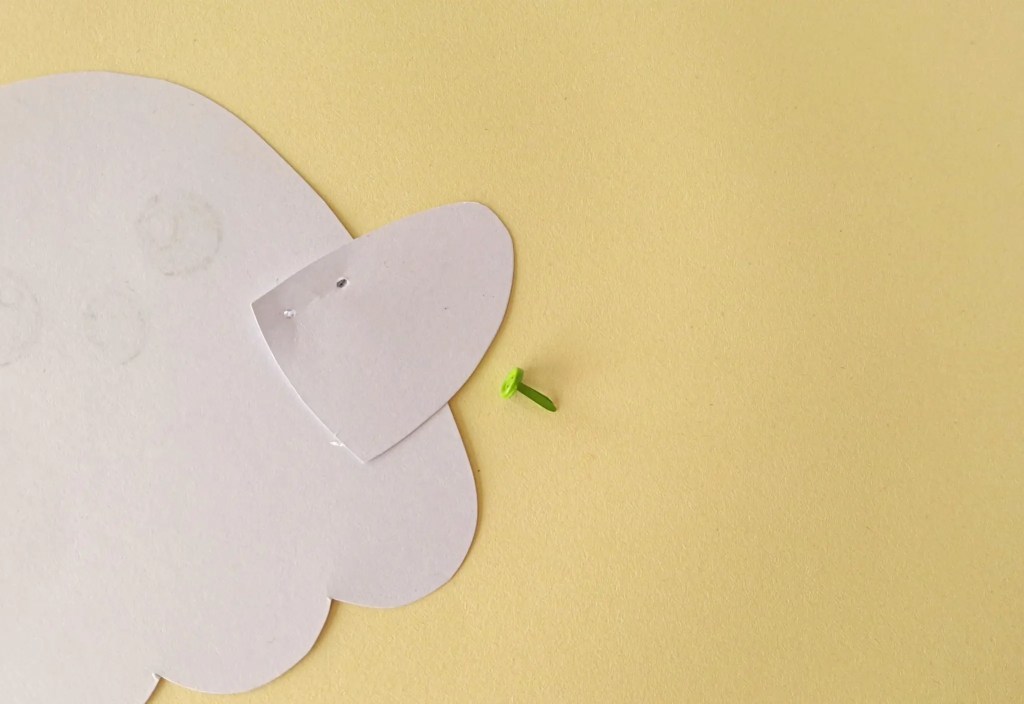
Place the right arm against the right side of the ghost’s body.
Align the outer hole in the arm with the hole in the ghost’s body. The second hole in the arm should remain free for the string.
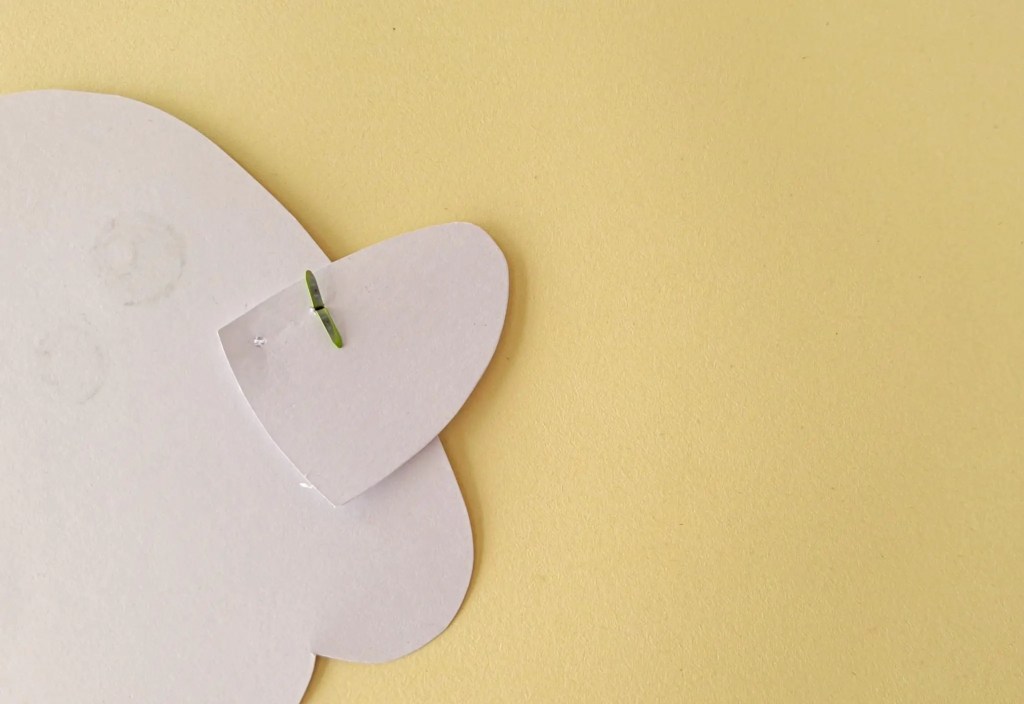
Step 7: Attach the Right Arm
Insert a brad fastener through the aligned holes to attach the arm to the ghost’s body.
Open the two ends of the brad at the back to hold it in place. Do not fasten it so tightly that the arm cannot move.
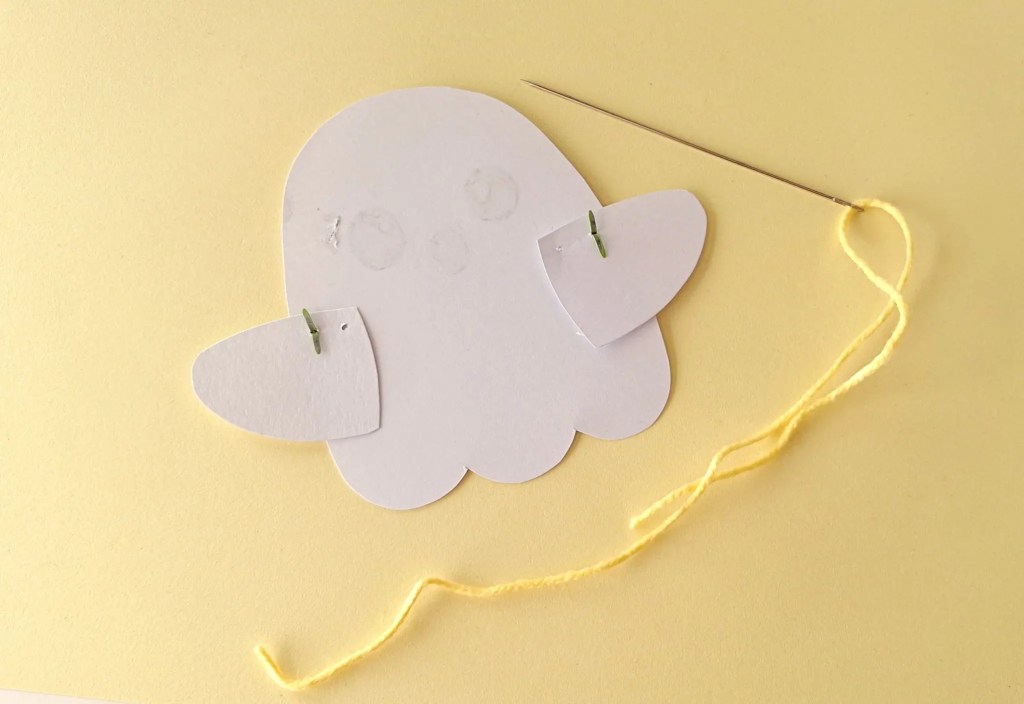
Step 8: Attach the Left Arm
Repeat the process to attach the left arm to the opposite side of the ghost’s body.
Check that both arms can move freely around the brad fasteners.
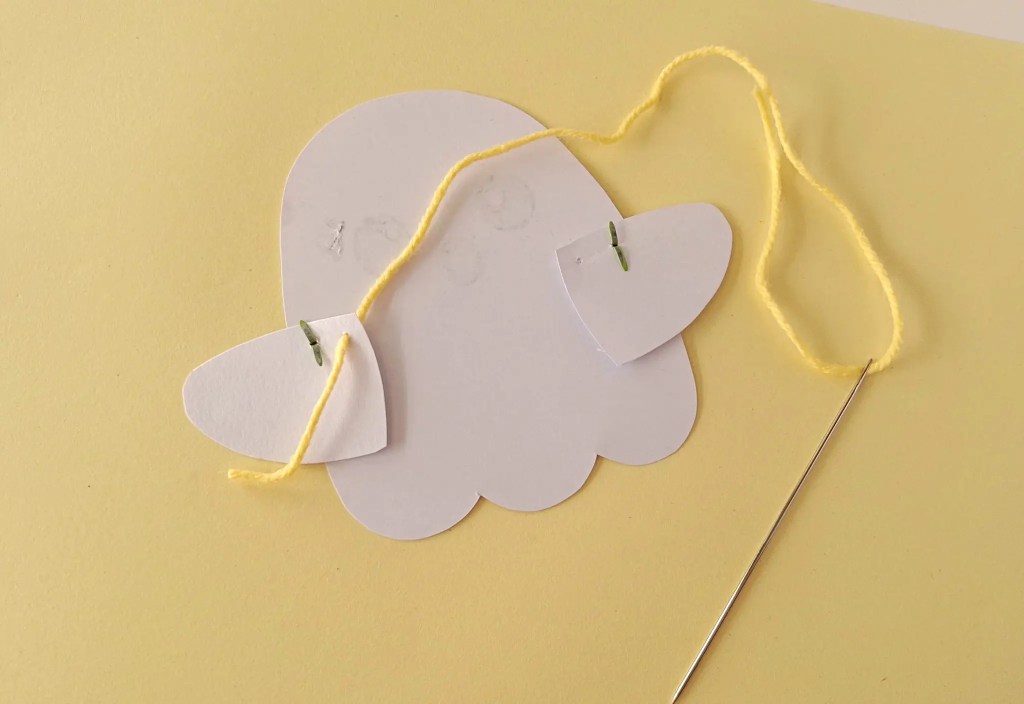
Step 9: Thread the Left Arm
Thread a needle with strong, non-stretch string or yarn.
From the front of the puppet, pass the needle through the remaining hole in the left arm and pull the string toward the back.

Step 10: Secure the First End
Tie two knots at the end of the string. The knots should be large enough to keep the string from slipping back through the hole.
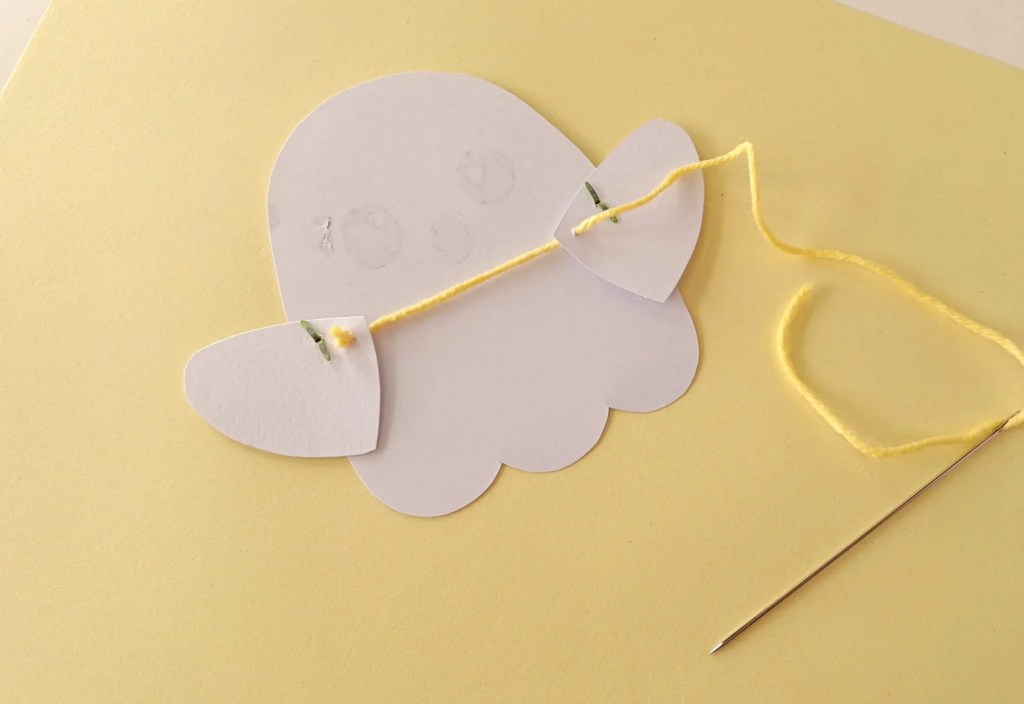
Step 11: Connect the Right Arm
With the string extending across the back of the ghost, pass the needle through the remaining hole in the right arm from the back.
Pull the string through carefully.
Keep the string taut enough to coordinate the movement of the two arms, but not so tight that the arms are pulled out of position.
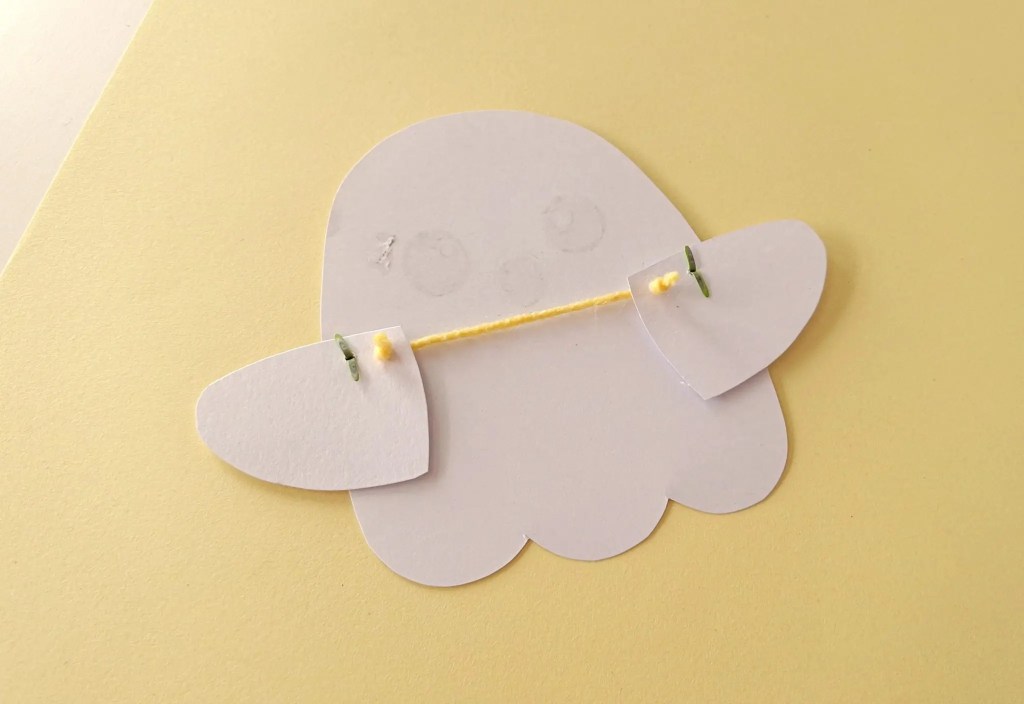
Step 12: Secure the Second End
Tie a knot close to the hole in the right arm. Trim away any excess string.
Test the arms before continuing. When you gently pull the centre of the string, both arms should move.

Step 13: Add the Popsicle Stick
Position a popsicle stick vertically at the centre of the string, with the string running above the stick.
Glue the top of the popsicle stick securely to the middle of the string. Allow the glue to dry completely before operating the puppet.
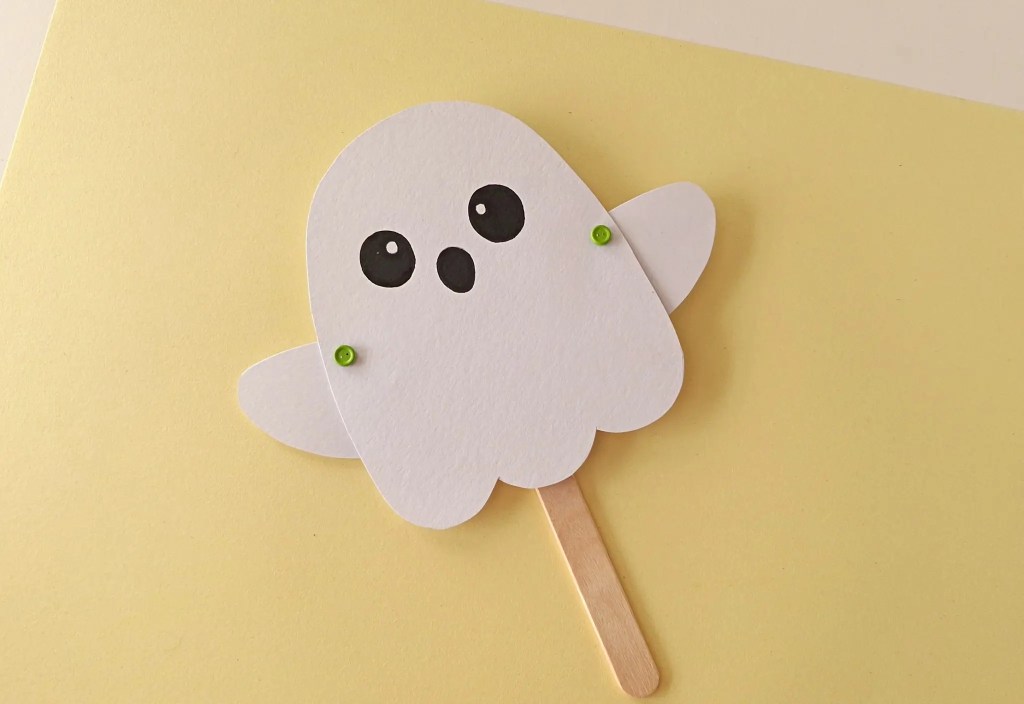
Step 14: Turn the Ghost Over
Turn the ghost puppet over so the front is facing upward.
The round tops of the brad fasteners will be visible where the arms are attached.

Step 15: Add Rosy Cheeks
Cut two small circles from pink craft paper.
Glue one circle over each brad fastener. These circles will disguise the fasteners and look like rosy cheeks on the ghost.
Be careful not to glue the paper circles to both the arms and the body, as this could prevent the arms from moving.

Step 16: Add the Accessories
Glue the paper hat to the top of the ghost’s head.
Attach the broomstick to one of the ghost’s hands. Allow all the glue to dry thoroughly.
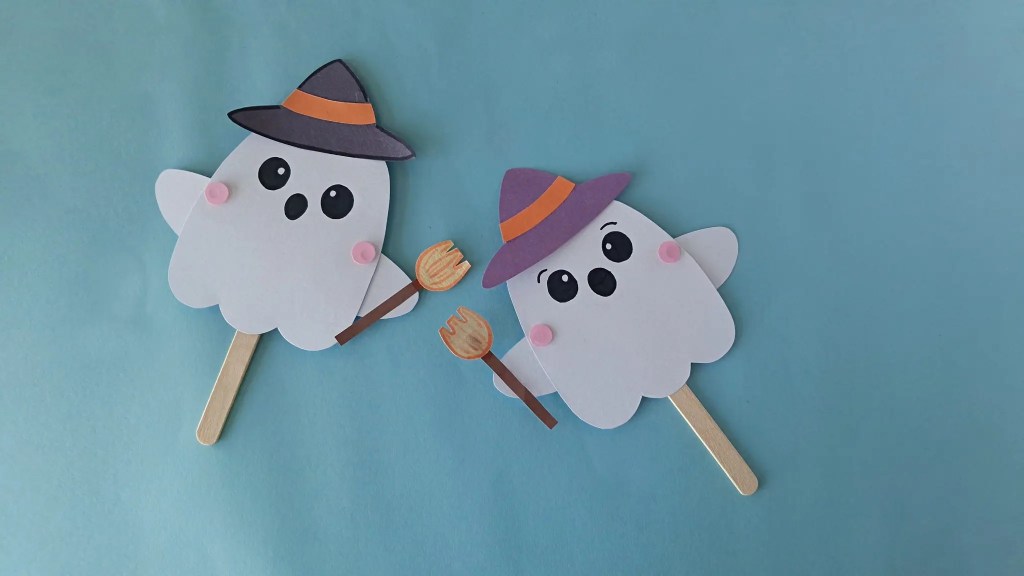
Step 17: Make the Ghost’s Arms Move
Hold the bottom of the ghost puppet steady with one hand.
Use your other hand to pull the popsicle stick up and down. As the string moves, the ghost’s arms will move up and down too!
Helpful Crafting Tips
- Use cardstock for the ghost’s body and arms so the puppet is sturdy enough to move repeatedly.
- Keep the brad fasteners slightly loose so the arms can pivot.
- Strong, non-stretch string works better than soft, stretchy yarn for the moving mechanism.
- Test the arm movement before gluing on the cheeks and accessories.
- If the arms do not move easily, check that the string is not too tight and that glue has not reached the joints.
- Let the glue holding the popsicle stick dry completely before testing the finished puppet.
Ways to Personalize Your Ghost Puppet
Every ghost can have its own look and personality. Kids could:
- Draw a silly, surprised, or sleepy expression
- Decorate the hat with stars, dots, or tiny paper shapes
- Choose different colors for the hat and hatband
- Add a paper bow tie or hair bow
- Replace the broom with a miniature trick-or-treat bag
- Give the ghost a name and invent a story about its Halloween adventures
What Children Can Learn
This moving ghost puppet gives children an opportunity to practise:
- Tracing and cutting
- Fine motor coordination
- Following instructions in sequence
- Creative decision-making
- Learning how simple joints and pulling mechanisms create movement
Moving the popsicle stick and observing what happens to the arms also offers a simple introduction to cause and effect.
Kids can explore another simple paper mechanism with our Moving Caterpillar Craft.
Frequently Asked Questions
What kind of paper works best?
White cardstock is the best choice for the ghost’s body and arms because it is sturdier than regular printer paper. Lightweight craft paper works well for the hat, broom, cheeks, and decorative pieces.
Can I make the holes without an awl?
An adult can carefully make the holes with a large needle or another suitable paper-piercing tool. Protect the work surface underneath the paper, and keep sharp tools away from young children.
Why aren’t my ghost’s arms moving?
Make sure the brad fasteners are loose enough for the arms to pivot. The string should be secure without pulling the arms tightly against the body. You should also check that no glue is restricting the moving joints.
Can children assemble the moving mechanism themselves?
Older children may be able to assemble it with close adult supervision. An adult should make the holes and handle the needle when crafting with younger children.
A Friendly Halloween Ghost
This moving ghost puppet is a playful Halloween craft with a little surprise built in. Once kids see those arms wave for the first time, they’ll want to make their friendly ghost fly, dance, and greet everyone who passes by.
Add this waving ghost to your collection of non-spooky Halloween crafts for kids for even more friendly Halloween fun.
Get more craft ideas like this along with delicious easy meals and fun holiday celebrations by subscribing to our newsletter. We often send out free printables in these as well, just for our email subscribers.


Leave a Reply