Looking for a fun Halloween treat that doesn’t require fancy decorating skills? These easy Ghost Cupcakes are just the thing! Made with a boxed cake mix, white frosting, and black decorating icing, they’re a simple way to add a little spooky fun to your Halloween celebrations.
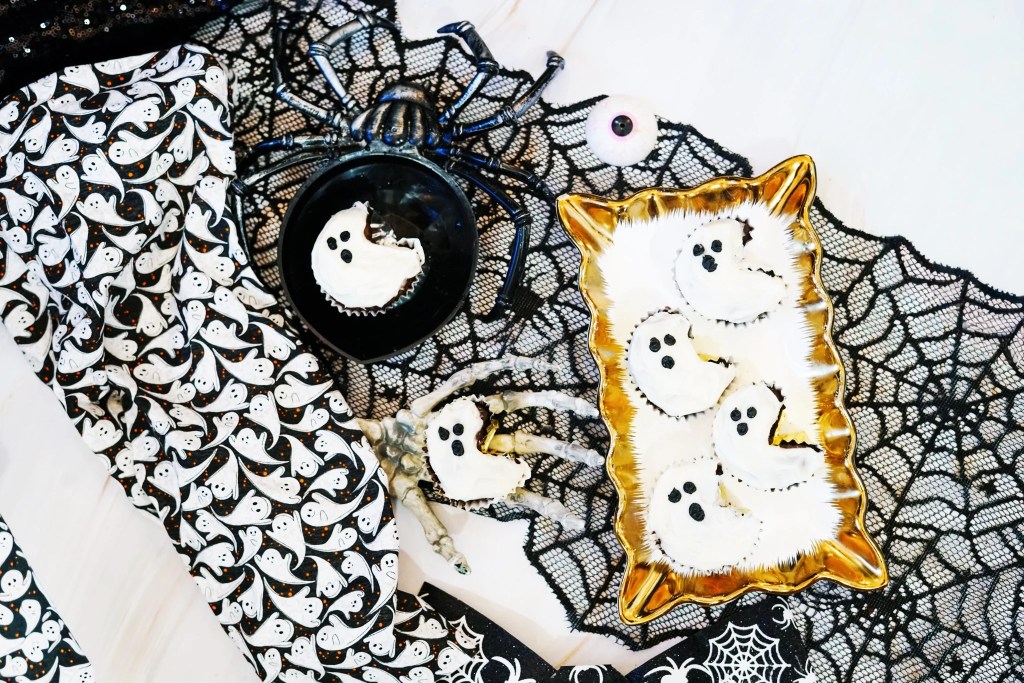
But here’s what makes these cupcakes extra special. Instead of baking them in the usual round shape, we’re using a clever little trick to give them their own ghostly silhouettes. Add some white frosting and three little dots for a face, and you’ve got adorable ghosts that are almost too cute to eat!
These would be perfect for a Halloween party, classroom celebration, or a special after-school treat.
Planning a whole afternoon of Halloween fun? Pair these cupcakes with our Flying Witch Paper Plate Craft for a little crafting and a sweet treat afterward.

Why You’ll Love These Ghost Cupcakes
- They’re easy to make. Starting with a boxed cake mix keeps things simple and saves time.
- No fancy decorating skills required. You only need white frosting and black icing to create the ghost faces.
- The shape makes them extra fun. Instead of ordinary round cupcakes, these have a cute ghostly silhouette.
- They’re great for Halloween parties. Add them to a dessert table or serve them as a fun seasonal treat.
- Kids can help. Little ones will especially enjoy adding the ghost faces once the cupcakes have cooled.
Disclosure: Some of the links in the post below are affiliate links provided for your convenience. This means that if you purchase something through one of these links, I get a small commission at no added cost to you.
Ingredients for Ghost Cupcakes
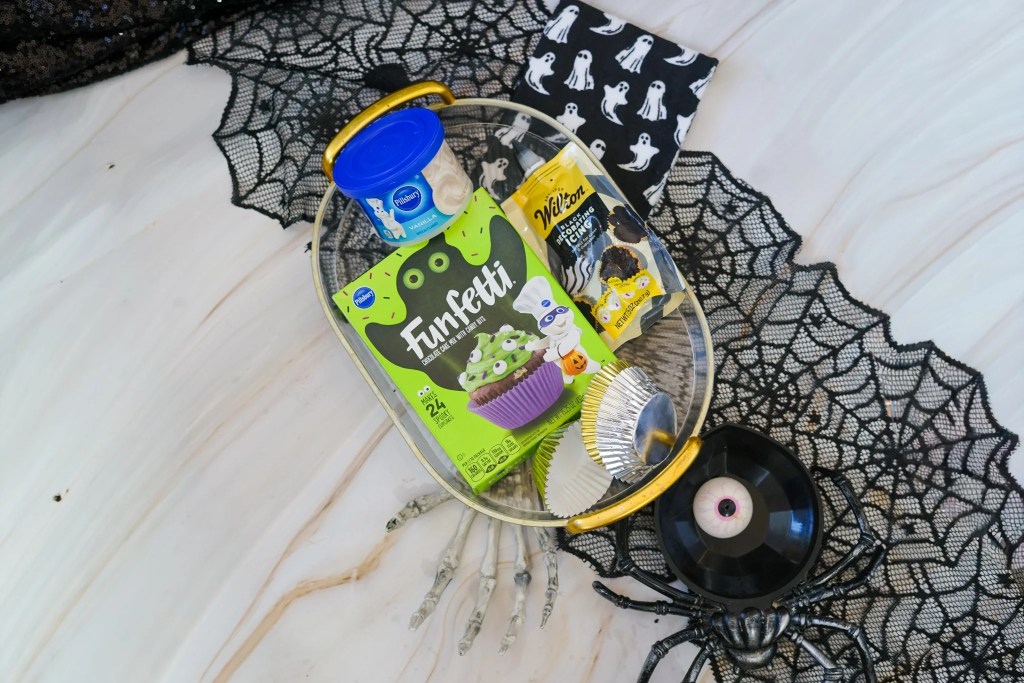
You only need a handful of ingredients to make these cute Halloween treats.
- Boxed cake mix: We used chocolate cake mix, but you can choose your favorite flavor.
- Ingredients called for on the cake mix box: Usually eggs, oil, and water, depending on the brand.
- Cupcake liners: Standard cupcake liners work well for this recipe.
- White frosting: Store-bought vanilla frosting makes this recipe especially quick and easy.
- Black decorating icing: Perfect for adding the eyes and mouths to your little ghosts.
Equipment You’ll Need
- Muffin pan
- Mixing bowl
- Electric mixer or whisk
- Spoon or spatula
- Oven-safe metal corn holders or tightly packed aluminum foil for shaping the cupcakes
- Optional: Oven-safe stainless steel cannoli tubes
How to Make Ghost Cupcakes
Step 1: Prepare the Cake Batter
Preheat your oven to 350°F.
Prepare the cake batter according to the directions on the package, mixing until everything is well combined.
Step 2: Shape the Cupcakes
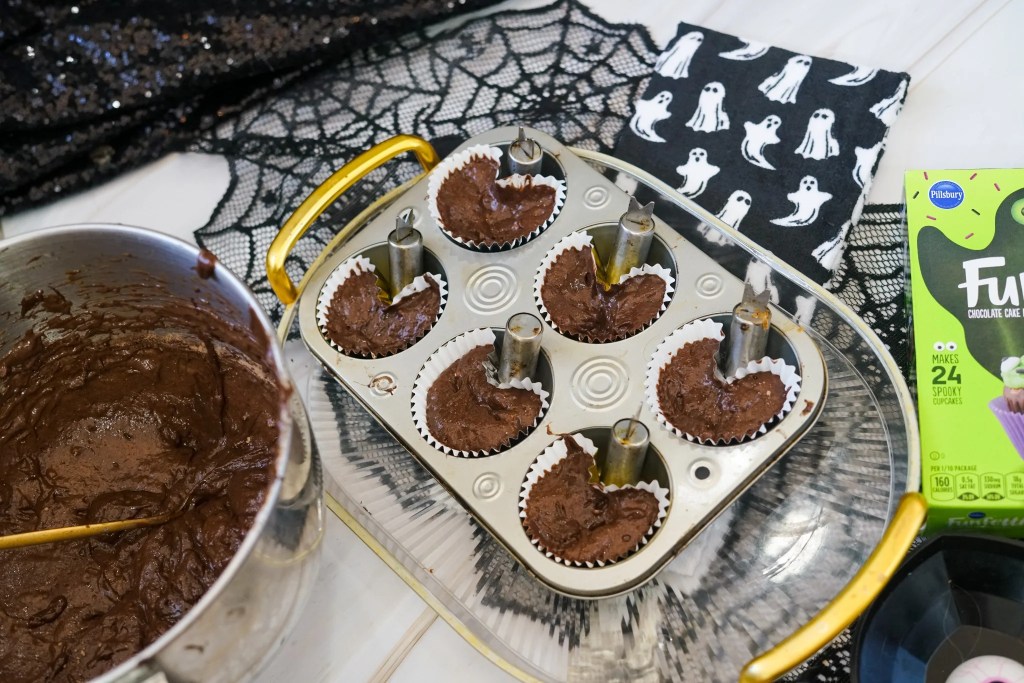
Place cupcake liners in your muffin pan and fill each one about halfway with batter.
Now comes the fun part!
To create the ghost shapes shown in our photos and video, position oven-safe metal corn holders between the outside of the cupcake liners and the muffin pan. Gently push the liners inward to create curved indentations along the sides.
Don’t have metal corn holders? You can also try using tightly packed balls or short rolls of aluminum foil. Wedge them between the cupcake liners and the sides of the muffin pan to create the indentations. This is a common technique for making shaped cupcakes, although the exact results may vary.
If you’ve never tried shaping cupcakes with aluminum foil before, Food Network has a helpful tutorial showing how this technique can be used to create different cupcake shapes.
Oven-safe stainless steel cannoli tubes may also work, depending on their size and how securely they fit.
Whatever you use, make sure it holds the liners in position without tipping or spilling the batter.
Important safety note: Only use materials and equipment that are suitable for oven use. Never use plastic-handled corn holders, glass marbles, or other objects that aren’t intended for baking.
Step 3: Bake the Cupcakes
Bake at 350°F for approximately 12 minutes, or until a toothpick inserted into the center comes out clean.
The exact baking time will depend on your cake mix, oven, and the size of your cupcakes, so keep an eye on them and allow additional time if needed.
Remove the cupcakes from the oven and let them cool completely before decorating.
Step 4: Frost the Ghosts
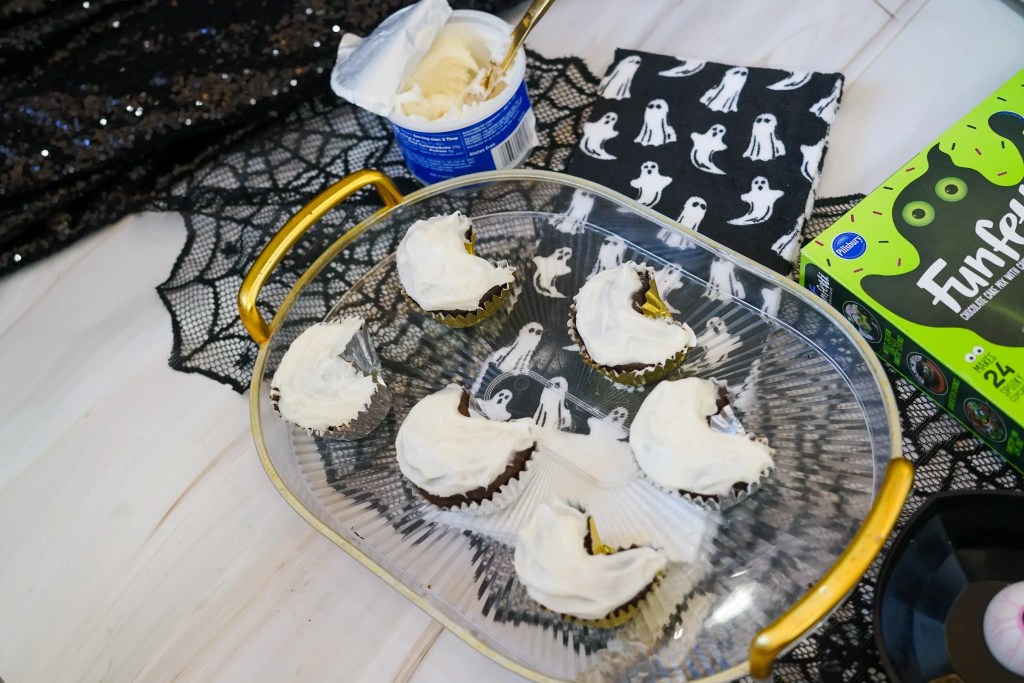
Once the cupcakes have cooled, spread white frosting over the tops, following their ghostly shapes.
You don’t need to make the frosting perfectly smooth. A few little swirls and uneven edges can actually give your ghosts some extra personality!

Step 5: Add the Ghost Faces
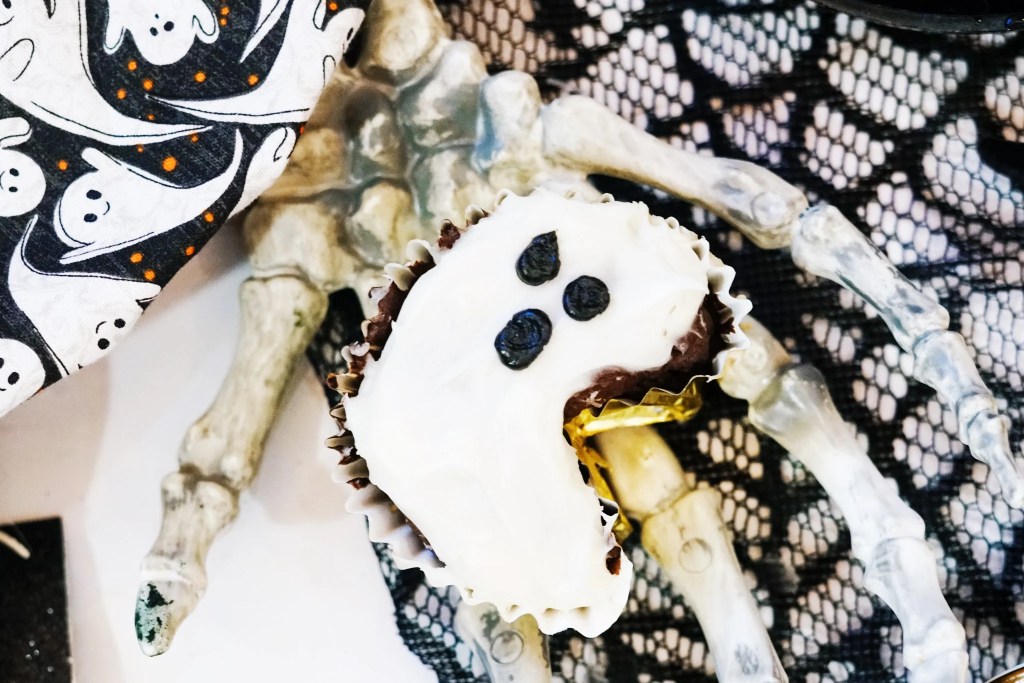
Using black decorating icing, add two small dots for the eyes and a slightly larger dot for the mouth.
You can give each ghost the same expression or have a little fun creating different faces.
And that’s it! Your adorable Ghost Cupcakes are ready for Halloween.
Tips for Making the Best Ghost Cupcakes
Don’t overfill the cupcake liners. Filling them about halfway helps prevent the batter from rising too far over the shaped edges.
Make sure your shaping pieces are secure. The indentations need to stay in place while the cupcakes bake. If you’re using aluminum foil, pack it tightly so it doesn’t flatten or shift.
Use only oven-safe materials. The original method uses metal corn holders, but not all corn holders are safe for baking. Be sure to check before putting anything in the oven.
Let the cupcakes cool completely. If you try to frost them while they’re still warm, the frosting may melt and slide off.
Keep the decorating simple. You don’t need piping skills or elaborate decorations. Two eyes and a mouth are enough to transform each cupcake into a little ghost.
Don’t worry about perfection. Your ghosts don’t all need to look exactly alike. Different shapes and expressions are part of the fun!
Can You Make These Ghost Cupcakes Ahead of Time?
Absolutely! You can bake the cupcakes a day ahead and store them in an airtight container once they’ve cooled completely.
Wait until closer to serving time to add the frosting and faces if you’d like them to look their freshest.
You can also prepare the frosting and decorating supplies ahead of time, making it easy to finish everything just before your Halloween celebration.
How to Store Ghost Cupcakes
Store your decorated cupcakes in an airtight container at room temperature for up to 2 days, as long as you’re using frosting that can safely be kept at room temperature.
If your frosting requires refrigeration, follow the storage instructions on the package.
For longer storage, you can freeze the unfrosted cupcakes in an airtight, freezer-safe container for up to 2 months. Thaw them before decorating.
Fun Ways to Serve Ghost Cupcakes
These little ghosts are perfect for all kinds of Halloween celebrations!
Arrange them on a festive Halloween platter, add them to a dessert table, or serve them alongside other spooky treats for a family movie night.
You could even turn decorating into a party activity. Bake the ghost-shaped cupcakes ahead of time, then let the kids add their own frosting and faces.
Some ghosts might look surprised, some might look spooky, and others might end up looking downright silly!
Whether you’re making these for a Halloween party, a classroom celebration, or just a little fun at home, these Ghost Cupcakes are sure to bring some smiles. And with their funny little faces, each one has its own personality. Don’t be surprised if everyone wants to pick out their favorite ghost!

Easy Ghost Cupcakes for Halloween
Ingredients
- 1 box chocolate cake mix
- 0.33 cup Oil – usually 1/3 cup or whatever required by that cake mix package
- 3 Eggs – usually 3 but be sure to check the cake mix package
- Water as required by cake mix package
- 1 can White frosting enough to frost the cupcakes
- 1 tube Black decorating icing for the eyes and mouths
Instructions
-
Prepare the batter. Preheat the oven to 350°F. Prepare the chocolate cake batter according to the package directions.
-
Fill the liners. Place cupcake liners in a muffin pan and fill each one about halfway with batter.
-
Create the ghost shapes. Position oven-safe, all-metal corn holders between the outside of the cupcake liners and the muffin pan, gently pushing the liners inward to create curved ghost shapes. Alternatively, try tightly packed balls or short rolls of aluminum foil. Oven-safe stainless steel cannoli tubes may also work, depending on their size. Make sure the shaping pieces fit securely.
-
Bake. Bake for approximately 12 minutes, or until a toothpick inserted into the center comes out clean. Baking time may vary depending on the cake mix and oven.
-
Cool and frost. Allow the cupcakes to cool completely. Spread white frosting over each cupcake, following its ghost shape.
-
Decorate. Use black decorating icing to add two eyes and a mouth to each ghost. Serve and enjoy!
Recipe Notes
-
Shaping the cupcakes: The original recipe uses oven-safe metal corn holders to create indentations in the cupcake liners. Tightly packed aluminum foil is another cupcake-shaping technique you can try, although the exact ghost shapes may vary. Oven-safe stainless steel cannoli tubes are another possible alternative.
-
Safety: Never use plastic-handled corn holders, glass marbles, or objects that aren’t suitable for oven use.
-
Don’t overfill: Fill the liners about halfway to help preserve the ghost shapes as the cupcakes bake.
-
Baking time: The original recipe specifies 12 minutes, but follow the doneness test rather than relying on the time alone.
-
Storage: Keep decorated cupcakes in an airtight container for up to 2 days at room temperature if the frosting is shelf-stable. Otherwise, follow the frosting manufacturer’s refrigeration instructions.
More Halloween Treats
Looking for more fun Halloween treats? Try our Halloween Candy Bark for another easy party dessert, or make these adorable Hocus Pocus Cookies. They’re perfect for a spooky movie night!
For delicious recipes along with fun holiday celebration and adorable craft ideas, subscribe to our newsletter. We often send out free printables in these as well, just for our email subscribers.


Leave a Reply