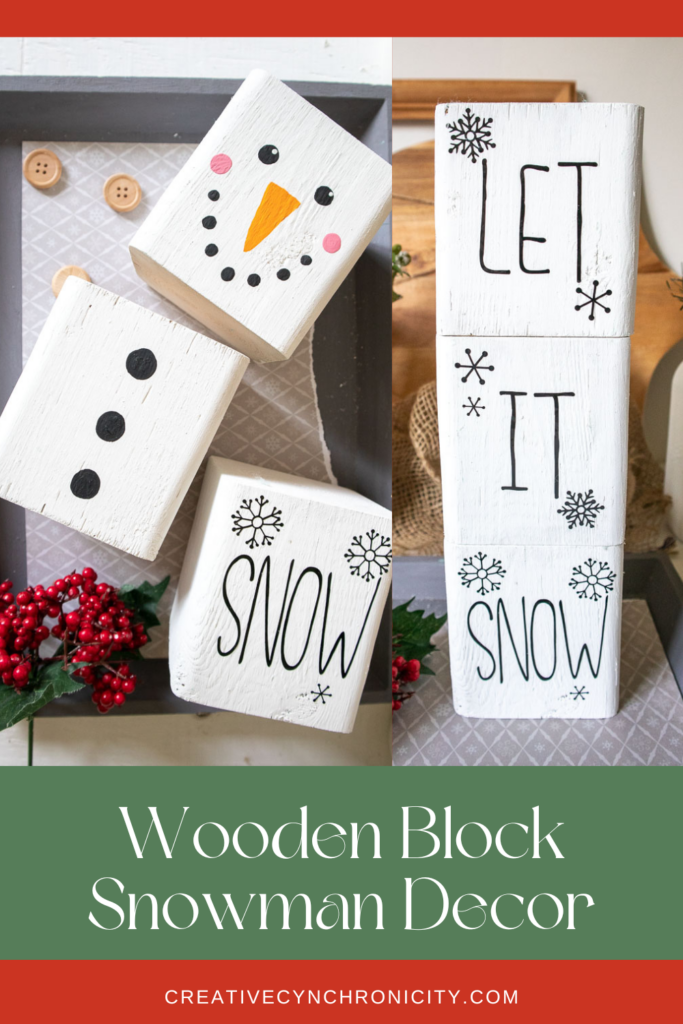
You can make this wooden block snowman decor in an afternoon. Simple materials and the help of your Cricut machine will make this craft a breeze.
These double-sided blocks are the perfect holiday decor and in fact, they will last throughout the whole winter season. Give this adorable snowman a home and watch everyone smile when they see it!

Wooden Block Snowman Decor
Materials Needed:
- 4×4 post cut into 3 pieces each measuring 4 1/2” high
- Crafter’s Acrylics in White / Bright Orange / Black / Wild Rose Pink
- Paintbrushes, fine tip and medium flat brush
- Chenille sock
- Cricut Design Space Snowflake Images #M8070D4
- Cricut Joy
- Smart Vinyl Permanent in black
- Weeder
- Scissors
- Cricut Transfer Tape
- Cricut Joy (or other die cutting machine)


Instructions:

Gather supplies.
Painting the Wooden Blocks

Paint the surface of the wood blocks in white. Let the paint dry and paint an additional coat as needed for full coverage.

Using a fine tip paint brush, apply an upside down triangle shape in the middle of one block in orange.

Using a fine tip paintbrush, paint two circles in black for the eyes; and seven smaller circles for the mouth.

Paint two larger circles for the rosy cheeks in pink.

Using the back end of a fine tip paintbrush, dab two small circles inside the eyes for highlights in white.

Paint three circles for the buttons on another block.
Preparing the Images
Open a blank canvas in Design Space.
Select the text icon from the toolbar.

Type LET.
Change the font to “Little White Lies”.

With the word highlighted, adjust the letter spacing to 0.7.

Stretch the lettering by clicking on the lock symbol above the size section and adjusting the height to 1.7” while keeping the width the same.
Next, click on the unlock symbol and adjust the word height to 2”.

Steps 5-11 for the other words: IT and SNOW.
Click on the images icon in the toolbar and search snowflakes #M8070D4.
Adjust the size to 2.25”.

Cutting
Select “Make It” in Design Space.

For cutting the words, set the material type to Smart Vinyl.


Follow prompts for loading the Smart Vinyl into the Cricut Joy and cutting. When prompted, unload the from the cutting machine.


Applying the Vinyl to the Painted Snowman Blocks
Cut around each word and snowflake with a pair of scissors.

Using the weeding tool, peel away the excess vinyl around the cut images and discard.

Cut a piece of transfer tape a bit larger than the size of the cut word.

Peel away the transfer tape backing but ensure the transfer tape is not overly sticky.

Place the transfer tape overtop of the cut word. Gently rub the vinyl to help it stick to the transfer tape. Peel away the vinyl backing, leaving just the image adhered to the transfer tape.

Position the word with the transfer tape on to the opposite side of the wooden block. Press the vinyl word down with your fingers to help it to stick to the block. Slowly and carefully remove the transfer tape leaving the vinyl image on the block.


Repeat for the other words and snowflakes on the remaining wooden blocks.

Finishing
Add a sock to the top of the snowman head.

Stack the blocks vertically or place them in a row to enjoy!
Leave a Reply