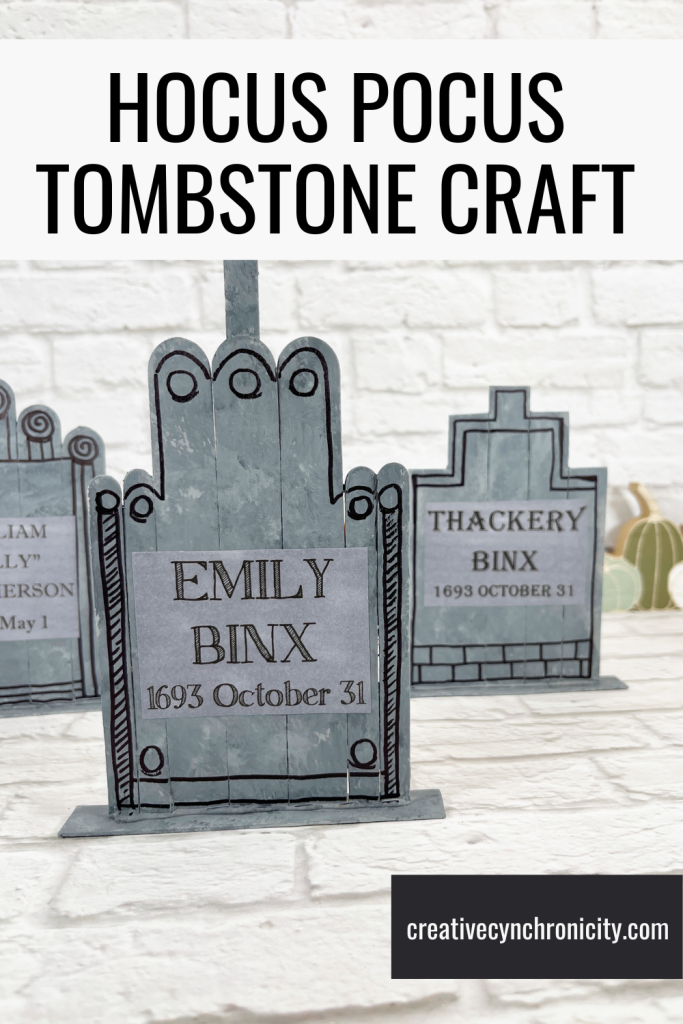
Using simple supplies from the dollar store you can create this spooky, cute Hocus Pocus Tombstone Craft for Halloween. You and the kids can make these in about half an hour.
Use this Hocus Pocus Dollar Store Craft Stick Tombstone Trio to decorate your home or add family names with Sharpie to use as place cards at a Hocus Pocus inspired dinner.
Find more great Hocus Pocus ideas here:
and here
and here (we’re big fans….can you tell?)

HOCUS POCUS DOLLAR STORE CRAFT STICK TOMBSTONE TRIO CRAFT
Grab your FREE Hocus Pocus Tombstone Pattern Template here.
Materials:

- Craft Sticks, Jumbo – Dollar Store
- Craft Sticks, Regular – Dollar Store
- Glue Gun and Glue Sticks – Dollar Store
- Permanent Black Marker – Dollar Store
- Glue Stick – Dollar Store
- Acrylic Craft Paint – Light Grey, Dark Grey
- Marker, Dark Grey OR Grey Paper
- Paintbrush
- Scissors
- Pencil
- Ruler
- HOCUS POCUS TOMBSTONE PATTERNS

Instructions:
STEP ONE

Gather all supplies. To create Emily Binx tombstone, line up three jumbo and four regular craft sticks on your work surface. Using scissors, trim additional jumbo craft sticks to the width of the tombstone and attach with a glue gun and glue sticks. Cut a regular craft stick into 3” and 1” pieces, glue into a cross pattern, and then glue onto the top, back of the tombstone.

To create the Thackery Binx tombstone, line up five jumbo craft sticks in a graduated pattern. Using scissors, trim additional jumbo craft sticks to the width of the tombstone and attach with a glue gun and glue sticks. Trim the top rounded ends of the craft sticks to create square edges.

To create the Billy Butcherson tombstone, line up five jumbo craft sticks in a rounded pattern. Using scissors, trim additional jumbo craft sticks to the width of the tombstone and attach with a glue gun and glue sticks.
TIP: You can use liquid craft glue for this project, but you will have to wait for it to dry.
STEP TWO

Using a ruler and pencil, draw a straight line across the bottom of each tombstone. Carefully cut the craft sticks with scissors so you have a straight bottom edge.

Measure and cut three jumbo craft sticks to 4.5” long. Run a bead of hot glue along the bottom cut edge of each tombstone and attach to the base. Hold in place until the glue cools and sets up.

STEP THREE

Working one at a time, basecoat the tombstones with light grey acrylic craft paint. While the light grey paint is still wet, pounce dark grey acrylic paint over the surface of each tombstone in a random fashion with the paintbrush.

Add some additional light grey paint, if necessary to create a stone texture. Paint the back, the edges, and the base.
STEP FOUR

Using a permanent black marker, create some patterns on the tombstones. Simple shapes like circles, lines, swirls, and rectangles were used to create depth and dimension.
STEP FIVE

Download and print the HOCUS POCUS TOMBSTONE PATTERNS. Print on white paper, and then color the name plates with a dark grey marker. You can also print directly on grey paper. Cut out the name plates with scissors, inside the lines.
STEP SIX

Flip the name plates over and apply a glue stick over the back of the paper. Attach each name plate to the corresponding tombstone to complete the trio.


Leave a Reply