• Nav Social Menu

    • Amazon
    • Bluesky
    • Etsy
    • Facebook
    • Instagram
    • Pinterest
    • Threads
    • YouTube

Creative Cynchronicity

  • Home
  • CELEBRATE
    • 4th of July
    • Advent
    • April Fool’s Day
    • Autumn
    • Back to School
    • Canada Day
    • Christmas
    • Cinco de Mayo
    • Dr. Seuss’ Birthday
    • Earth Day
    • Easter
    • Family Day
    • Father’s Day
    • Football Friday
    • Halloween
      • Candy Corn
    • Shark Week
    • Spring
    • St. Patrick’s Day
    • Star Wars Day
      • Star Wars
    • Summer
    • Valentine’s Day
    • Veterans Day
    • Victoria Day
  • COOK
    • 30 Minute Meals
    • Appetizers
    • Apples
    • Barbecue
    • Beef
    • Beverages
    • Breads
    • Breakfast ideas
    • brown bag lunch
    • Burgers
    • Canadian recipes
    • Canning
    • Casseroles
    • Charcuterie Boards/Party Trays
    • Cheese
    • Chicken
    • Cookies
    • Cranberries
    • Desserts
    • Egg recipes
    • Fish and Seafood
    • Food on a Stick
    • Menu Plans
    • Side dishes
    • Slow Cooker
    • Snacks
    • Soups and stews
    • Turkey
  • CREATE
    • Artist Trading Cards (ATCs)
    • DIY Gifts
    • duct tape
    • Fabric Art
    • paper art
    • Teacher Gifts
    • Teen Crafts
  • SHOP
  • ABOUT CYN & CREATIVE CYNCHRONICITY
  • Get in Touch!
You are here: Home / CELEBRATE / Halloween / Foam Clay Ghost Craft

October 9, 2023 By Cyn Gagen Leave a Comment

Foam Clay Ghost Craft

Filed Under: Halloween, CELEBRATE, Clay Crafts, CREATE

This is such an easy craft and so much fun for Halloween. You can make this foam clay ghost craft with a limited number of supplies and your creativity.

You can easily vary the colors you use for the hats, change what the ghosts are holding, and so on. Create a whole collection of these little ghost friends!
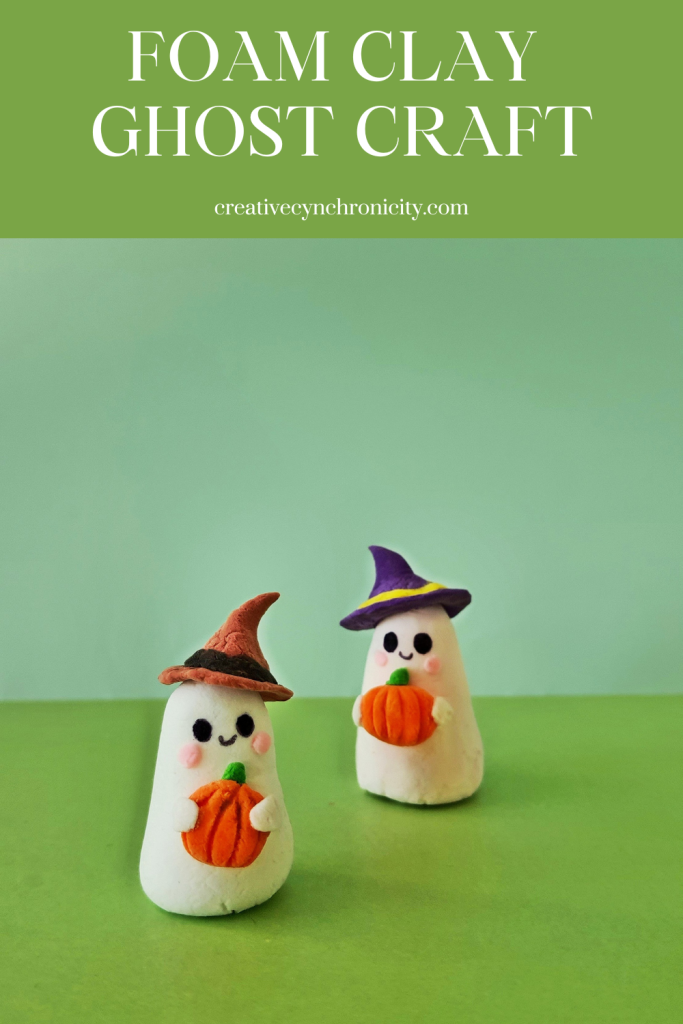
Foam Clay Ghost Craft

Subscribe to our email list!

* indicates required

Foam Clay Ghost Craft

List of Supplies

  • Foam clay
  • Clay carving tools
  • Sharpies

Instructions:

Step 1:

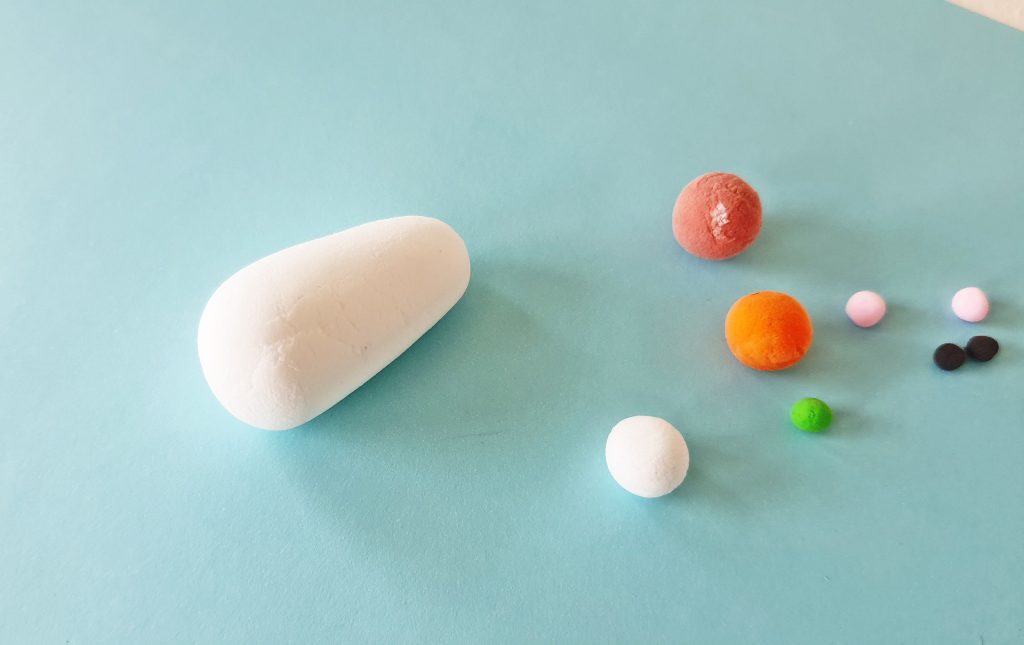
For the ghost, select white clay and different colored clays for the other items (pumpkin, stem, hat, hat-band, blush etc.). Take amounts of each colored clay as per the size of the items. You’ll need white clay the most as the ghost is the biggest in size of all the other items. 

Step 2:

Roll each clay piece on a flat and smooth surface with your palm to make a smooth and even ball shape. You can adjust the size of each clay ball later if required.
Step 3:

Craft the clay ghost first. Roll the clay ball on the surface backward and forward to create a cylinder-like shape. Keep one side wider than the other (the wider side will be the bottom side of the clay ghost).

Step 4:

Use the tip of your thumb to make a small hole on the wider end. This will help the clay ghost to stand nicely.

Step 5:

Flatten the orange ball prepared for the pumpkin and prepare the stem from green clay.

Step 6:

Use a clay knife to make half-cuts from the top center of the flattened orange clay to the bottom. Attach the stem on the top center of the flat clay pumpkin.

Step 7:

Lay the clay ghost on a flat surface with its front side facing up. Place the clay pumpkin on the top of it, around the center. Prepare 2 small clay arms from white clay.

Step 8:

Attach the 2 clay arms on both sides of the pumpkin and joining the other open ends of the clay arms with the clay ghost’s body.

Step 9:

Use a black sharpie to draw the eyes and mouth of the clay ghost. You can use pink sharpie to draw the blushes or you can use pink clay to make blushes, as you like.

Step 10:

Prepare 2 clay balls for the hat.

Step 11:

Flatten one of the clay balls to make a thin round shape (flat shape) and use the other clay ball to make a cone shape.

Step 12:

Attach the cone shape in the center of the flat round shape. Prepare a black clay strip for the band of the hat. 

Step 13:

Wrap the black strip around the bottom part of the clay cone to make the clay hat. Place and join the clay hat on the top of the clay ghost to complete the craft. 

Previous Post: « Mummy Rice Krispie Treats
Next Post: Hocus Pocus Book of Spells Craft »

Reader Interactions

Leave a Reply Cancel reply

Your email address will not be published. Required fields are marked *

Recipe Rating


This site uses Akismet to reduce spam. Learn how your comment data is processed.

Primary Sidebar

Welcome to Creative Cynchronicity! 
Learn more about me here! 

Creative Cynchronicity is a participant in the Amazon Services LLC Associates Program, an affiliate advertising program designed to provide a means for sites to earn advertising fees by advertising and linking to Amazon.com and Amazon.ca.

Crocheted Sunflower Granny Square

Two granny squares with a sunflower in the center of each. Sunflower is golden yellow with a dark brown center. On one square, the flower is surrounded by white and on the other it's surrounded by blue.

Archives

Copyright © 2025 Creative Cynchronicity - All Rights Reserved · Privacy Policy