Back to school season calls for something extra special and what could be more perfect than these adorable Chalkboard Cookies? With a simple sugar cookie base, vibrant green icing, and fun DIY white chocolate “chalk,” they’re a creative and tasty treat to celebrate a new school year.
Whether you’re making them for lunchbox surprises, teacher gifts, or a back-to-school party, these cookies are a guaranteed hit. Plus, they’re easier than they look!

Why You’ll Love These Chalkboard Cookies
- Fun for all ages – Kids and adults alike will love decorating these!
- Beginner-friendly – No need for professional piping skills.
- Perfect for school events – Ideal for class parties or teacher appreciation.
- Creative twist – White chocolate chalk is such a clever detail!
Get more adorable food ideas like this along with simple crafts, delicious easy meals, and fun holiday celebrations by subscribing to our newsletter. We often send out free printables in these as well, just for email subscribers.
Easy Chalkboard Cookies for Back to School Fun
Difficulty: Easy
Prep time: 30 minutes
Bake time: 11-12 minutes
Inactive time: 12-16 hours
Servings: 14-16
*** Special equipment – rectangular cookie cutter, straws to shape the chalk
Ingredients:

For the cookies –
1 cup sugar
1 cup unsalted butter, softened
1 egg
1 teaspoon vanilla
3 cups flour
For the icing –
4 cups powdered sugar, divided
2 tablespoons meringue powder
2 teaspoons vanilla, divided
½-¾ cup water, divided
2 tablespoons corn syrup
Green food coloring
To decorate –
¼ cup white chocolate

Directions:
Preheat the oven to 350 degrees. Line a couple baking sheets with parchment and set aside.
In a mixing bowl with a mixer, combine the softened butter and sugar. Cream until smooth.

Add in the egg and vanilla and mix to combine.

Add in the flour and mix well, scraping the sides and bottom often.

Transfer the dough to your work surface and knead well.

Lightly flour the work surface and use a rolling pin to roll out the dough to about ⅝ of an inch thickness.
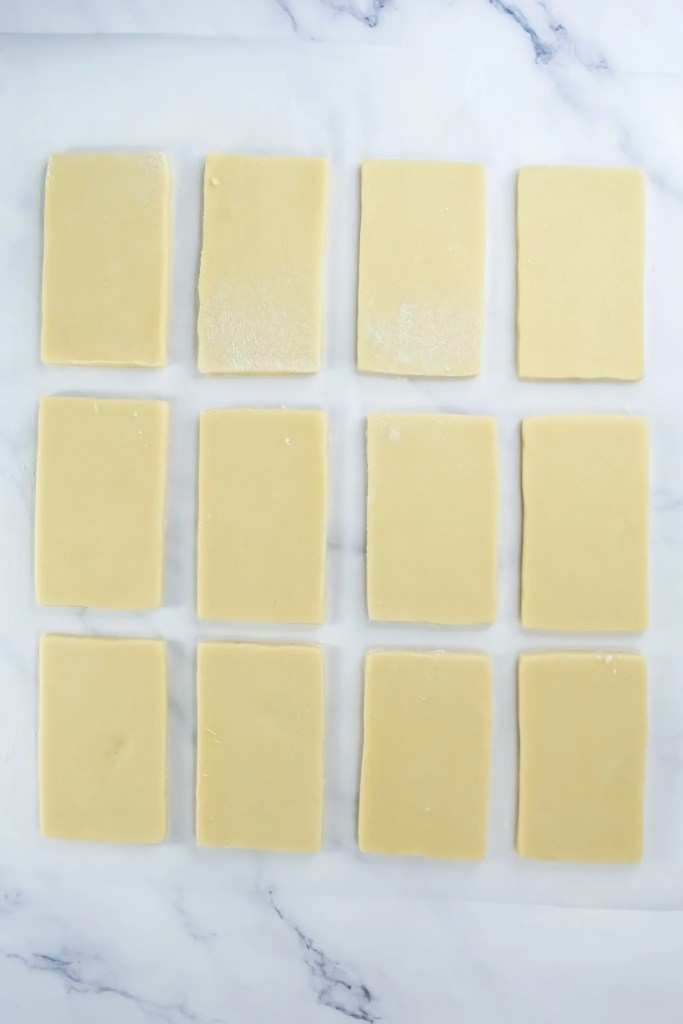
Use a rectangular cookie cutter to cut out as many rectangles as you’re able. Save the dough and re-roll as many times as possible.
Carefully transfer the cut out cookies to the prepared baking sheets, leaving about ½-1 inch between each cookie. They should not spread much.
Bake in the preheated oven for 11-12 minutes, just until the edges are slightly browned and the center is set. Do not overbake. Allow to cool completely before decorating.

Make the Icing:
In a bowl using a mixer, combine 2 cups of the powdered sugar, 1 t vanilla and 2 T meringue powder. Mix in about ¼ of water and use the paddle attachment to mix well for about 2-3 minutes or until thoroughly combined, scraping the sides often.

In another mixing bowl, combine the remaining 2 c powdered sugar, 1 t vanilla, 2 T corn syrup and about ¼ c of water. Mix with the whisk attachment until thoroughly combined, scraping the sides often.


Transfer the icing into one bowl and mix together using the whisk attachment. Scrape the sides often to ensure it’s thoroughly mixed.


If needed, thin out the consistency of the icing using a tablespoon or so of water at a time.


Add in the green food coloring and combine well. Again, scraping the sides and bottom often.
Transfer the icing to a piping bag.
Decorate the Cookies:
When ready to decorate, cut a small opening in the piping bag.

Pipe around the outside edges and then fill in the center of each cookie. If needed, use a toothpick to help spread the icing. Allow the decorated cookies to set for about 12-18 hours for the icing to harden before proceeding.
Make the White Chocolate Chalk:

Melt the white chocolate in a microwave safe bowl. Transfer to a piping bag and set aside to cool slightly.

Cut a few straws into 3 inch or so size tubes. Place a rubber band around them to keep them tight and upright in a small bowl.

Cut a small hole in the end of the piping bag and pipe the melted white chocolate into each straw. Allow to set completely.

To remove the white chocolate from the straws, either unwrap carefully for paper straws, or cut open a plastic straw.
Write on the Cookies:
Very carefully, write the desired message or decoration on the cookies. The white chocolate may crumble a bit but we kept it in theme with the chalk dust you’d see writing on an actual chalkboard.
Do not press too hard in order to prevent the white chocolate chalk from breaking as well as indenting the icing on the cookie. Rather take several passes over the icing to darken the chalk.
Storage: Decorated cookies should be stored in an airtight container for up to 1 week.

FAQs
What kind of cookie dough works best for these chalkboard cookies?
We recommend a sturdy sugar cookie dough that holds its shape well when baked. You can use our homemade recipe or store-bought dough.
Do I need any special tools to decorate the cookies?
No special tools required! You can use a piping bag with a small round tip or even a zip-top bag with the corner snipped off. A toothpick or skewer can help with spreading and fixing details.
What icing should I use for the chalkboard effect?
Royal icing works best for a smooth, firm finish. Tint it green for the chalkboard base. If royal icing isn’t your thing, you can try a thick glaze icing instead.
Can I make these cookies ahead of time?
Yes! The cookies can be baked and decorated up to 3 days in advance. Store them in an airtight container at room temperature. You can also freeze the undecorated cookies for up to 3 months.
Are these cookies safe for school lunches or class parties?
They’re a great nut-free option (our dough and icing are nut-free), but always check with your school’s allergy policy before bringing in homemade treats.
Whether you’re cheering on your kids or surprising a favorite teacher, these chalkboard cookies are the perfect way to sweeten the new school year. Want more fun and easy ideas? Be sure to check out these posts:
- Rainbow Oreo Brownies
- Cookie Ice Cream Sandwiches
- Biscuit Dough Donut Holes
- Oreo Cheesecake Cones
- Fruit Cookie Cups
- Easy Lemon Squares
- Apple “Donuts”
- Butterfly Snack Bags
If you try this recipe, I’d love to see your creations! Tag me @CreativeCynchronicity on Facebook or @creativecynchro on Instagram or leave a comment below.

Chalkboard Cookies
These easy chalkboard cookies are a sweet way to celebrate the back-to-school season! Made with your favorite sugar cookie dough and decorated with green icing and white lettering, they look just like mini chalkboards. Perfect for lunchbox treats, teacher gifts, or a fun baking activity with the kids.
Ingredients
For the cookies –
- 1 cup sugar
- 1 cup unsalted butter softened
- 1 egg
- 1 tsp vanilla
- 3 cups flour
For the icing –
- 4 cups powdered sugar divided
- 2 tbsp meringue powder
- 2 tsp vanilla divided
- ½-¾ cup water divided
- 2 tbsp corn syrup
- Green food coloring
To decorate –
- ¼ cup white chocolate
Instructions
-
Preheat the oven to 350 degrees. Line a couple baking sheets with parchment and set aside.
-
In the bowl of a stand mixer, combine the softened butter and sugar. Cream until smooth.
-
Add in the egg and vanilla and mix to combine.
-
Add in the flour and mix well, scraping the sides and bottom often.
-
Transfer the dough to your work surface and knead well.
-
Lightly flour the work surface and use a rolling pin to roll out the dough to about ⅝ of an inch thickness.
-
Use a rectangular cookie cutter to cut out as many rectangles as you’re able. Save the dough and reroll as many times as possible.
-
Carefully transfer the cut out cookies to the prepared baking sheets, leaving about ½-1 inch between each cookie. They should not spread much.
-
Bake in the preheated oven for 11-12 minutes, just until the edges are slightly browned and the center is set. Do not overbake. Allow to cool completely before decorating.
-
For the icing – in one bowl of a stand mixer, combine 2 cups of the powdered sugar, 1 t vanilla and 2 T meringue powder. Mix in about ¼ of water and use the paddle attachment to mix well for about 2-3 minutes or until thoroughly combined, scraping the sides often.
-
In another bowl of a stand mixer, combine the remaining 2 c powdered sugar, 1 t vanilla, 2 T corn starch and about ¼ c of water. Mix with the whisk attachment until thoroughly combined, scraping the sides often.
-
Transfer the icing into one bowl and mix together using the whisk attachment. Scrape the sides often to ensure it’s thoroughly mixed.
-
If needed, thin out the consistency of the icing using a tablespoon or so of water at a time.
-
Add in the green food coloring and combine well. Again, scraping the sides and bottom often.
-
Transfer the icing to a piping bag.
-
When ready to decorate, cut a small opening in the piping bag.
-
Pipe around the outside edges and then fill in the center of each cookie. If needed, use a toothpick to help spread the icing. Allow the decorated cookies to set for about 12-26 hours for the icing to harden before proceeding.
-
For the white chocolate chalk – melt the white chocolate in a microwave safe bowl. Transfer to a piping bag and set aside to cool slightly.
-
Cut a few straws into 3 inch or so size tubes. Place a rubber band around them to keep them tight and upright in a small bowl.
-
Cut a small hole in the end of the piping bag and pipe the melted white chocolate into each straw. Allow to set completely.
-
To remove the white chocolate from the straws, either unwrap carefully for paper straws, or cut open a plastic straw.
-
Very carefully, write the desired message or decoration on the cookies. The white chocolate may crumble a bit but we kept it in theme with the chalk dust you’d see writing on an actual chalkboard. Do not press too hard in order to prevent the white chocolate chalk from breaking as well as indenting the icing on the cookie. Rather take several passes over the icing to darken the chalk.
Recipe Notes
Storage: Decorated cookies should be stored in an airtight container for up to 1 week.
Back-to-school never looked so sweet! These Chalkboard Cookies are fun to decorate and make an adorable treat for lunchboxes, teachers, or class parties. Pin this idea to one of your Pinterest boards for your next school celebration!


Leave a Reply