As some of you may know I’ve been trying to fill my large picture window in my living room with all kinds of snowflakes. I used to make these fun crystal snowflakes with my students every year. They were always fascinated to see the crystals forming and with older students, we were able to turn this into a bit of a science lesson. These will make a great addition to my window of snow!
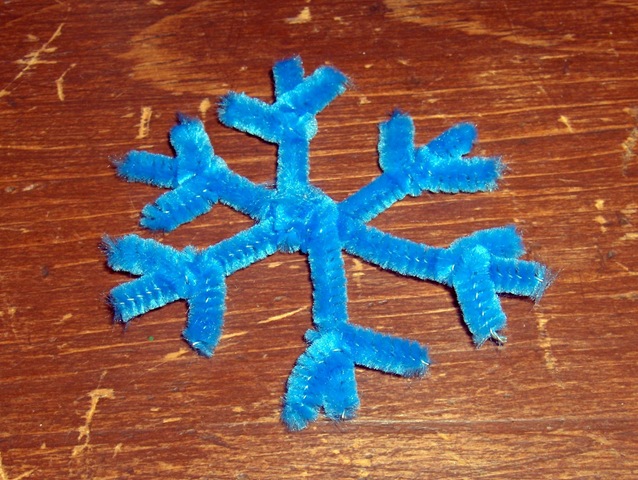
Start by making a snowflake out of chenille stems twisted together. Of course it doesn’t have to be a snowflake – you could take pieces of the chenille stems and twist them around a pencil or something similar to form a curly cue kind of shape and make icicles, for example. You can also form the crystals around string or yarn instead of the chenille stems but I used these because I could easily form snowflakes out of them. I used blue because my colour scheme is blue, white, and silver but you can use any colour you’d like. You can also add some food colouring to the water – a bit of blue in the water forming crystals on white snowflakes can add a pretty touch.
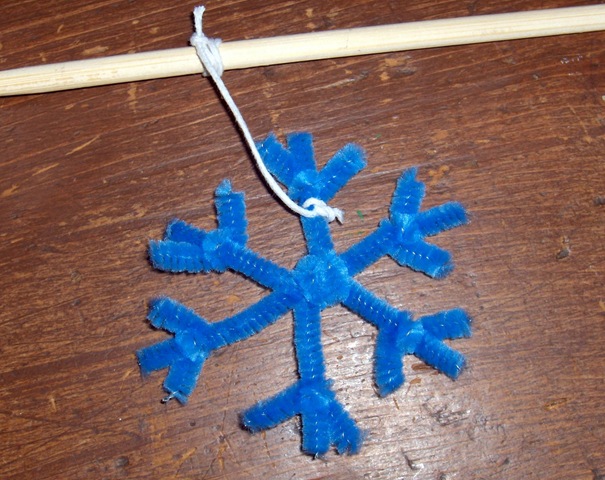
I tied a string onto the snowflake and then around a chopstick (you could use a pen or pencil or something similar) so that I had a way to suspend the snowflake in the water. You don’t want it touching the bottom or sides of the jar you’re using because when the crystals form, your snowflake can get crystallized right to the jar.
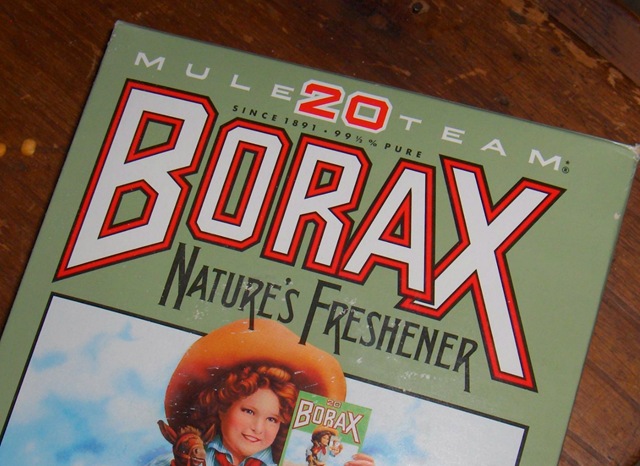
To form the crystals, I’m using Borax. It is possible to make crystals using substances such as salt or sugar but they generally take quite a bit longer to form. I found the Borax in my local grocery store in the laundry detergent section. Each kind of crystal is a solid that has flat sides, is symmetrical, and is arranged into a repeating pattern. Different types of crystals form different shapes – salt crystals are always cubes, snow crystals always have six sides, and sugar crystals resemble hexagonal prisms.
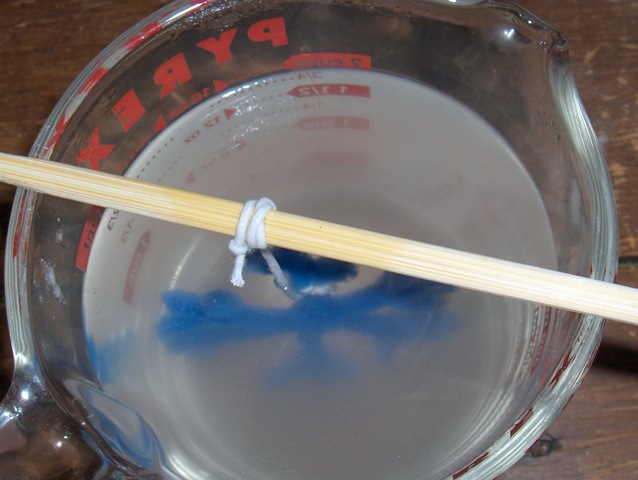
You’re going to want to use about 3 tablespoons of Borax for every cup of boiling water. In the measuring cup I’m using as my jar, in order to assure that my snowflake was submerged in the water, I needed to use just over 2 cups of water. You need to use boiling water because it will dissolve far more Borax crystals in it than cold water will. Heated water molecules move further away from each other and this leaves more room for the Borax crystals to dissolve. I find it best to add just one tablespoon of Borax at a time, stirring well after each addition to get it to dissolve as much as possible.
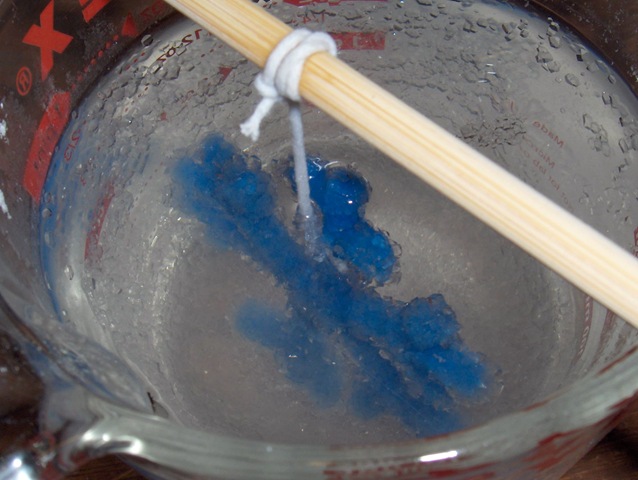
What we’re trying to achieve in this solution is to reach the point of saturation – where no more Borax can be dissolved. At this point, the crystals begin to form and pile on top of each other, building up along any surfaces they encounter. Crystallization begins fairly quickly – once I had submerged my snowflake into the solution, I could see a few crystals forming after just half an hour.
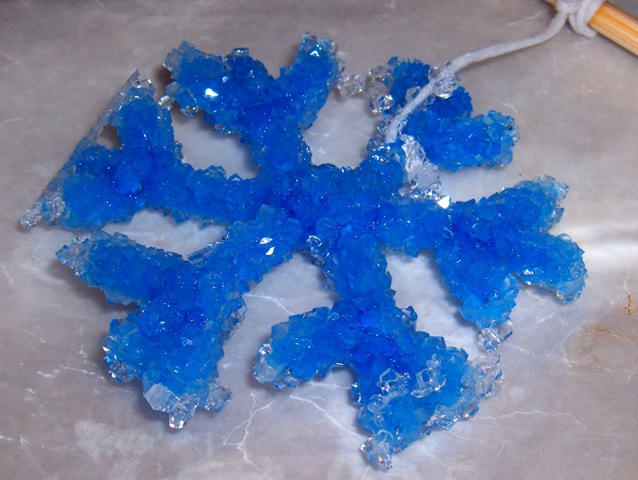
After about 8 hours, the snowflake was covered in crystals. I removed it from the solution and placed it on waxed paper to dry. Look at how it glistens!!!
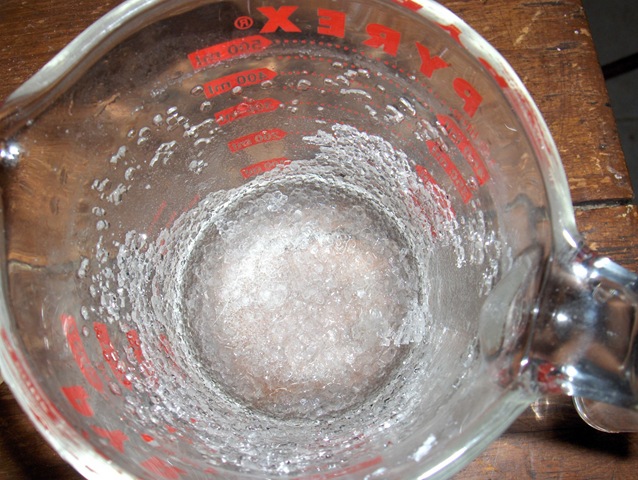
The crystals that formed on the bottom and sides of the measuring cup are so pretty too. The wheels are turning now as to other items that I might be able to crystallize! These crystals are quick and easy to create – children will need some supervision since you’re using boiling water and you don’t want them ingesting Borax but they can have lots of fun coming up with shapes to form the crystals around and watching as they grow!
Now, what to do with the rest of that box of Borax? My pal Darcy has a great post with 10 Uses for Borax that you should definitely check out!
Karen C says
I love this idea….had never heard of this before. Have a grandson that will enjoy watching this take shape. Thank you for sharing.
Kitty Gleason says
Very cool – think I will try this with my nieces and nephews this weekend.
Nelia says
I am an old lady, but I am going to have sooo much fun making these next Christmas.
STACY says
this is a nice idea but not when little children are around – that is asking for a posioning to happen-little kids will think these are to eat – I suggest taking your time and using sugar water
admin says
I don’t have any small children around but I do have mine hanging high out of reach of the household pets. As far as durability goes, I made some a couple of years ago, wrapped them in tissue, and have brought them out for two Christmas seasons and they are still as beautiful as they were to begin with. If they rub up against something else while packed away, you may lose a crystal or two but nothing substantial. Thanks for the great points and questions!
Dotty Kay Stillman says
This looks like a really neat project. I am wondering about the durability of the finish project – will it last if stored for another holiday season?
Janet says
I used to make these when I was a nanny and children loved them. I am going to try these again with my neighbors kids again.
Marjorie says
I was thrilled to find this. I remember doing something many years ago that must have been similar. We’d go out and get dried weeds, etc. and “treat” them and when they were done they looked similar to the creativity shown outside by our great God! Now I can revise my need for frosty leaves, weeds etc. for making breath snatching beautiful arrangements! Again THANK YOU!!!
Nancy says
This is brilliant .Going to do this with my 4 year old granddaughter she will just love this .Thank you for posting such a great idea 🙂
helena says
Put food coloring in it, a votive glass and use the battery flicking candles. Any glass shape of choice
Paula Kiger says
Great idea! I work with my great grandson on craft projects and he will be fascinated by this! Thanks!
Maria Iemma says
Wow – This is a wonderful craft that I can make with my granddaughter for decorating our window this Christmas. I appreciate the post and step by step instructions.