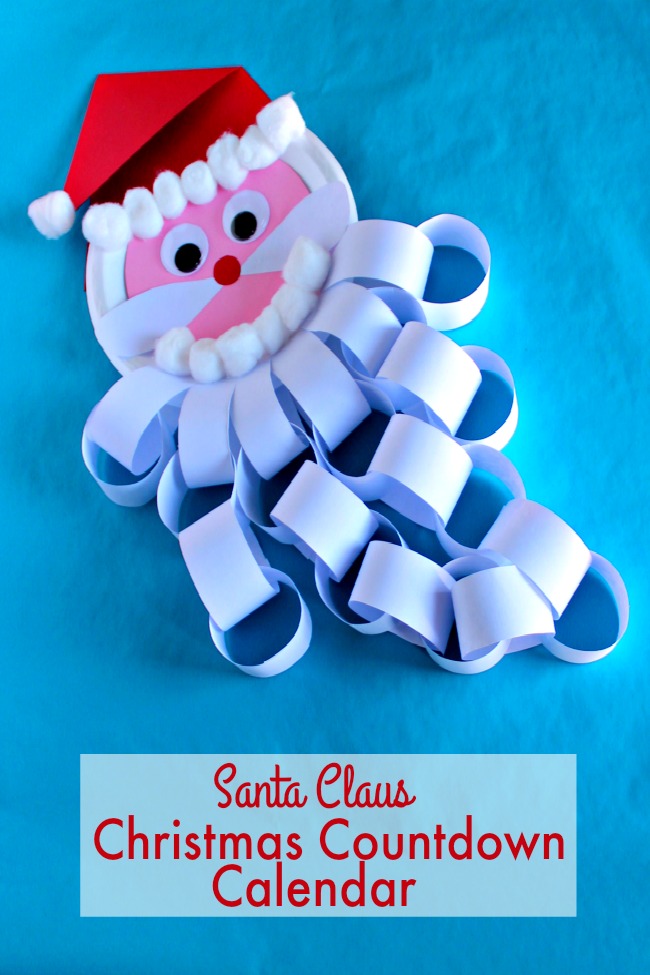
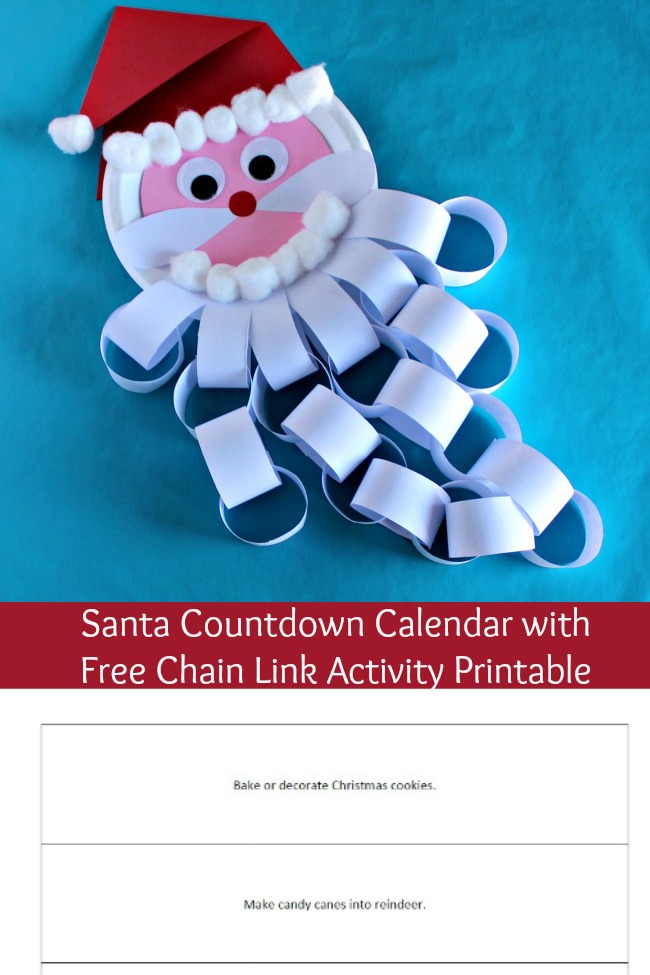
Sometimes I think that the time getting ready for Christmas is even better than the big day itself. I love lighting the Advent candles each Sunday, setting out the pieces of our Nativity set bit by bit, and counting down the days on an Advent calendar, getting one step closer to Christmas Day. This Santa Claus Christmas Countdown Calendar is a fun way to mark the days.
Not only is it fun, but it can even help put a stop to the constant cries of “How many more days?” from the little ones.
Welcome to Day 3 of the Fourth Annual 12 Days of Christmas Series!

We have teamed up with 50 plus bloggers to bring you a oodles of DIY Ideas and Recipes to make your holiday season merrier. There are 12 different posts in the series and we have spread them out over a four week period with three posts per week. Now is the time to subscribe!
GO HERE for the complete list of Dates and Topics plus a collection of most popular holiday ideas including ornaments, games, recipes and more from all 50 plus talented bloggers!
It’s Day 3 and we are sharing DIY Christmas Countdown Calendar Ideas!
DIY Santa Claus Christmas Countdown Calendar Tutorial
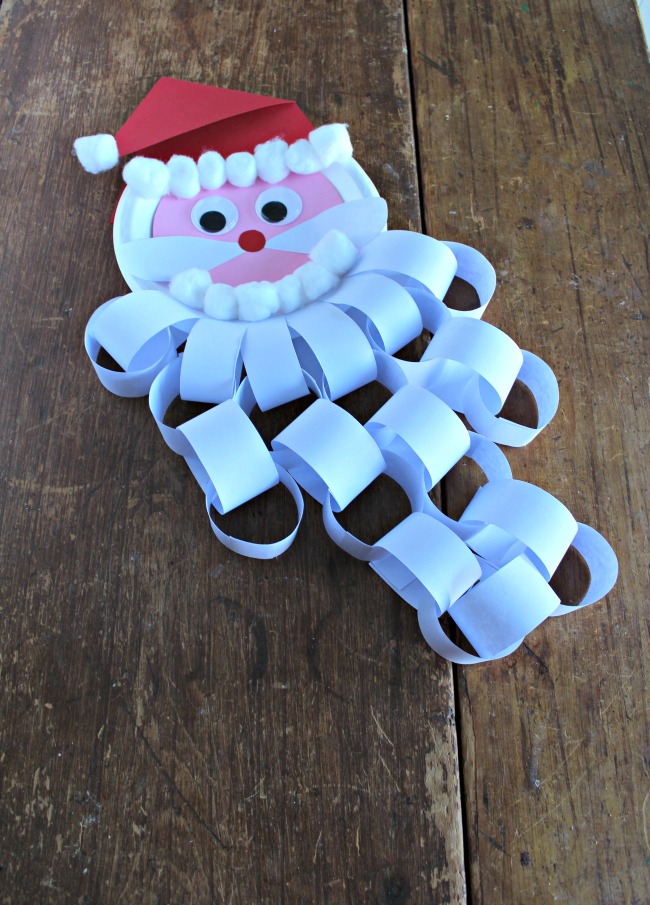
You can make this and surprise the kids but this is a great craft to get the kids involved in too! It’s simple and inexpensive and a great way to practice those cutting and gluing skills.
I was inspired to make this project by the Santa Beard craft over on I Heart Crafty Things.
Materials needed:
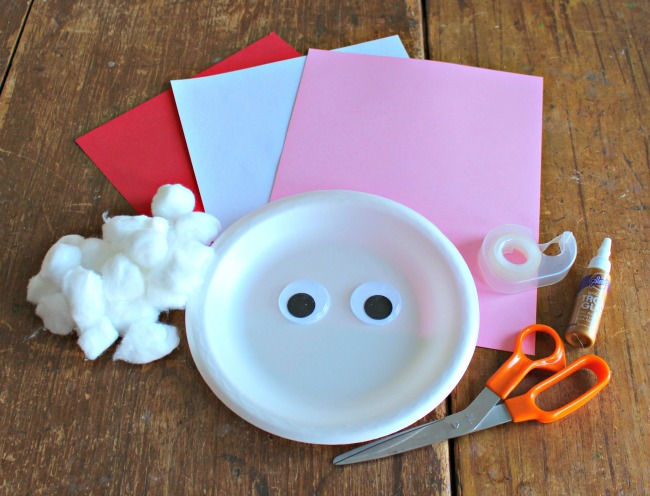
1 plain foam plate – the original called for the thin paper plates. I found that these foam plates were a bit sturdier and help up a bit better, especially with little hands.
White paper for the paper chain (as well as a couple scraps for the mustache). You can make all of the loops with plain paper or use the printed loops (free printable below) for some or all of them.
Pink or peach or any color paper you’d like for Santa’s face – the original used paint in place of the paper
Red paper for Santa’s hat and nose – you can use a red pompom for the nose instead if you’d like but you’ll have scraps of the red paper left anyway so you might as well use it
2 large googly eyes
Cotton balls
Glue – I used my favorite Aleene’s Tacky Glue. If you’re making this with the kids, you’ll need white glue for assembling the main parts of Santa but a glue stick will work really well for the chains.
Scissors
Scotch tape or a stapler
Instructions:
Prepping the pieces:
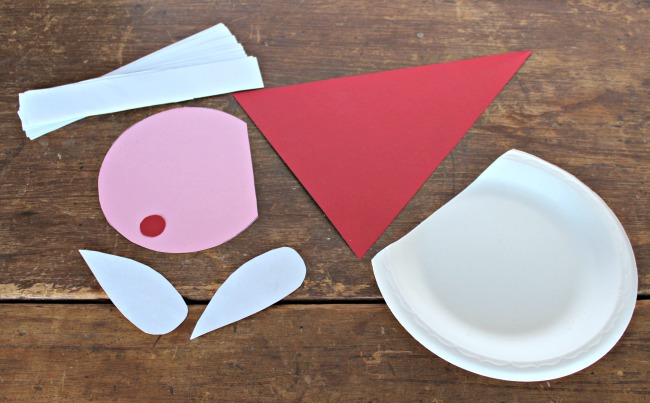
Begin by cutting out all of the pieces for your Santa Claus. If the kids are helping to make this, you can let them make draw and cut out the necessary items free-form or you can make patterns out of cardboard. Obviously, letting the older kids use their imaginations and creativity is always a valuable experience but this might be too challenging for the littles. Tracing the cardboard templates is a great way to work on fine motor coordination.
Pieces needed:
25 paper strips – mine were about 1.5 inches wide and 8 inches long. Remember that you can find a free printable below if you want to add fun activities to the strips.
Use some scraps of white paper to make the mustache. I made mine with two teardrop shapes but you could just as easily cut out a circle and then cut it in half. Or just draw out a mustache of your own liking!
Cut off the top edge of the plate to make a straight edge.
I used a small dessert plate as a template to trace the pink circle and then cut off an edge to match the plate.
Cut a large triangle from the red piece of paper. The bottom edge of the triangle is about 8 1/2 inches across and from the bottom edge to the top point is about 11 inches. You want to make it a tall triangle so you have enough to fold over and form the hat.
From the scraps of red, cut out a small circle for the nose.
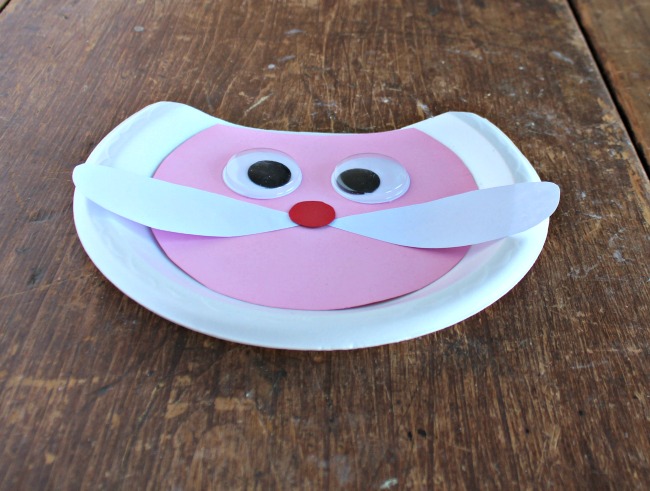
Glue the face onto the plate. Add the eyes, nose, and mustache. I let this dry for a couple minutes (it doesn’t take long with the tacky glue) before starting to add the loops.
Making the chains:
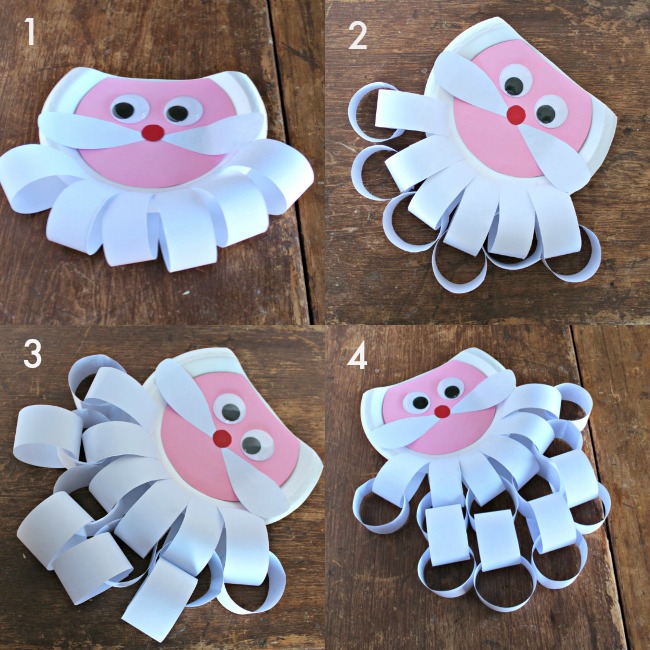
1. Attach 6 strips of paper to the bottom edge of plate. I taped it to each side of the plate to hold them in place but you can staple them instead.
2. Using 6 more strips of paper, loop them through each of the strips attached to the plate. Secure them with glue.
3. For this row, you’ll be attaching 4 strips of paper, forming loops and securing with glue. Attach these to the 4 center loops – the 2 outer ones will be left as is.
4. This is another row of 4 loops, attached to the previous row of 4 as pictured above.
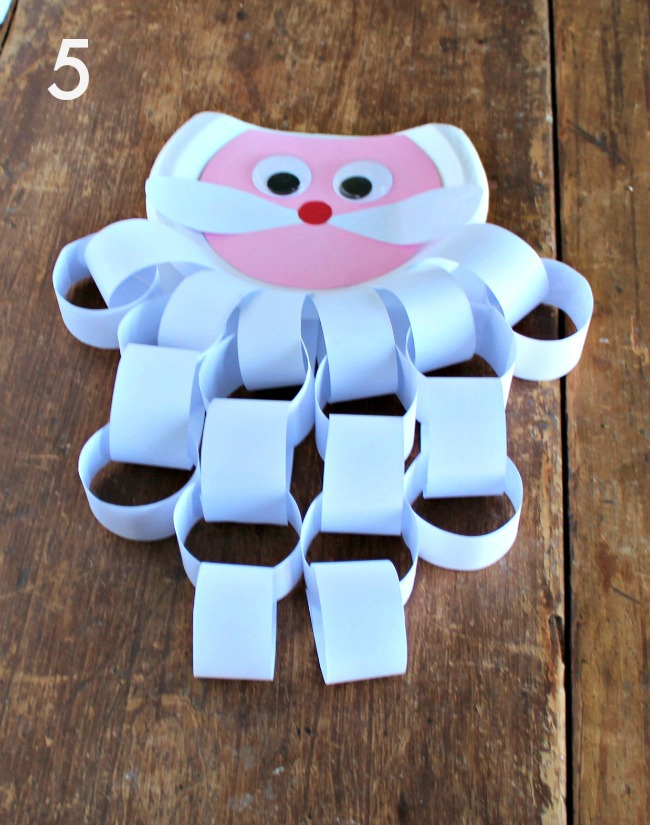
5. The 5th row is made up of 2 loops. As with the previous rows, attach these to the 2 center loops and leave the outer loops as is.
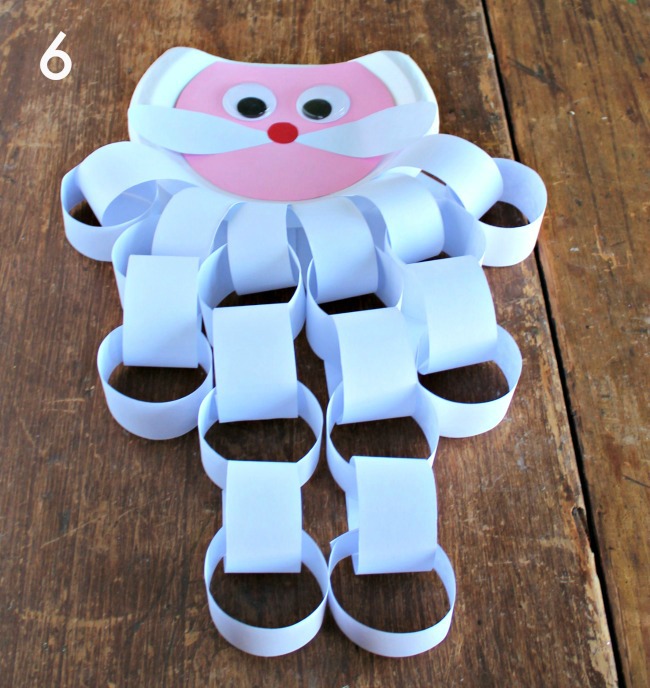
6. This row is also made up of 2 loops, attached to the 2 loops of the previous row.
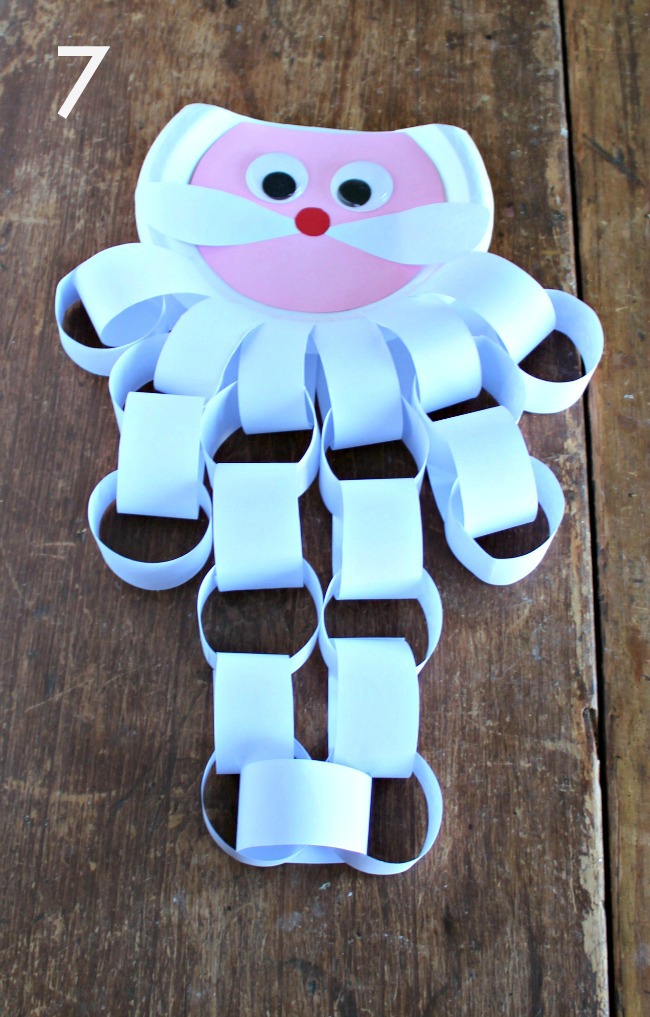
7. The final row is made up of a single loop used to attach the 2 loops from the previous row together. That’s it! Santa’s beard is complete!
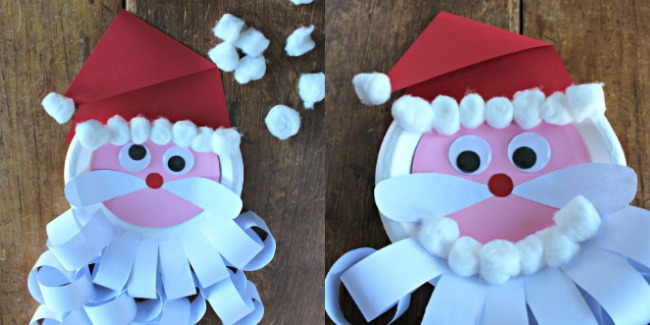
Fold the red triangle down to form Santa’s hat. Glue the hat onto the back of the plate. If needed you can also add some tape or staples to make it more secure. Glue cotton balls along the bottom edge of the hat (this will cover up the tape/staples if needed too). Add more cotton balls to cover the tape/staples holding the first row of loops onto the plate. See photos above for placement.
You can hang Santa up by using tape on the back of it or add a ribbon or yarn as a hanger. Each day, rip open one of the chain links and remove it. When all the loops are gone, it’s Christmas Day!
Ideas for using the calendar:
~Simply tear off the loops each day as described above.
~Each time your child removes a loop from the calendar, they can hand it in for some sort of treat (candy cane, piece of chocolate, a small toy, etc)
~ Turn some or all of the loops into coupons. They can be for tablet time, a favorite meal, a special treat, permission to stay up 15 minutes late, and so on.
~ Use some of the printable chain links below. There are 5 pages worth of Christmas bucket list type ideas (things like baking cookies, hanging stockings, driving around to see Christmas lights etc) that you can add to your Santa beard. If you have some specific activities (holiday parties, a school Christmas concert, and so on), you could add these to your loops as well.
Please note: For some reason when the PDF generated, it made each of these 2 pages. The second page is blank. When you go to print, simply choose to have it print page 1 only of each of these and you’ll be all set!
Christmas Activity Paper Chains Page 1
Christmas Activity Paper Chains Page 2
Christmas Activity Paper Chains Page 3
Christmas Activity Paper Chains Page 4
Christmas Activity Paper Chains Page 5
Scroll down for many more DIY Christmas Countdown Calendar Ideas for your holiday season!
Did you see the amazing DIY gift ideas we shared on Day Two? Check out my Melted Snowman Hot Cocoa in a jar!
Marie InteriorFrugalista says
This is a really cute and unique idea for a Christmas countdown. I love that Santa’s beard holds ideas to create magical memories for the holidays. Definitely showing my daughter this!
Hostgre says
Good idea! I always remember when I was a child and I woke up early to be the one who updated the Christmas Calendar 🙂
Beverly says
This is such a fun countdown. Having the activities is a great idea!
Super Mom - No Cape! says
What an adorable Santa craft. I can just hear the kids giggling each time the tear off a bit of Santa’s beard!