This adorable paper plate squirrel craft is a fun way to welcome fall! Made with inexpensive supplies and a couple of paper plates, this little squirrel gets an extra-special touch from a tail made with handprints.
You can use the included hand pattern, but tracing your child’s hand instead turns this simple fall craft into a sweet keepsake, too. Those little hands grow far too quickly!
This is a great craft to make after a nature walk, as part of a woodland animal theme, or when the squirrels outside are particularly busy gathering their treasures for the season.

Paper Plate Squirrel Craft for Kids
One of my favorite things about paper plate crafts is that you don’t need a huge collection of specialty supplies to make something cute.
We recently made this adorable paper plate octopus, and this little squirrel is another fun way to turn an inexpensive paper plate into something special.Most of the materials for this squirrel can be found at the dollar store or may already be tucked away in your craft supplies.
Younger children will need some adult assistance with tracing, cutting, and assembly. Older kids can complete much more of the project independently. As always, adjust the amount of help according to your child’s individual abilities.

Supplies
- 2 paper plates
- 1 large wiggle eye (approximately 28 mm)
- Tan cardstock
- Ivory cardstock
- Dark brown cardstock
- Tan acrylic craft paint
- Ivory acrylic craft paint
- Pink acrylic craft paint
- Liquid craft glue
- Paintbrush
- Scissors
- Pencil
- Black permanent marker
- New pencil with an unused eraser
- Squirrel patterns
Optional: An adult can use a low-temperature glue gun and glue sticks to speed up assembly.
You can also substitute construction paper, craft foam, or felt for the cardstock if that’s what you have on hand.
Instructions

Step 1: Paint the Paper Plates
Gather your supplies.
Paint the outside of one paper plate with tan acrylic craft paint. Paint the outside of the second paper plate with ivory acrylic craft paint.
Set them aside to dry. Apply a second coat of paint if needed for good coverage.
Step 2: Trace the Squirrel
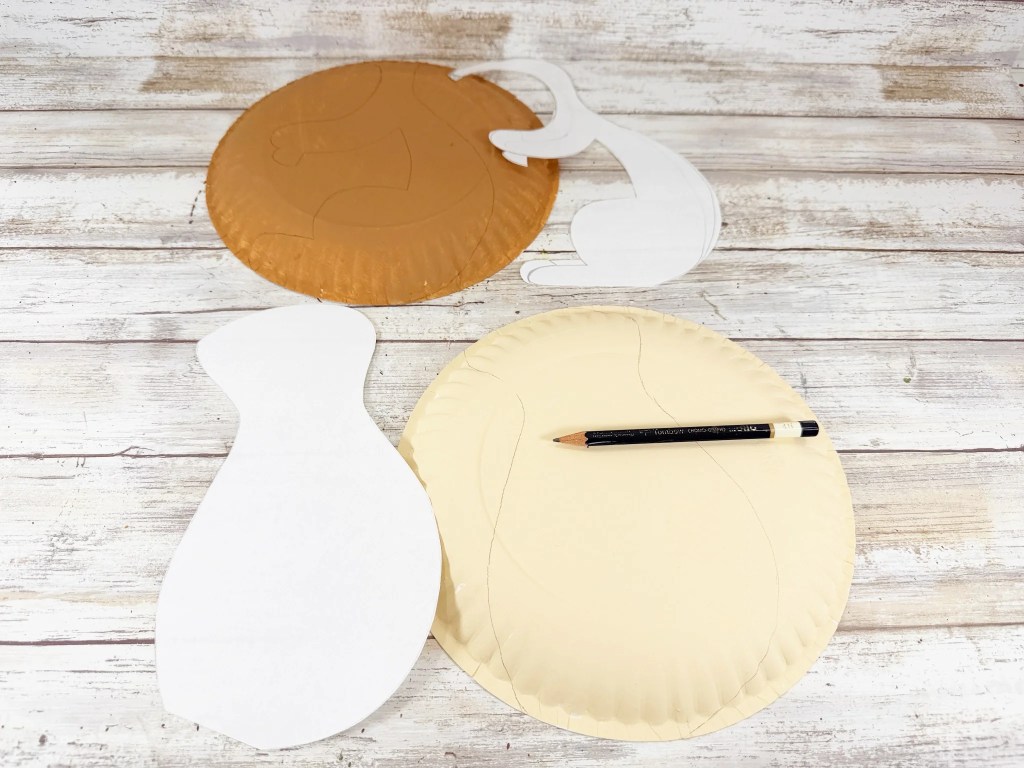
Download and print the squirrel patterns, then cut them out.
Using a pencil, trace the squirrel pattern with the arms onto the tan paper plate.
Trace the solid squirrel pattern onto the ivory paper plate.

Step 3: Cut Out the Squirrel Pieces
Cut out both squirrel shapes.
For the neatest finished edges, cut just inside the pencil lines so they don’t show on your finished squirrel.

Step 4: Trace the Tail, Ears, Nose, and Hands
Trace the tail once onto tan cardstock.
Trace the inner ear once onto ivory cardstock.
On the dark brown cardstock, trace the two outer ears and the nose.
For the tail, you’ll need eight hand shapes: three tan and five dark brown.
Here’s where you can make this squirrel extra special: instead of using the included hand pattern, trace your child’s hand onto the cardstock. You’ll have an adorable handprint squirrel tail and a little keepsake of just how small those hands were.
If you’re crafting with a group of children, the included hand template can make preparation quicker and easier.

Step 5: Cut Out the Pieces
Cut out all of the cardstock pieces.
Again, cutting just inside your traced pencil lines will give everything a cleaner finished appearance.

Step 6: Assemble the Squirrel’s Body
Glue the tan squirrel shape on top of the ivory squirrel shape.
If any of the ivory paper plate extends beyond the tan squirrel around the edges, carefully trim away the excess with scissors.
Allow the glue to dry before continuing.

Step 7: Make the Squirrel’s Face
Glue the ivory inner ear onto one of the dark brown outer ears.
Attach both ears, the dark brown nose, and the wiggle eye to the squirrel’s head, using the photos as a guide.
Let the glue dry.

Step 8: Create the Handprint Tail
Now for the best part – that big, fluffy squirrel tail!
Starting at the base of the cardstock tail, glue the five dark brown handprints in place, slightly overlapping them as you work your way up.
Add the three tan handprints toward the top of the tail, again overlapping them slightly.
Arrange the fingers so they fan outward and give the squirrel’s tail plenty of fluffy texture.

Step 9: Attach the Tail
Glue the completed handprint tail to the back of the squirrel’s body.
Set the squirrel aside until the glue is completely dry.

Step 10: Add a Rosy Cheek
Dip the eraser end of a new pencil into pink acrylic craft paint.
Gently stamp it onto the squirrel’s face just below the wiggle eye to create a rosy pink cheek.
Let the paint dry.

Step 11: Add the Smile
Using a black permanent marker, draw a little smile from the squirrel’s nose toward its rosy cheek.
Your paper plate squirrel is finished!

Make It Your Own
There are plenty of easy ways kids can put their own spin on this squirrel craft.
Try different shades of brown, tan, rust, or gray for your squirrel. Kids could also add little details such as eyelashes, eyebrows, or freckles.
You could even take a look at the squirrels in your own backyard or neighbourhood and use their coloring as inspiration.
Ways to Use Your Squirrel Craft
This simple squirrel craft would be a fun addition to:
- A fall or autumn unit
- A woodland animal theme: Pair your squirrel with our woodland animal bookmarks and make a whole collection of forest friends.
- A lesson about squirrels and how they prepare for winter
- A nature study: Head outside before crafting to watch the squirrels in your neighbourhood. Notice their colors, their fluffy tails, and whether you can spot them gathering or hiding food. Then check out these 10 fun squirrel facts from the National Wildlife Federation to learn a little more about these clever backyard visitors.
- A fall bulletin board
- A storytime about squirrels
- A family nature walk followed by craft time
You could also write the child’s name and date on the back, especially if you’ve used their actual handprints for the tail. Pull it out a few years from now and those once-little hands may be the part of the craft you love most.

FAQs
Can I make this squirrel craft without a paper plate?
Yes. You can trace the squirrel patterns onto sturdy cardstock instead. The paper plates add a little extra dimension and sturdiness, but they aren’t essential.
What can I use instead of cardstock for the squirrel’s tail and other details?
Construction paper, craft felt, or thin craft foam will all work. This is also a good opportunity to use scraps left over from other projects.
Do I have to use my child’s handprints for the tail?
Not at all. A printable hand pattern is included with the squirrel pattern. Tracing your child’s hand simply turns the craft into a fun fall keepsake.
Can younger children make this paper plate squirrel craft?
Yes, with adult assistance. Younger children can help paint, glue, and add the facial details, while an adult handles any cutting that is beyond their skill level. Older children may be able to complete most of the craft independently.
Can we use different colors for the squirrel?
Absolutely. Try gray, reddish brown, dark brown, or other colors inspired by squirrels you’ve seen in your own neighbourhood.
If your kids enjoy making animal crafts, they might also like this snowy owl craft. It’s another inexpensive project that pairs crafting with learning about wildlife.
This Dollar Store Paper Plate Squirrel Craft is simple, inexpensive, and just plain cute – exactly the kind of fall afternoon project that’s easy to pull together when you’re ready for a little creative time with the kids.
Looking for more easy kids’ crafts?
Get more craft ideas like this along with delicious easy meals and fun holiday celebrations by subscribing to our newsletter. We often send out free printables in these as well, just for our email subscribers.


Leave a Reply