These adorable paper bag pencil and backpack puppets are a fun back-to-school craft for kids. Made with simple supplies like paper bags and colorful craft paper, they’re inexpensive, easy to customize, and perfect for some imaginative play once the crafting is finished.
Make them as a first-day-of-school activity, add them to a classroom craft table, or use them for a fun afternoon project at home.
And why stop at two? Pair your pencil and backpack with our Paper Bag Crayon Box and Notebook Puppets and make a whole collection of cute school-supply characters!

Supplies Needed
- Colored craft paper
- Small paper bags (approximately 8 inches)
- Pencil
- Printable template
- Scissors
- Craft glue
- Markers
How to Make a Paper Bag Pencil Puppet

Step 1
Download and print the template, then cut out the patterns for the pencil puppet.
Choose your craft paper colors. You can make a traditional yellow pencil with a pink eraser or let the kids choose their own color combination.
Trace the template pieces onto the appropriate papers with a pencil, then cut them out.

Step 2
Glue the pencil lead to the pointed end of the wood-colored piece.
Glue the band piece along one edge of the eraser.

Step 3
Choose a small paper bag, approximately 8 inches tall. Cut a piece of yellow craft paper large enough to cover one side of the bag.

Step 4
Glue the yellow paper onto the paper bag to create the body of the pencil.
Lay the bag so the bottom flap is folded flat against the yellow side. This flap will become the pointed end of your pencil puppet.

Step 5
Glue the wooden pencil-tip piece onto the folded bottom flap of the paper bag, with the sharpened tip pointing upward.

Step 6
Glue the prepared eraser piece to the opposite, open end of the paper bag.

Step 7
Glue the eyes and blush pieces onto the yellow pencil body.

Step 8
Use a black marker to draw a mouth.

Step 9
Use coordinating markers to add outlines and any extra details you’d like. This is an easy way to give the finished pencil puppet a little more definition and personality.
Your paper bag pencil puppet is ready for play!
How to Make a Paper Bag Backpack Puppet
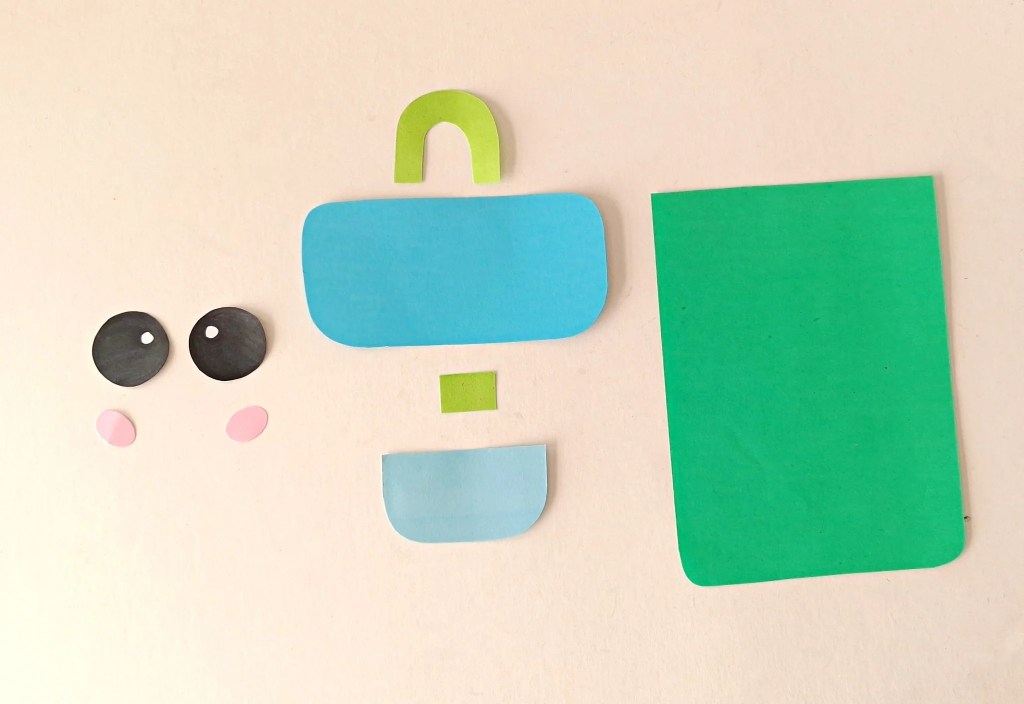
Step 1
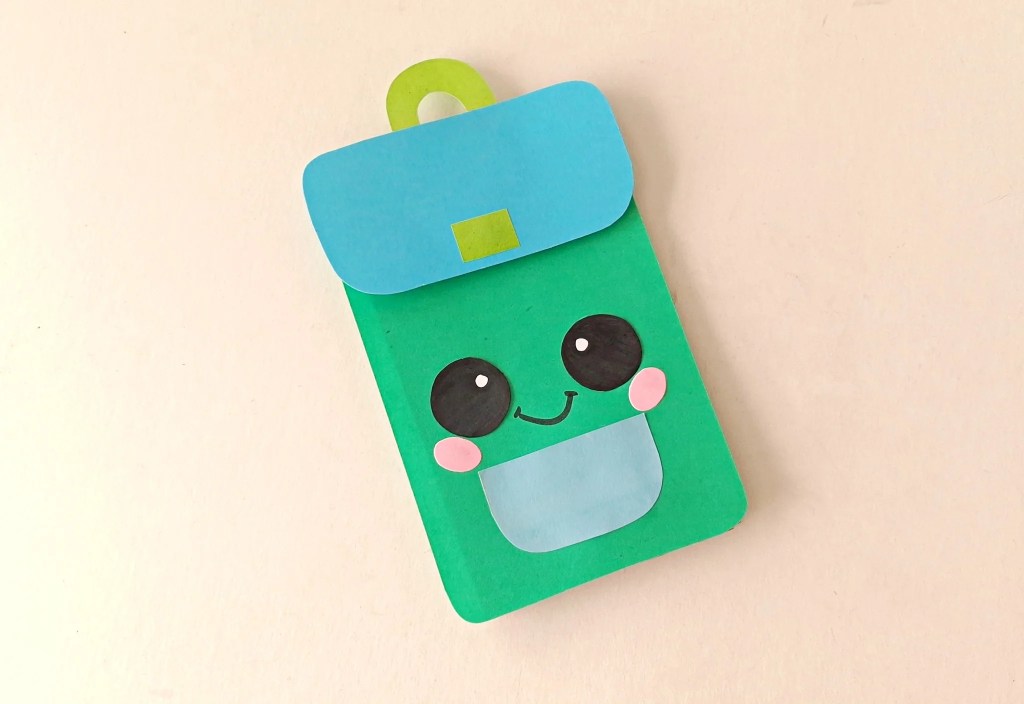
Download and print the template, then cut out the patterns for the backpack puppet.
Choose several colors of craft paper for your backpack. Trace each template piece onto the appropriate paper with a pencil, then cut out the pieces.
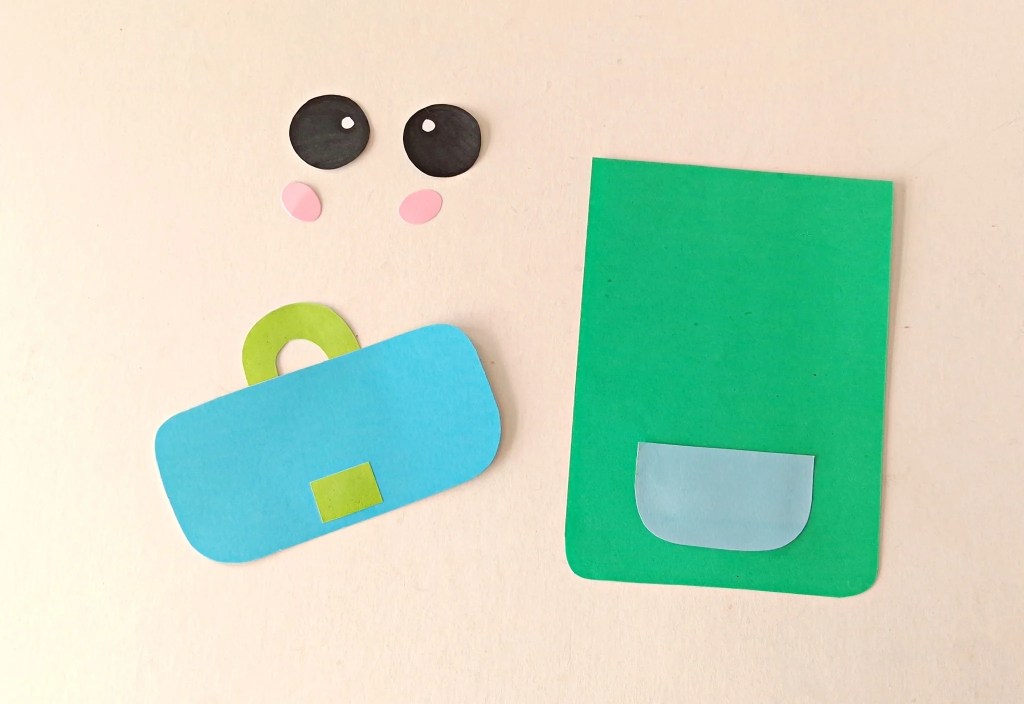
Step 2
Glue the pocket piece onto the lower portion of the backpack base.
Glue the handle to the top center of the flap. Then, glue the small rectangle piece to the center of the lower edge of the flap.
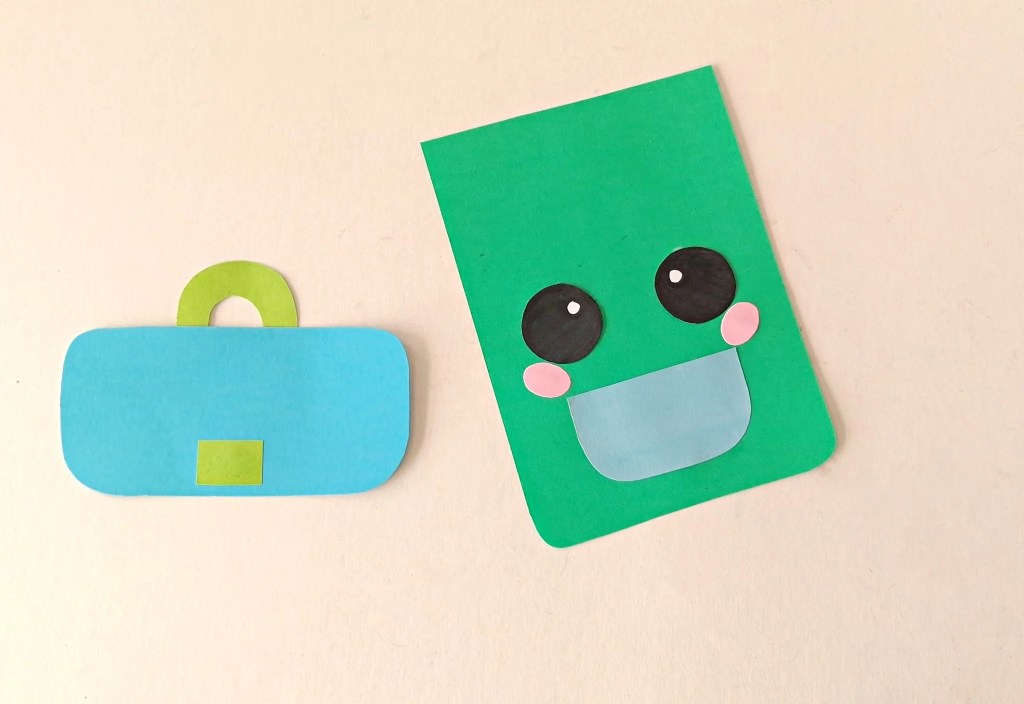
Step 3
Glue the eyes and blush pieces onto the backpack base, just above the pocket.
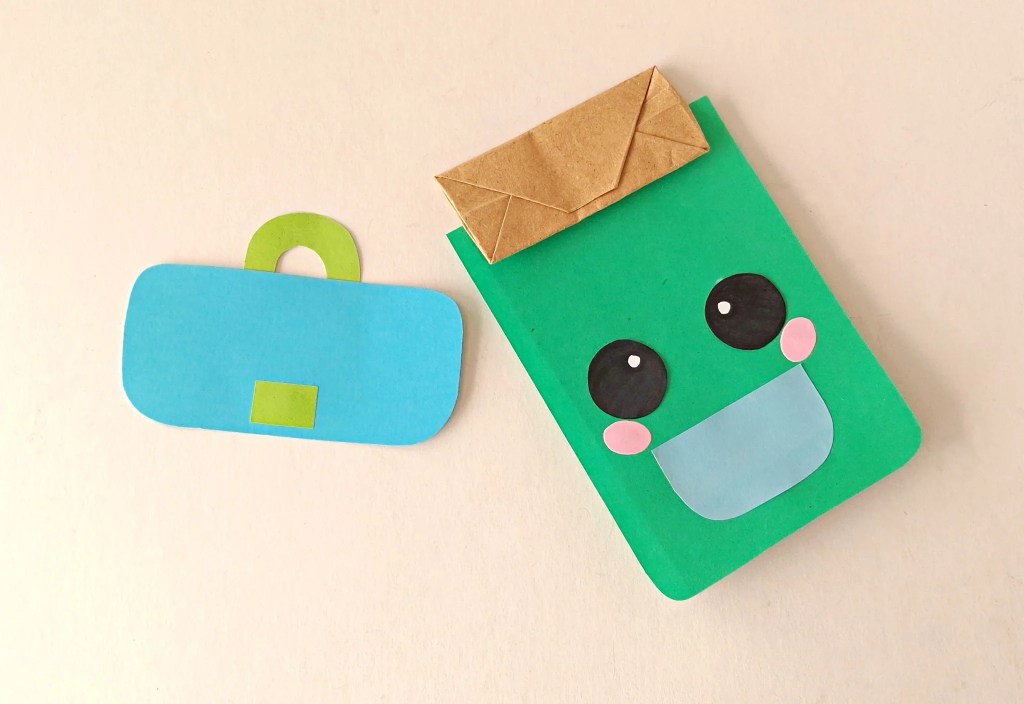
Step 4
Take a paper bag and glue the backpack base onto one side.
Step 5
Fold the bottom flap of the paper bag flat against the backpack base. Glue the backpack flap piece onto this folded section.
Your backpack puppet is finished and ready for some back-to-school fun!

Ways to Use Your Pencil and Backpack Puppets
Of course, making the puppets is only half the fun. Once they’re finished, kids can use them for all kinds of imaginative play.
Try using them to:
- Put on a back-to-school puppet show.
- Act out what might happen on the first day of school.
- Practice introductions before starting a new school year.
- Make up silly stories about school supplies that come to life.
- Pair them with favorite back-to-school books for storytime.
- Use them as characters while talking about feelings kids may have about starting school.
For younger children who are nervous about a new school year, puppet play can also provide an easy, low-pressure way to talk about what they’re excited about—or what might be worrying them.

Make Them Your Own
There’s no need to stick with traditional school-supply colors. A purple pencil? Absolutely. A backpack covered in polka dots, hearts, stars, or stripes? Even better.
Set out markers, scraps of colorful paper, stickers, or other lightweight embellishments and let the kids add their own details. They can even make their puppet resemble their own backpack or favorite pencil.

Crafting With Younger Kids
Younger children may need help tracing and cutting some of the smaller template pieces. You can prepare those parts ahead of time and let them handle the gluing, decorating, and choosing colors.
Older kids can usually complete most or all of the project independently.
And remember, the finished puppets don’t have to look exactly like the examples. A slightly crooked smile or mismatched eyes just gives them more personality!
Once the puppets are finished, encourage the kids to use them for some imaginative play. They can make up a back-to-school story or even put on their own puppet show. PBS KIDS recommends puppet play as a simple way to encourage storytelling, problem-solving, and self-expression.
It’s a simple back-to-school craft that keeps the fun going long after the crafting is finished.
Get more craft ideas like this along with delicious easy meals and fun holiday celebrations by subscribing to our newsletter. We often send out free printables in these as well, just for our email subscribers.


Leave a Reply