There’s something so magical about adding little handmade touches to your holiday décor, and these crochet holly berries are the perfect quick project to bring that festive charm to life.
Whether you’re making them for gift wrapping, ornaments, wreaths, or to tuck onto your holiday table settings, these tiny berries and leaves come together beautifully with just a bit of yarn and a few simple stitches.
Best of all, they’re wonderfully scrap-friendly, making them an easy last-minute craft for cozy December afternoons. If you love adding creative, heartfelt details to your Christmas decorating, this sweet little project is going to be a favorite.

Crochet Holly Berries
List of Supplies
- Yarn – standard worsted-weight acrylic or cotton
- Crochet hook – • 3.5 mm (E) – Creates tighter stitches, firmer leaves, and rounder berries. Great if you want your pieces to hold their shape well and look a little more “polished.” OR 4.0 mm (G) – Still works beautifully and is easier for beginners. The stitches will be slightly softer, and the pieces will turn out a touch larger.
- Scissors
- Tapestry needle
Stitches used for this project
- Chain – CH
- Magic Ring – MR
- Single Crochet – SC
- Slip Stitch – SL St
- Decrease – Dec
- Picot – p or mp (make picot)

Instructions:
Crochet Berries Steps:

Step 1:
Take a red yarn bundle and create a magic ring.

Step 2:
Chain 1.

Step 3:
Work 1 SC into the magic ring.

Step 4:
Again work 5 more SC into the MR (in total 6 SC).

Step 5:
Insert your hook into the first stitch to make a slip stitch.

Step 6:
Chain 1.

Step 7:
Work SC into the every next stitch and make slip stitch to end this round. (total 6 SC).

Step 8:
Chain 1 and repeat SC in each stitch around (total 6 SC).

Step 9:
Cut the yarn with a long tail.

Step 10:
Sew the remaining yarn tail using a tapestry needle to close the open end of the crochet berry.
Get more craft ideas like this along with delicious easy meals and fun holiday celebrations by subscribing to our newsletter. We often send out free printables in these as well, just for our email subscribers.
Crochet Leaf Steps:

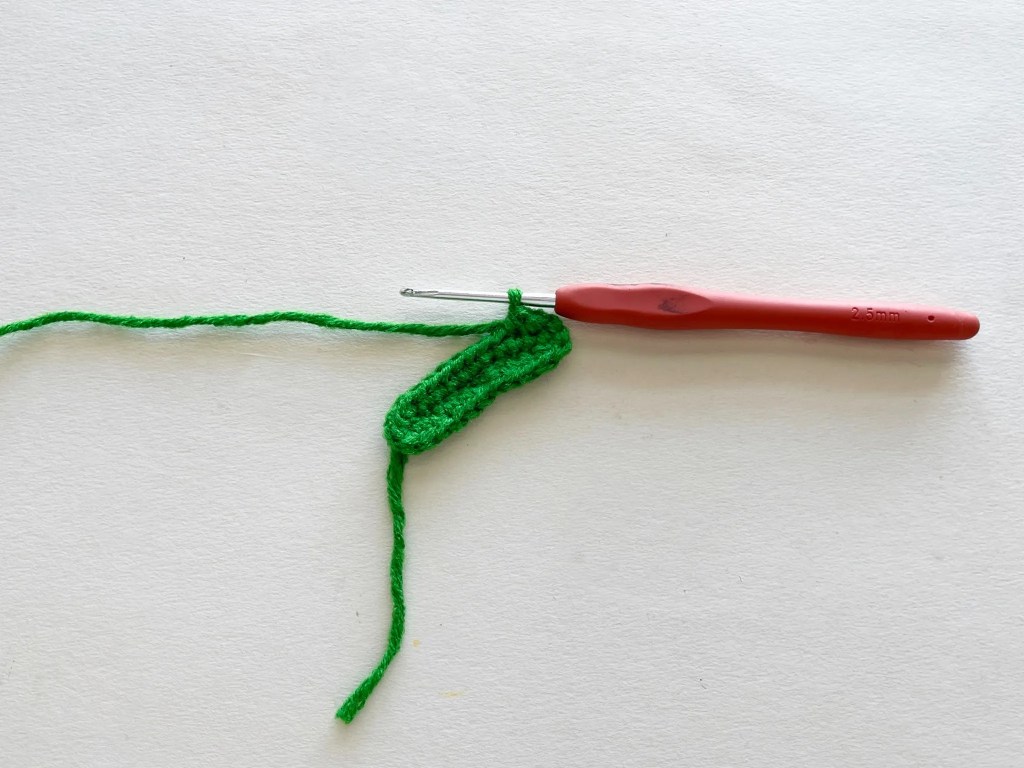
Step 1:
Create a slip knot then work 13 chain stitches.

Step 2:
Starting on the second chain, so skip first chain, 1 SC into the next chain.

Step 3:
Repeat SC 10 more times.

Step 4:
Work 3 SC into the last CH.

Step 5:
Symmetrically work on the other side, 11 SC.

Step 6:
Now slip stitch into the first stitch.

Step 7:
Chain 1.
Step 8:
2 SC into the next two stitches (1 SC in each stitch).

Step 9:
In this step you have to decrease 1 SC.

Step 10:
Work Chain 2 on hook.

Step 11:
Insert hook through the bottom chain of the chain stitch on hook.

Step 12:
Work a slip stitch. This stitch is called a picot stitch.

Step 13:
Slip stitch into the next stitch.

Step 14:
Repeat this pattern- CH 1,1 DEC, CH 2, Picot, Sl St)* 6 times.

Step 15:
Then work 2 Sc into the last two stitches.
Step 16:
Slip stitch into the first Chain.

Step 17:
Cut the yarn with a long tail.

Step 18:
Crochet 1 or 2 more leaves and some berries. Keep 2 inches or more long tail for each crocheted items.

Step 19:
Join the leaf patterns by tying or stitching with their tails.

Step 20:
Join the berries similarly.

Step 21:
Join the berries with the leaves. You can use hot glue in case there’s not enough yarn tails to stitch or to tie a knot.
Once you’ve stitched together your berries and leaves, the possibilities are endless. Add them to garlands, use them as embellishments on handmade gifts, or whip up a whole handful to decorate your tree.

These simple little touches bring warmth, colour, and a sprinkle of creativity to your holiday season. If you make a set, I’d love to see how you use them!
Share your finished holly berries with me on Facebook at Creative Cynchronicity or Instagram at CreativeCynchro so I can cheer you on.
Discover more beginner-friendly patterns in our Simple Crochet Projects collection!


Leave a Reply