 It’s so nice to have all those fresh apples around at this time of year isn’t it? Lots of lovely recipes to be made with them and some really delightful crafts too! I posted a while back some recipes and craft ideas but since that time I have gathered up and tried even more.

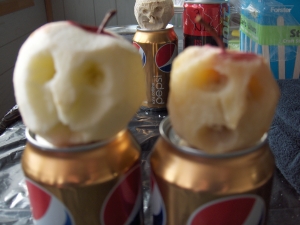
This is after 1 1/2 days of drying; You can see the difference in size between the one that’s airdrying and the one partly dried in the microwave.
What I would like to share with you here is my attempt at making dried applehead dolls. For many applehead doll tutorials, they have you carve the face and then leave the apple to dry naturally for 2+ weeks (generally can take about a month!) or use a fruit dehydrator to speed up the process. When I was in Teachers’ College, I learned a different method. It’s not quite as fast as a dehydrator but certainly doesn’t take a month either.

Peeled and ready for carving!
You need firm apples such as Granny Smiths or Red Delicious apples…softer ones will not hold up as well to the carving and drying process. You need to peel the apple. If you are handy with a knife you can use that but most people take off too much of the apple with it and so it’s better (and safer) to use a potato peeler to just shave off the peel. The instructions at the websites above have you using Xacto knives to carve the apples but that sounds kind of dangerous to me! We were learning how to make them so we could then teach students to do so and I am certainly not putting Xacto knives into the hands of 8 year olds, so we simply used the tip of the peeler but blunt table knives work too.

A face carved in!
I have seen people use the softer type apples like Royal Galas and the good quality plastic knives with young children but when we tried those apples, they were so soft and filled with moisture that they had a tendency to start going mouldy before we could get them dried out. It was also much easier to accidentally lop off too much apple in the carving process (we lost a lot of noses that way!) because of the softness of it. Perhaps if you are using a dehydrator, these softer apples would dry out better but I used Red Delicious both in college and for the following tutorial.

Getting a lemon juice bath
Now, don’t get too hung up over the carving process. Whatever you carve into the apple is going to change quite a bit over the course of the drying process anyway so you won’t end up with exactly what you intend. Just try to cut recesses for features like the eyes, mouth and ears. You can also cut in some scars or wrinkles to add character to the face. For the nose, it’s suggested that you cut a triangle between the mouth and eyes. This is not a fine art sculpture! You don’t have to create perfect facial features…you just want to cut in the hint of the features because truly the apple and the drying process does most of the work. As it starts sinking in on itself, those cuts you made will become more pronounced, more definition will be added to the face and the features will become clearer and more face-like.

Coating the apple in salt
Once you have carved the apple to your satisfaction, coat it with lemon juice. This helps in the drying process and helps to keep the apple from browning too much. Once coated with the juice, roll the applehead in salt until it is completely crusted with it. Now let the drying process begin. How long this will take will depend on the humidity levels in your home but the salt and lemon juice do speed things up. When we made them in college, ours took anywhere from 10-15 days to fully dry. It helps to prop them up somehow…putting them on a drying/cooling rack is best but you can also prop them on the top of an empty pop bottle or rig up something similar to ensure even drying. Before leaving them to dry, you may want to think ahead to how you will “dress” your appleheads once dried. Some people stick them on dowels, popsicle sticks, or wooden skewers; others use thick wire instead but it’s generally easiest to insert these while the apple is still moist. These can then form the neck and main part of the body of the doll and give you something to build on and dress.

All coated in salt, stuck on a popsicle stick, propped up to dry
Some of the instructions I have found online described different drying methods than the one I have outlined here. To see which one was truly most effective, I am experimenting with 4 of those methods. As I said before, I don’t own a dehydrator so that one is out but I am trying out 1) the salt and lemon juice method as described above, 2) allowing the apple to simply air dry on its own 3) using the oven to speed up the drying process 4) using the microwave to speed up the drying process. In methods 2, 3, and 4, I dipped the apples into a mixture of 1 cup of lemon juice and 2 T. salt right after peeling them and then again after carving them. Note: You don’t HAVE to use the lemon juice. Some people prefer to let the apples undergo the natural browning process because they find that colouring suitable to the nature of the face they are creating. Method #2 is pretty straight forward. In #3, I placed the apple on a foil lined baking sheet and put it in the oven with it set to the lowest possible temperature. For me, that was 150 degrees F but a setting of 200 will suffice. The apple was left in the oven for 4 hours but I did go in and turn it periodically to try to ensure more even drying. I read on one site that it is possible to totally dry out the applehead in the oven at such a low temperature but it takes about 4 days. I was not prepared to use up the amount of electricity that such a method would take nor did I feel that we could give up the oven for 4 days while I made dolls, so I went for the idea whereby the oven drying is meant to be a starter for the process, not the whole process.

Another carved face
For the final method, I put the apple in the microwave on a plate lined with paper towel. The instructions I found, which were vague at best, said to start off with just a few seconds at a time and work up from there. I set the microwave for 30 second intervals and ended up going with a total of 4 minutes and 30 seconds before giving up. It became clear very quickly that the apple was NOT drying out one little bit in the microwave. It was shrinking in size as it should, but it simply got softer, mushier, and wetter to the touch the more it “cooked”. By the time I took it out, it was more of a baked apple dessert than it was an applehead for a doll. Perhaps I was doing something wrong but every reference I found to using the microwave method was, as I said, very vague and gave no instructions beyond saying that you could use the microwave in place of the oven and to start off with short intervals and work your way up. I would NOT recommend this method. Whichever of these methods you try, know that each will still require a period of time just allowing it to air dry. These methods are basically ways to kick start the process and will not completely eliminate the need for air drying.

This is the one from the microwave…it’s mushy! YUCK!
As you can see, I photographed the appleheads through these processes. I will continue to photograph them and update this periodically so that you can see what they look like at each step and so that you can see how quickly they progress in each.

The four I did: left to right: The coated in salt one, the one I am airdrying, the one from the oven, the one from the microwave
Hazel the Halloween Applehead Witch! You can check this out for a video tutorial of how to make apple head dolls here.

Sandy Sandy says
Very informative. We were wondering about the microwave. Don’t think we’ll use that method. Thanks!
jet says
i like your idea to dry the appleshead in salt. i like to try it out one day.
at the moment i’m bussy to seatle in my new home.
thank you for sharing this great idea of yours and the great tute as well;-D