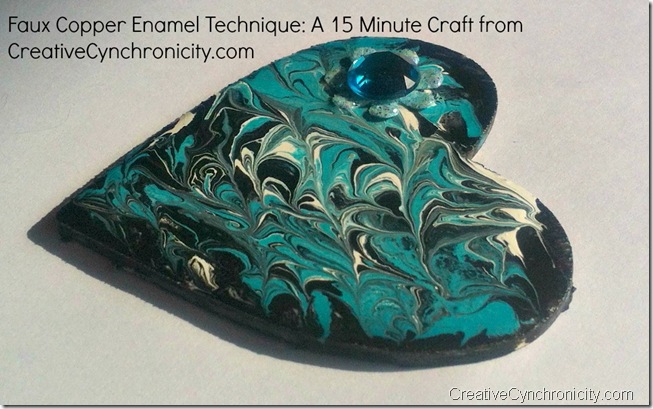
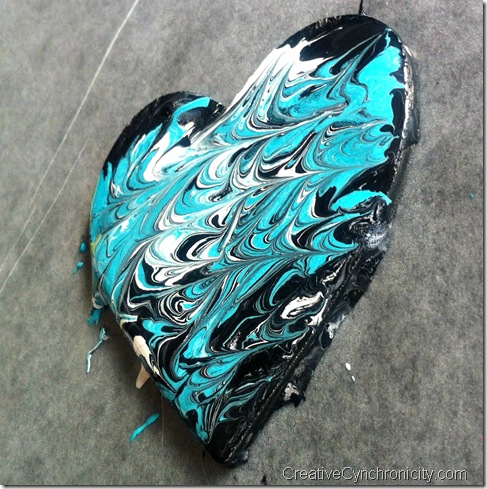
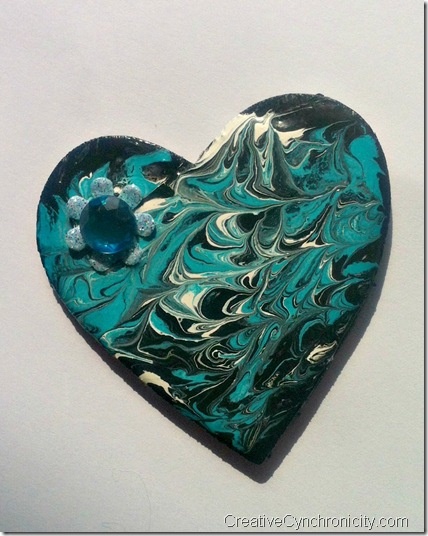
Do you remember the Aleene’s Creative Living show? My mom and I used to tape it and then watch it together when we’d get home from work every evening. I became a crafter because of my mom, learning alongside her when I was younger and we still love to get together and craft whenever we can! This is one of our favorite techniques from the show. It uses Aleene’s Tacky Glue and paint to create a faux copper enamel look that’s really pretty.
Materials needed:
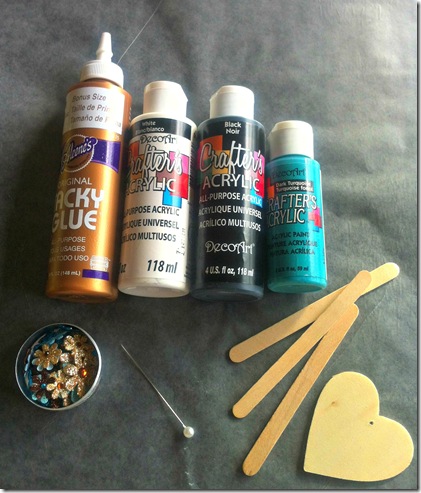
Aleene’s Tacky Glue – any of the formulations will work (Fast Grab, classic, etc.) but will have slightly different effects. It’s fun to try out all of them and get a variety of looks!
3 colors of paint – I find that any more than three can often look muddled. You might get away with adding a 4th in small quantities but try experimenting before you make your final piece just in case. I tend to like to use black or another very dark color for the base color and I generally use white as one of my colors to add some contrast. Any acrylic craft paint will work – mine is just the inexpensive dollar store stuff!
A wooden craft (popsicle) stick for each color of paint you’re using
A straight pin – I like using a hat pin or corsage pin because they’re longer and have a nice large end to hold on to but any old pin will work
A surface to create this faux copper enamel technique on – I’ve done it on paper, cardboard (use old cereal boxes!), and this time, am working on a wooden heart. It was on clearance at the dollar store after Valentine’s Day but won’t look like it once I’m done with it!.
Wax paper – I’ve found this to be the BEST surface for working on with this technique. You can mix the paints right on the paper and once your project has dried, you can simply peel it off the paper and it won’t stick and ruin it.
Paper towel, an old rag, or baby wipe – just something that you can use to clean the pin as you work
Optional: This technique is lovely just as is but if you want some embellishments or bling to dress it up, you can certainly add those once it’s dry. Also, I find, because of the glue mixed in, that this is a very durable finish but depending on what you’re making you might want to use a top coat of Mod Podge or Crystal Lacquer or something similar to protect it further.
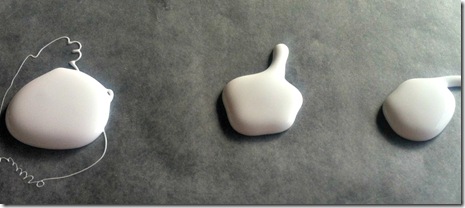
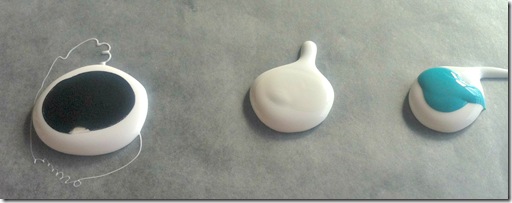
Begin by squeezing out one blob of glue for each color of paint you’re using. I generally use a bigger blob (for this project, about the size of a quarter – the wooden heart is about 2 inches across) for the background color and smaller ones for the accents (about the size of nickels in this case).
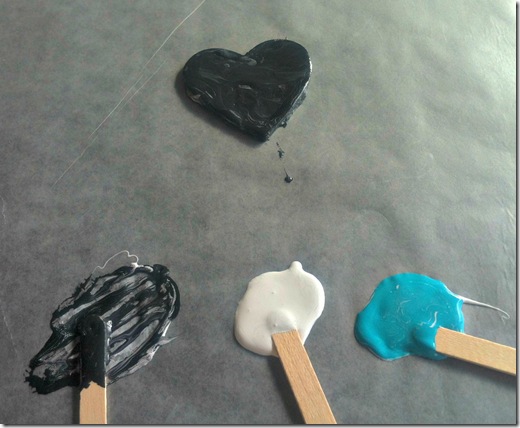
Squeeze a little bit of paint into each blob of glue. You don’t need much! Start with just a small amount, mix it in with your craft stick and add more if you want. Remember that the glue dries clear so if you want to have white, you must add white paint to the glue!
Using your craft stick, cover your item (in this case, the wooden heart) with the background color. It’s best to use the craft stick rather than a paint brush because of the glue in this mixture. It can ruin your brush and the glue tends to pull out bristles and leave them behind in your brush.
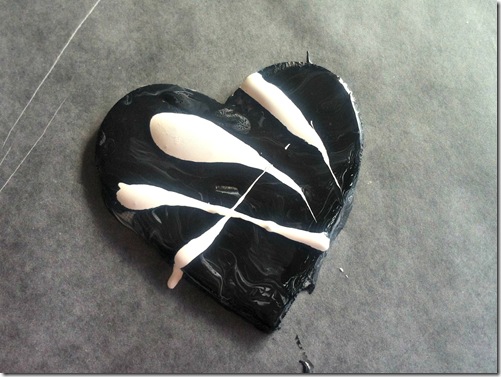
Using the craft sticks for each of the accent colors, gather up some paint on the stick and then hold it over the item you’re painting to drizzle paint onto it. You may get a few little blobs here and there but that just adds to the copper enamel look.
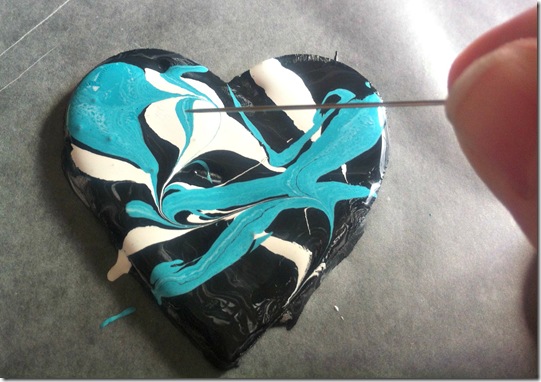
Use the pin to pull the paint colors through each other. You can just pull it straight through or do zigzags, swirls, or snake like motions. I generally do a combination of several of these. Be sure to clean your pin after every time you run it through the glue/paint to get good clean lines. You may find that as you work you feel you need a bit more of a certain color – keep adding and moving the paint until you’re happy with it.
Let it dry thoroughly.
If you want to give it a coat of some kind of protective surface, be sure to do that before adding your embellishments.
You can attach a cord or chain to this to make a pendant or a pin back for a brooch. You can make two of them and create earrings – just remember, it’s nearly impossible to get this technique to look exactly the same each time! This makes for a fun ring or you can create several small shapes and glue them onto a headband or barrette. And you’re not just limited to jewellery: make key-chains, decorate boxes or book covers, create bookmarks, votive or tea-light holders (for the battery operated kind) – pretty much anything you can paint!
What will YOU make with this fun and easy technique?
This post is part of the Craft Lightning 15 Minute Crafts week hosted by Country Chic Cottage and 30 Minute Crafts. Be sure to click on the image below so that you can check out all the other great 15 minute projects!
Melissa says
Wow, so pretty and creative! I love it!
JENN says
THAT is so cool! So beautiful!! I’ll have to try that with my kids! Does any glue work or do you have to use the one you mentioned?
admin says
Honestly I had never tried it with anything other than a tacky glue but I decided to try it out right now for you. I used a white school glue and it still works somewhat but it looks more like marbling than copper enameling. The problem is that the school glue is thinner – almost the consistency of the paint itself so when you drizzle it over the background, it immediately starts blending into the other colors before you even use the pin. Then when you do use the pin, the lines aren’t as crisp and distinct. I snapped a couple pics for you to see and I’ll email those to you so you can tell the difference.
Mallery says
What a great craft idea! How wonderful that you and your Mom still craft together!
AmyLee Brooks says
Thank You for sharing this! I can’t wait to play with this idea, it’s WONDERFUL!
JaneEllen says
I’m pretty sure I remember when they did this technique on the show. I had to print this out so I can do it. It’s really looks quite simple if you just follow the steps, great tutorial.
I don’t know what I’d do without Aleene’s glues, they’re fantastic. Can do so many things with them. I’ve been using them for years. Sure miss their show also. Two of the girls are still doing crafts, only online now. So glad you shared this post.
Happy Spring
Alexandra McAllister says
WOW! That is a beautiful piece of art! Love it! I enjoy all your pics in your posts! Thanks for sharing.
Marjolaine Walker says
I love this, thanks for the step-by-step. Will try it soon!
Tatiana says
Super cool! Thanks for sharing.
Corri Garza says
This is so cool! I would love to give this a try…thanks for the tutorial!
Cherish Flieder says
Creative technique. I will have to try this out. 🙂
Theresa Cifali says
This is a great tutorial, Cyn. Looks really easy to do and I will definitely be trying this. Just gorgeous.
Ellen Christian says
That’s really cool. I love the way that turned out.