Ready for a craft that’s just as fun to play with as it is to make? This paper cup launching rocket combines simple crafting with hands-on STEM learning for an activity kids will want to launch again and again.
Using paper cups, elastic bands, and a few craft supplies, you’ll create a rocket that really flies!
Whether you’re exploring a space theme at home, adding a hands-on activity to a classroom unit, or looking for an engaging afternoon craft, this easy project is sure to spark imaginations.

Why Kids Love This Craft
- They get to launch a rocket that really flies.
- It combines crafting and play in one activity.
- Kids can decorate their rocket however they like.
- It introduces simple STEM concepts through hands-on fun.
Supplies
- Colored cardstock or craft paper
- Rocket template
- Paper cups (2-3)
- Craft glue
- Pencil
- Scissors
- Craft sticks (or popsicle sticks)
- 2 elastic bands
- Awl (adult use only)
Instructions

Step 1: Prepare the launcher
If your paper cup is lightweight, stack two cups together to make a sturdier launcher.
Using an awl (with adult assistance), make four evenly spaced holes about ½ inch below the rim of the cup.

Step 2: Attach the elastic bands
Thread one elastic band through one hole from the outside of the cup.

Pull the loop completely through the cup and secure it by sliding a small craft stick through the loop on the outside.

Stretch the elastic band across the inside of the cup and pull the other end through the hole directly opposite. Secure it with another craft stick.

Repeat with the second elastic band using the remaining two holes.
Step 3: Cut out the rocket pieces
Print the rocket template.

Trace the template pieces onto your coloured craft paper and cut them out.
Cover a second paper cup with black craft paper. This will become the launch stand.
Step 4: Assemble the rocket
Roll the nose cone template into a cone shape and glue the overlapping edge.

Fold the tabs on the rocket fins.
Glue the nose cone to the closed end of the elastic-band launcher cup.

Attach the fins on opposite sides of the cup.
Step 5: Add the decorations
Glue the small flame onto the larger flame.
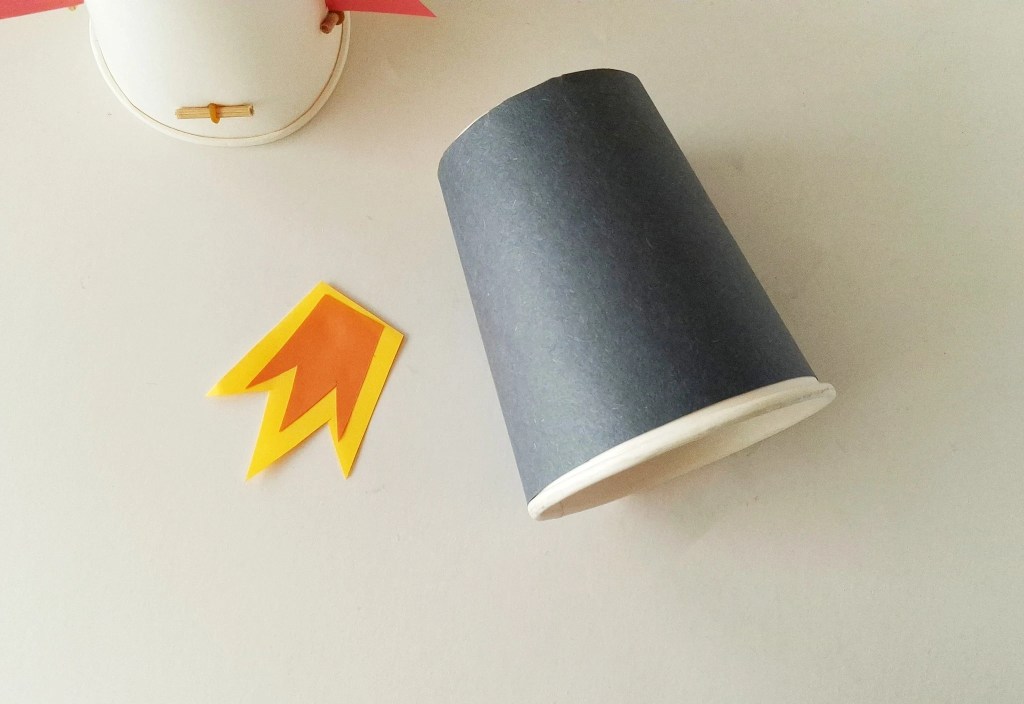
Attach the flame to the black-covered paper cup, positioning it about ½ inch from the closed end with the flames pointing toward the open end.

Glue the round window pieces between the fins on the rocket.

Step 6: Launch your rocket
Place the finished rocket on top of the flame-covered launch cup.

Hold the rocket near the open end, pull it straight down to stretch the elastic bands, then release. Watch your paper cup rocket soar!
Tips for Success
- Use two paper cups for a sturdier launcher.
- If your rocket doesn’t fly very far, try using stronger elastic bands
- Make sure the elastic bands are pulled tight.
- Let the glue dry completely before launching.
- Launch in an open area away from breakable objects.
How Does the Rocket Launch?
When you pull the rocket down, the elastic bands store energy, much like a slingshot. Releasing the rocket changes that stored energy into motion, sending the rocket flying into the air.
Once you’ve launched your rocket a few times, encourage kids to experiment!
Experiment with different elastic bands or pull-back distances to see how they affect how high your rocket launches!
What happens if you pull the rocket back farther? Does a heavier or lighter rocket fly differently? Small changes can lead to big discoveries, making this craft a wonderful introduction to simple engineering concepts.

Keep the Space Adventure Going
The fun doesn’t have to end when your rocket lands! Continue your space adventure with these creative projects:
- Moving Rocket Craft – Create a rocket with movable pieces that encourages imaginative play and helps develop fine motor skills.
- Paper Plate Astronaut Helmet – Every astronaut needs the right gear! Make your own helmet before heading off on your next space mission.
If your child is fascinated by rockets and space exploration, check out NASA Space Place for fun facts, games, and kid-friendly activities to continue the learning.
Let’s Keep Creating Together
If you love simple crafts that encourage creativity without requiring a trip to the craft store, I’d love to have you join our newsletter. You’ll get easy craft ideas, seasonal inspiration, recipes, and family activities delivered straight to your inbox.

Frequently Asked Questions
Why won’t my paper cup rocket launch?
If your rocket isn’t launching well, check that the elastic bands are pulled tight and securely attached. A sturdier launcher made from two nested paper cups can also help. Make sure you’re pulling the rocket straight down before releasing it.
What age is this paper cup rocket craft suitable for?
This craft is best suited for children ages 6 and up with adult supervision. Younger children can help decorate and assemble the rocket, while an adult should make the holes in the paper cup using the awl.
Can I make this rocket without a template?
Yes! While the template makes it easier to create evenly shaped fins and a nose cone, you can draw your own simple rocket pieces using coloured cardstock or construction paper.
What kind of elastic bands work best?
Medium-sized elastic bands that stretch easily without being too loose or too tight work best. If your rocket isn’t flying very far, try experimenting with different sizes or thicknesses of elastic bands.
Can I decorate my rocket differently?
Absolutely! Use markers, stickers, glitter, washi tape, foil, or other craft supplies to personalize your rocket. Kids can even create rockets inspired by real space missions or invent their own colourful designs.
Is this a good STEM activity?
Yes! This craft introduces basic STEM concepts by showing how stored energy in the stretched elastic bands is converted into motion when the rocket is released. It’s a fun, hands-on way to explore simple physics.
How can kids experiment with this activity?
Encourage kids to test different variables, such as pulling the rocket back different distances, using one versus two paper cups for the launcher, or adding decorations to see how extra weight affects the flight.
What other space crafts can we make?
If your kids enjoyed this project, try making a moving rocket craft, a paper weaving rocket, a layered outer space scene, or create a fun Space Camp at Home with crafts, games, and activities themed around space exploration.
Did you make this paper cup launching rocket? We’d love to see it! Leave a comment below and tell us how far your rocket flew, or share a photo and tag us on social media. Seeing your creative projects always makes our day!


Leave a Reply