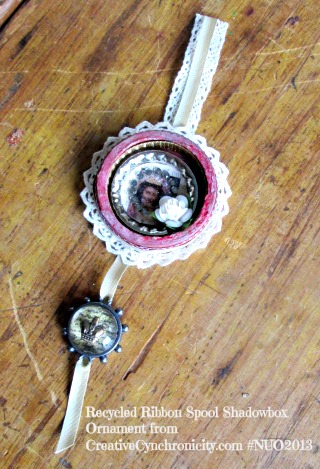
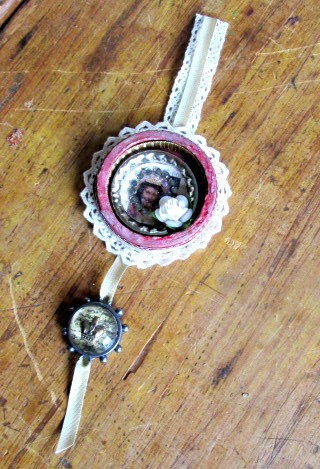
Thanks to Erin of My Very Educated Mother for letting me participate in her No Ugly Ornament series once again. This year I decided to do a variation on one of my favourites – a shadow-box ornament that is made by recycling the empty cardboard spool from a roll of ribbon.
Materials needed:
Empty spool from a roll of ribbon, bakers’ twine, or something similar – this forms the base for the shadow-box
Paints, inks, sprays – I used Liquitex Basics acrylic paints, Liquitex Professional Acrylic Ink, Tattered Angels Glimmer Mists
Assorted ribbons and lace trims, ribbon or string to use as a hanger
Glue – I used Liquitex Gel Medium
Mod Podge Dimensional Magic (I used my heat gun and made this crackle and bubble a bit but you can leave it as is if you prefer)
Prima flower for embellishment
Papers and pictures to put in the shadow-box
Bottle-cap (optional – you don’t have to use this in the shadow-box but I think it gave it some nice framing)
A pair of tweezers (may be helpful for placing items)
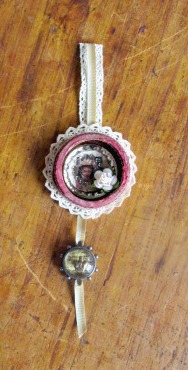
Optional: (for the “charm” hanging down from the ornament)
Spellbinders Media Mixage Bezel
Prima Pebble (or if you can’t find one of these, simply buy flat-backed marbles and Mod Podge some paper underneath to make your own)
Prima Say it in Crystals Self-Adhesive Embellishments
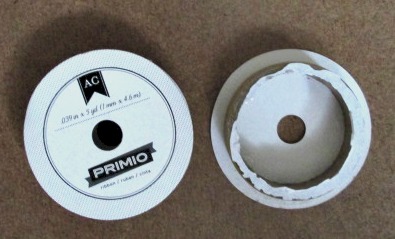
Instructions: These ornaments are quick and easy to make. The longest part of this is waiting for the paint and Dimensional Magic to dry! You’ll need to begin by carefully tearing off the top piece of cardboard on the ribbon spool. Once you do this, you may find that there is some glue residue left behind. If need be, you can use an emery board or small piece of sandpaper to file that away. If it’s really stubborn, I have glued layers of crumpled up tissue paper over the whole ribbon spool and found that it’s a good way to camouflage any imperfections.
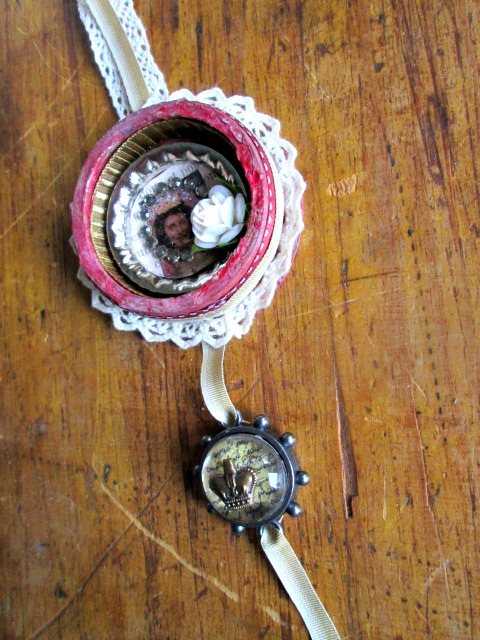
Paint, ink, spray the ribbon spool until you reach your desired results. I layered on the paints, inks, and sprays, letting them spread and blend into one another. Sometimes I used a paper towel or cotton ball to give it a helping hand. Be sure to cover the spool completely, inside, outside, and on the back as parts can show through once you’ve finished the embellishment. Once the paint and ink is dry, I started gluing on the ribbons and trims. I like adding a piece of ribbon to the inside of the shadow-box as well as on the outside – again, it helps to frame and add interest to the main part of the ornament.

I found it easiest to work on the bottle-cap portion – the part that’s going to be the focal part of the ornament – before putting it inside the shadow-box. If you do need to add additional elements to it once inside, you may find it helpful to use a pair of tweezers to place things. As I said, I covered the image I was using with Mod Podge Dimensional Magic and then used my heat gun to make it bubble and crackle, giving it a more distressed look. The little rhinestone circle around the image came in the package of Prima Pebbles but you could certainly glue in individual rhinestones or other bits of bling.
Be sure to check out the rest of the ornaments in this series all week long – you’ll find some great ideas for making your own ornaments to deck out your tree this year! Click on the button below to go to Erin’s blog.

Heather says
These look fab Cyn! And the big bonus is the reclaiming of a ribbon spool. Gosh, I’ve tossed a bunch of them!
~Heather
Cyn Gagen says
Thank you!
Danielle Colter says
THis is a great idea, I love DIY!
Vanessa Wille says
This is so cool! I’ve never seen anything like it. I regularly host “crafting” parties at my house. We craft and watch scary movies, eating lots of candy. I will def add this to our next party in December.
Cherilyn says
Such a cute idea! I’m going to make these with my girls.
Katie Heath says
This is a really great idea! So pretty and cute!
JanD says
So pretty, makes me want to create one.
Tonda Thomas says
I really love the whole idea of this! So creative!