Yesterday, Roberta and I attended Scrapfest in Kitchener, Ontario. I have to be honest – at first the only reason I was going was because Robi was. I figured the two of us could have fun while having a root canal done so it would be good no matter what. Well, I was pleasantly surprised because it was excellent.
There were prizes being given out at the show. Here’s Robi finally winning the long-awaited new car! (tee hee)
There were some manufacturers and scrapbooking stores present with a variety of special deals on their products as well as some products that were new to us. It was fun to try out some of these and to see what the hot “must have” items were.
This retractable craft knife has a really small blade in it (as well as a couple interchangeable ones) making it perfect for intricate detailed work. We won’t discuss the fact that I bought it mistakenly thinking it was the retractable punch tool. The Cinch machine that we saw at House of Scraps (Breslau, Ontario) is a bookbinding machine that is super easy to use. It even works well for me despite my hand and strength issues.
This quilling mould was one of the products that got me really excited. You create tight paper quilled coils and then press them down over one of the domes on the mould to make them 3 dimensional. They turn out kind of looking like a bowl.
Here’s the other product that really jumped out for me and made me ooh and ahh. It apparently had the same effect on others attending the show since the handle for this item was sold out and on backorder. The Sew Easy is a tool that pierces your paper into a pattern of holes so that you can then stitch easily with a needle and thread. There are many different patterns allowing you to do a variety of stitches and allow it takes a bit of pressure to pierce through a couple layers of thick paper or cardstock, it really does make it so much faster and easier to add some hand stitching to your paper crafts.
We just loved Jen Starr’s work!
My favourite part of the whole thing was all the free Make n Takes. It wasn’t just that it was fun to make the items but also that I had a good time crafting alongside my buddy and seeing how we each had a different take on the same crafts. Here is the Scrapping Turtle booth where we were making paper flower pins. Part of the paper was just basic scrapbooking paper but then there were layers in between of a paper that was likened to coffee filters. We cut the scrapbooking paper into circles but the “filter paper” was already precut into circles with scalloped or pinked edges. It apparently comes in kits with several sizes and several different edges on the circles. We sprayed the “filter” circles with spray inks and then layered them together with the scrapbooking papers. We sewed them all together, securing with a button in the center and had the choice of adding a pin or a barrette on the back. I don’t know why Robi didn’t think that a barrette would be a good choice for me!
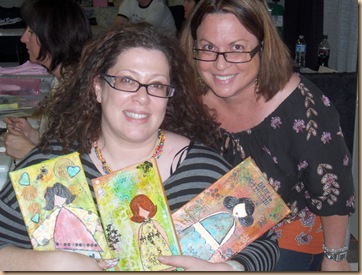
Roberta and I made these (mine is on the left) at the Creative Memories booth. Creative Memories has a number of products that I quite like but I was unimpressed with a couple of the ones we used for these. The basic shape of the paper strips was done with what looked like a metal ruler that had a curved edge, almost like a French curve. You laid it on the paper and then pulled the paper up against the ruler to tear it into the shape. They said it was to give it a rough distressed look but really it didn’t work very well and just ended up looking messy. The other thing that didn’t impress me was their tape runner. They were all gummed up and nearly impossible to use.
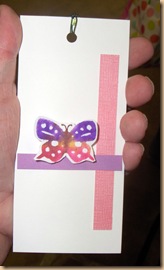
This tag I made at the Scrappin’ Buddies (located in Port Sydney, Ontario) booth still needs a little dressing up but I think the butterfly is very pretty. It’s similar to a technique I have used before. You use plain old basic Crayola waterbased markers to colour a stamp. Just before stamping it onto your surface, give it a quick little spritz of water (not too much or it will just run) and then stamp away! It gives the appearance of water colours! Quick, easy, inexpensive, yet beautiful. It’s a great technique to use with children too!
At Skribbles and Scraps (a store in Sarnia, Ontario), we made these “grunge” tags using a lot of Tim Holtz products. The tag is made of grunge board and the flower was cut from grunge paper. We got to choose an embossing plate (I chose gears of course) and the tag was run through the Cuttlebug to give it some texture. We inked these pieces up with Tim Holtz distress inks and then accented with Smooch ink. There was a “treasure box” of all kinds of brads and little metal doodads to further embellish with.
I made this card at the Crop Stop booth. This was where I made the “Incredible Sew Easy Discovery”! You can see the stitching that I did on the card, courtesy of the Sew Easy tool. The little glossy dots you see on this were made with Liquid Pearls. I sure wish I could remember who makes this paper because it’s just lovely.
This cute little kitchen themed card was made at A Scrapbooker’s Dream. There’s a pocket inside the card that holds a recipe. Note: Dear Scrapbooker’s Dream, whatever brand of glue runner you were using for this product does not hold on this cardstock and I’ve had to fix my pocket at home.
This was from my favourite booth in the whole show, Stamping Bella. She had the most incredible Make n Take creating mixed media canvases – so incredible in fact that the line up for it was hours long and we never got a chance to do it before the show closed. Of course, Robi, in true Robi-schmooze fashion, bonded instantly with Emily and was able to not only talk her out of a canvas (free), but was also able to arrange for her to give the two of us a private session to learn how to make these canvases AND for her to come on our In the Zone show to demonstrate it to our audience as well!


Leave a Reply