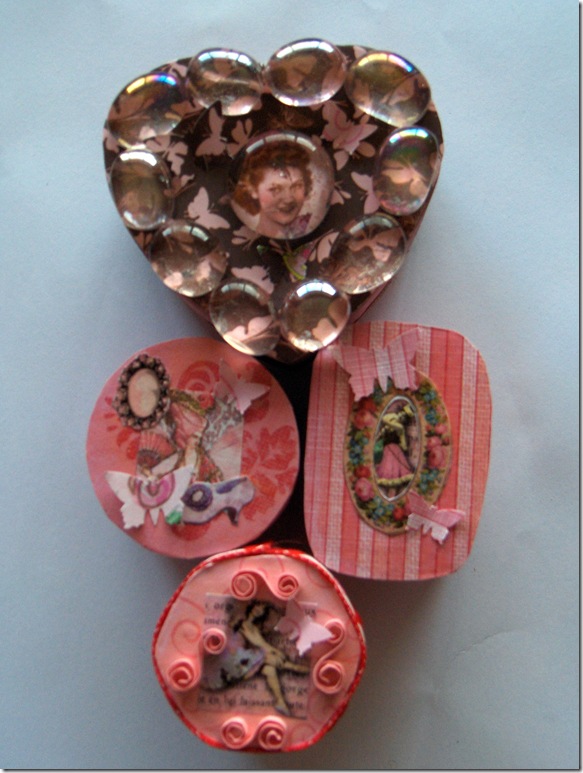
I’ve been working on these little boxes off and on for a while now. I’m not sure why it’s been taking me so long to finish them – I’ve been struggling with finding just the right inspiration for completing them. I apologize for the fuzziness of these photos. Clearly I am going to have to invest in a digital camera that can handle better close-ups of smaller items.
They are small balsa wood boxes that I found at the dollar store (Dollarama here in Ontario, Canada). One of the challenges I have found in working with them is the balsa wood itself. The wood is very thin and porous and so I find it absorbs paint quite a bit.
This means it needs several coats of paint for adequate coverage which then results in another issue. I found that the moisture from each layer of paint caused the boxes to warp just a bit – this was especially obvious on the octagonal and round boxes whereas I found that it was easier to overcome on the rounded ovals.
The other problem inherent with these coats of paint adding to the thickness and then causing the warping of the boxes was that it became very difficult to put the lids back on the boxes. I was quite concerned in some cases that I would actually crack the boxes in my attempt to put them back on.
So, while I think the boxes are quite pretty, I’d say that they are more decorative than functional. They would likely be fine for long-term storage of items but I don’t believe that they would hold up to frequent opening and closing.
I have heard that sealing such items with a layer of something like Mod Podge or a clear gel medium prior to painting them would alleviate these issues but in the past when I tried such a technique, I then found any collage items I placed on top were nearly impossible to apply without many many air bubbles forming. If I could finally get the pieces “bubble free”, as soon as I applied a top coat of product to seal the collage, those bubbles would come right back and no matter how hard I tried, each time it seemed like I had removed all the bubbles, when I would leave it to dry and return to check on it, there would be many new ones. I had no such problems with the method I used this time.
I simply painted the boxes, using as many coats of paint as necessary. Then I used Mod Podge or gel medium as my glue to apply my collage images as well as my top coat to seal these items to the boxes. The boxes were decorated with combinations of collage images, trimmed with ribbon, and then have a final touch of little dimensional butterflies. These butterflies were punched out of scraps of my scrapbooking papers. I gave each butterfly a little pinch to raise the wings away from the surface and attached them to the boxes with a dab of glue. On the octagonal box, I added some paper quilling scrolls to mimic the design in the scrapbooking paper.
On this box, a little larger than the others, I chose to further embellish with flat clear glass marbles. I used Aleene’s Tacky Glue to glue the marbles to the box – since they are heavier than the other elements I am using, the Tacky Glue provided a better degree of adhesion for them. For the center marble, I used a foam brush to apply a thin layer of gel medium to the back of the marble. I then placed the marble over a small image so that the image could be seen when the marble was placed right side up. I made sure to press the image firmly to the back of the marble to ensure that it was perfectly flat and evenly adhered. Once this dries, the gel medium turns invisible and you will be able to see the image clearly.


Leave a Reply