Yesterday was our big mul•tex™ live webcast and it was a wonderful show! My special guests Lisa Fulmer and Roberta Birnbaum did a fabulous job teaching us all about mul•tex™ and showing us some fantastic tips and techniques.
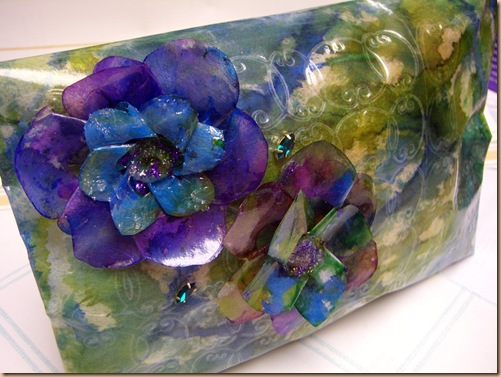
Above by Lisa Fulmer
If you missed the live show, click here for the playback: https://www.linqto.com/PlaybackRoom.aspx?roomname=creativeedventures&name=SingleExplicit_2012_02_19_11_59_47_776
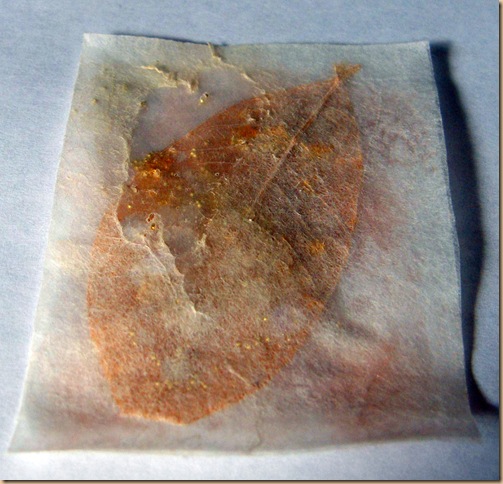
Above by Roberta Birnbaum
Many thanks to Lisa Fulmer of C & T Publishing for providing free samples to 20 lucky viewers and for providing prize packages to lucky winners Sheryl and Pam!
For my project I made an ATC (artist trading card). I cut a piece of mul•tex™ double the size of an ATC (standard ATC size is 2 1/2 by 3 1/2 inches and I cut my piece 5 by 3 1/2 inches). I folded it over with the glossy sides together and slipped a skeleton leaf inside. Using my iron set on the rayon setting, I fused the top and bottom edges of the ATC together, leaving one side open to form a pocket. This held the leaf in place while I continued working and created a pocket for me to pour other embellishments into.
A couple of tips: I didn’t use a silicone release sheet or any other type of protective covering while ironing. By doing this, the paper side of the mul•tex™ will wrinkle and crinkle as you apply the heat and that was part of the look I was going for. With the leaf in there, I found that the crinkling would even take on some of the texture of the leaf that way. If you want a smooth look, be sure to use a protective covering of some sort.
In the picture above you can see me beginning to use the delaminating technique. I spritzed on some water to dampen the paper and then rubbed it away with my finger. mul•tex™ is translucent anyway as you can see, but by removing some of the paper, you can gain an even clearer view through it. I wanted one side of my ATC to reveal all the little goodies I was embedding inside of it really clearly.
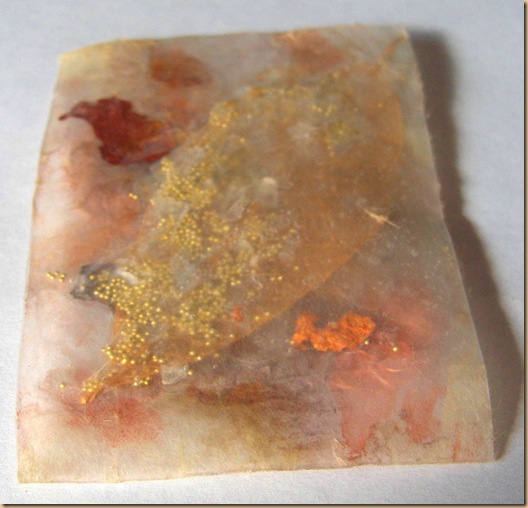
I filled the pocket with things like micro beads, US Artquest Gilding Bitz, sequins, and US Artquest Mica Flakes. In the past, I’ve also used saved up thread clippings, little bits of fabric or paper scraps, glitter, and more. I sealed the open edge shut with my iron and then ironed over the entire thing to get more crinkles in it. You can see that it even starts to bring out some of the texture of the skeleton leaf.
I decided to play up that texture. I used my US Artquest MicaColor sparkling mica and pigment watercolour paints but in a slightly untraditional manner. I spritzed a tiny bit of water onto the colour I wanted to use just to barely dampen it. I then used a wadded up bit of paper towel (sponge, cotton ball, or other such applicator would work too – I didn’t want to use a paint brush as I was trying to stay away from it looking too much like a typical application of water colours). I dabbed the paper towel into the colour and then dabbed and rubbed it over the texture on my ATC, giving a similar look to that of Rub n Buff. Check out US Artquest here: http://www.usartquest.com
As a final touch, I used my Aleene’s Tacky Glue to glue on some copper jewelry bits (from the jewelry section at Michaels) and some iridescent sequins. This method could be fun to create a shaker card too as you can fuse it down in such a way as to allow the little goodies inside to shake and move around.
Next week is my last mul•tex™ Monday post but don’t think that will be the end of ideas on how to use this product. I’m too big a fan for that! My next project is one that takes advantage of the food safe nature of the laminate side of mul•tex™ so I hope you’ll come back and check that out in a week!


Deb says
I have never seen this before – very excited to see the video & check it out. Your samples and ATC look fabulous.