Happy Spring! I can’t wait to get outside and enjoy the lovely weather. We have a few Spring events leading up to my daughter’s wedding and I’m trying to make decorations that will work not only for the parties but later, in someone’s home as well. Her wedding is a flower theme so the bridal shower is going to be a garden party. This little garden angel will make the perfect centerpiece for it! I made this one to use indoors but you can certainly make an outdoor version quite easily as well.
 For your own garden angel, here are the supplies you’ll need: Paints (I’m using DecoArt’s Chalky Finish Paint but for an outdoor version, Folk Art makes a great outdoor paint that’s perfect for this project), sealer (I’m using DecoArt’s Creme Wax especially made for over their chalky paints but you could substitute Mod Podge Outdoor), two clay pots for the bodice and skirt of her dress (the ones I’m using have a top diameter of 7 inches and 4 inches) a hot glue gun with the appropriate glue sticks (silicone adhesive from your hardware store is perfect for an outdoor angel), a small piece of sandpaper, a couple of rags, two old-fashioned peg style clothespins for the arms (you can also use wooden pegs or small branches), a foam ball for the head (the one I used came covered in faux birch bark but you could Mod Podge on some paper or fabric instead), Spanish moss for the hair (or something similar, perhaps some small flowers), some type of small wreath for the halo (or fashion one yourself out of small flowers), embellishments of your choice (here’s my insider tip: buy a bag of pretty potpourri for an inexpensive source of natural looking embellishments that work well with the outdoorsy theme. As a bonus, it can add a lovely scent to the angel!), and something to use as wings (I made some out of skeleton leaves but other types of leaves or raffia would work too). You might want to have some white glue on hand too as it may work better for some of the embellishments.

Begin by painting your clay pots and setting them aside to dry. I used three colors of the Americana Decor chalky finish paint: Vintage (a green), Everlasting (white), and Innocence (pink). I applied the paint with a rag and then used a damp rag to rub bits of it off and blend it together. I also used sandpaper to scuff it up a bit and remove paint in certain areas to give it an aged look. Once I was happy with the painting, I sealed it with the creme wax. Just apply it with a cloth and give it a bit of a buffing.

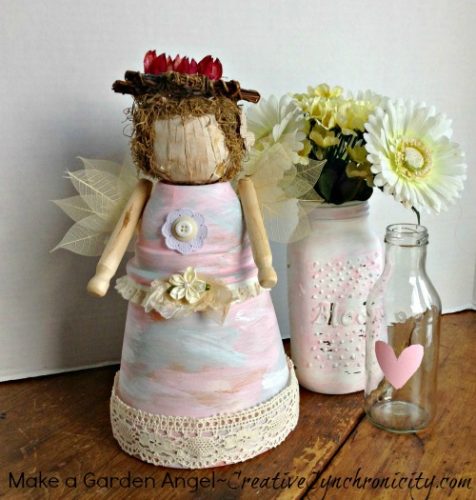
Once the paint and sealer are thoroughly dry, glue the smaller clay pot on top of the larger one. Now you can start adding features and embellishments: the clothespin arms, foam ball head, wreath halo, and leaf wings. For the wings, I simply layered and arranged the skeleton leaves into a wing shape using the white glue to hold them together. I found the hot glue better for then attaching them to the angel.
I hope you enjoy this project as much as I do! I know it will make a lovely addition to the bridal shower decor (and then my living room afterward).
Leave a Reply