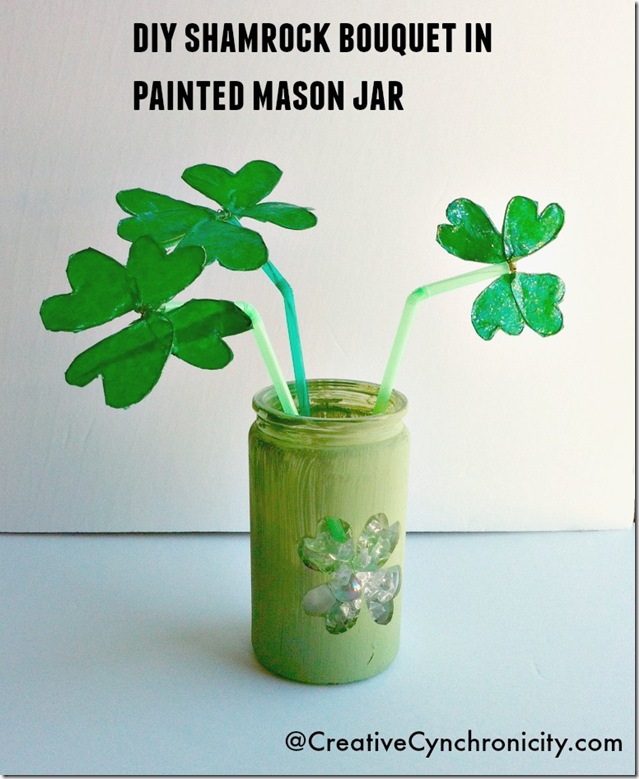
Here we are on Day Two of our 12 Days of St. Patrick’s Day Treats and Crafts and today, I’ve got a quick and easy Shamrock Bouquet in a Painted Jar that you can make with the kids and use as a fun St. Paddy’s Day centerpiece.
Materials needed:
- a jar (mason jar or a leftover jar from spaghetti sauce or something like that)
- some contact paper
- scissors
- tissue paper (I’m using green but you could use white and paint it)
- wire (I’m using a thin floral wire because it bends easily without the use of pliers but it holds its shape well),
- Mod Podge (I’m using sparkle Mod Podge because…well…it sparkles)
- a brush for the Mod Podge and the paint (foam brushes work great)
- paint (mine is DecoArt’s Chalky Finish in the color New Life).
- I used straws for the stems but if your wire is strong enough, you could just use more of that. Chenille stems (pipe cleaners) could work too.
- I filled the jar partway with some stones and sea glass to give it some weight and hold the stems of the shamrocks in place.
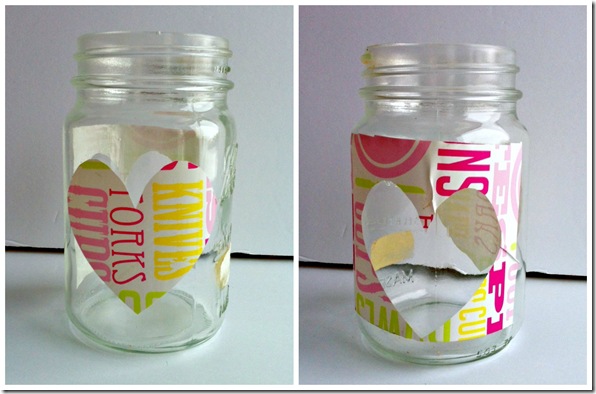
To make the jar, cut out the shape that you want from the contact paper.
Here, I made simple shamrocks using four hearts put together as my pattern. You can either use the positive space of the shape you cut out or the negative shape. I used the positive shape, meaning that my jar was painted green and the shamrock shape is clear (but I have green seaglass in there showing through). I could also have used the negative shape to keep the jar clear and the shamrock shape would have been the part that was painted green.
Place your shamrock “sticker” onto the jar and make sure that it has good adherence, especially around the edges so that paint doesn’t seep through.
NOTE – I used two coats of the paint. It still has some of that streaky rustic look to it but I like that. If you want a more solid look, you’ll need at least one more coat.
Once the jar has dried enough to handle it, remove your shamrock label carefully.
If any paint has seeped through, I find that a slightly dampened cotton swab is a great way to clean up the lines. If it has dried too much at that point, you should be able to scrape it off gently with your fingernail (as long as you don’t wait too long in which case you may need to use a sharp blade for it).
While the jar is drying thoroughly, you can work on the shamrocks.
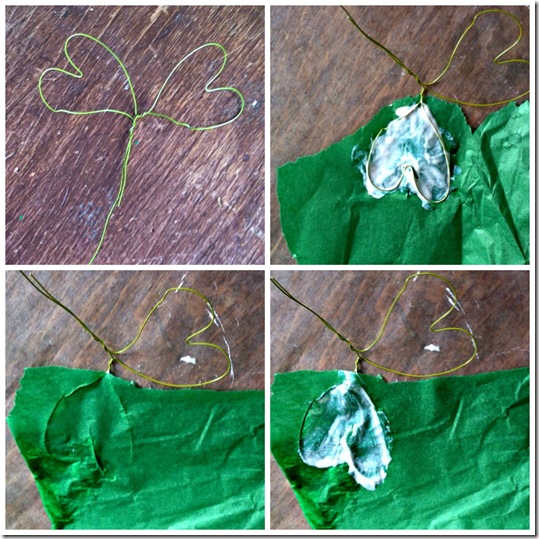
I find it easiest to bend the wire into two connected heart shapes (half a shamrock) and work with just one half at a time. You could also do one heart at a time if that’s easier for the kids to handle. Just be sure to leave a “tail” of wire so that you have some to work with when attaching the hearts together.
Lay the wire heart down on a piece of tissue paper and paint Mod Podge into the heart shape and right over the top of the wire. Fold the tissue paper over to encase the wire and Mod Podge painted section inside (or lay another piece of tissue paper on top instead of folding). Paint over it again with some Mod Podge and put aside to dry.
Once dry, you’re going to paint the other side as well so that both sides of the heart are completely coated with Mod Podge. This makes it much more durable, protects it from getting torn or damaged by moisture, and adds a lovely shine and translucency, making it look almost like stained glass.
Once all of your wire hearts have been covered in tissue paper and Mod Podge and are completely dry, you can wire them together into shamrock shapes. I then simply wired them into the straws and placed them in the jar.
You can of course adapt this to any occasion or celebration that you want. Hearts for Valentine’s Day or a wedding or bridal shower, Flowers for Mother’s Day. Bunnies and eggs for Easter. The possibilities are endless. What kind would you make?
 Be sure to check out the rest of the St. Patrick’s Day treats and crafts in this series below –


Barb W. says
Mason jar crafts are my favorite and this one doubly so as it deals with one of my very favorite holidays! I love how you created the shamrocks, so clever! And I would use the sparkle modge podge, too. You can never have enough sparkle!
Cynthia R says
I love the combination of crafts between the jar and the shamrocks made out of wire and tissue, great job!